Practice Lab 1.6 – Relationships
Scenario
You are a Power Platform functional consultant and have been assigned to the Fabrikam project for the next stage of the project.
In this practice lab, you will be modifying the properties of existing relationships, creating new relationships, and creating rollup columns.
You will then export your customizations from the solution and import them into another environment.
Exercise 1 – Change relationship behaviors
In this exercise, you will be modifying the cascade relationships for the project table. The Region to Project relationship will be changed to referential, restricted and the Project to Milestone relationship will be changed to custom.
Task 1.1 – Region-Project relationship
-
Navigate to the Power Apps Maker portal https://make.powerapps.com.
-
Make sure you are in your Practice environment.
-
Select Solutions.
-
Click to open the Fabrikam Environmental solution.
-
In the Objects pane on the left, click and expand Tables.
-
Select the Project table.
-
Under Schema, click on Relationships.
-
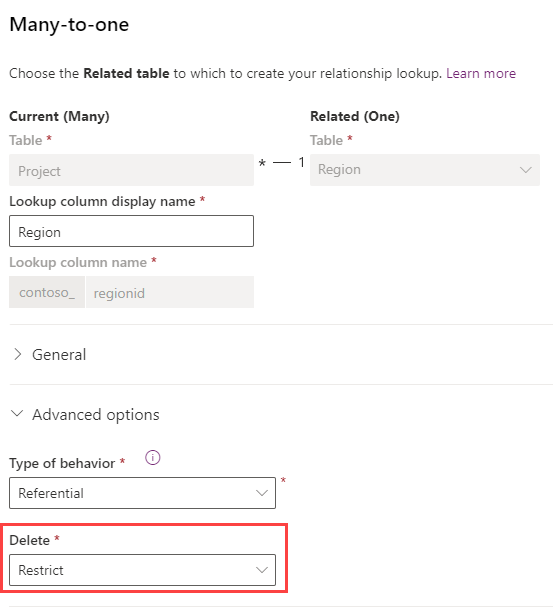
Scroll down and select the Region relationship.
-
In the Many-to-one pane that appears on the right-hand side of the screen, expand Advanced options.
-
Change the Delete drop-down to Restrict.
-
Click Done.
Task 1.2 – Project-Milestone relationship
-
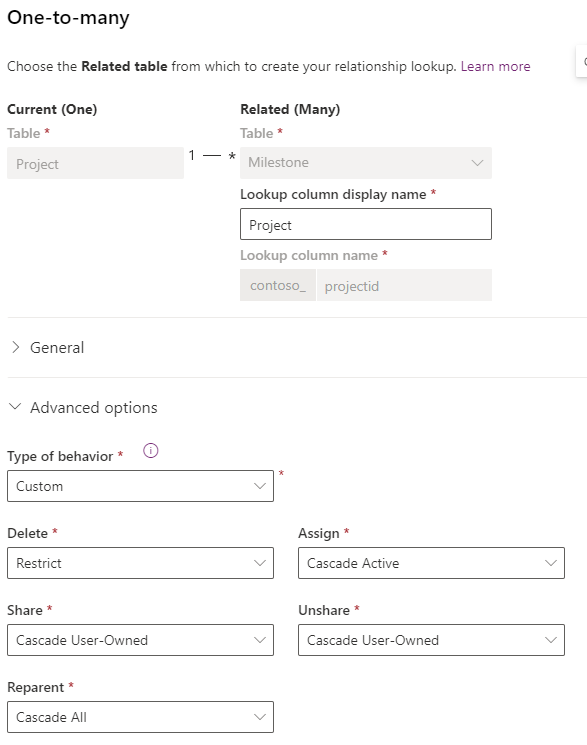
Select the Milestone relationship in the Project table. Note that this relationship uses Project as the Display name and contoso_project_milestone as the Name.
-
In the One-to-many pane that appears on the right-hand side of the screen, expand Advanced options.
-
Change the Type of behavior drop-down to Custom.
-
Change the Delete drop-down to Restrict.
-
Change the Assign drop-down to Cascade Active.
-
Change the Share drop-down to Cascade User-Owned.
-
Change the Unshare drop-down to Cascade User-Owned.
-
Click Done.
Exercise 2 – Add new relationship
In this exercise, you will create a new relationship between the Resource and Project tables to create a lookup for the Lead Resource on the Project.
Task 2.1 – Create new Project Lead relationship
-
Navigate to the Power Apps Maker portal https://make.powerapps.com.
-
Make sure you are in your Practice environment.
-
Select Solutions.
-
Click to open the Fabrikam Environmental solution.
-
In the Objects pane on the left, click and expand Tables.
-
Select the Project table.
-
Under Schema, click on Relationships.
-
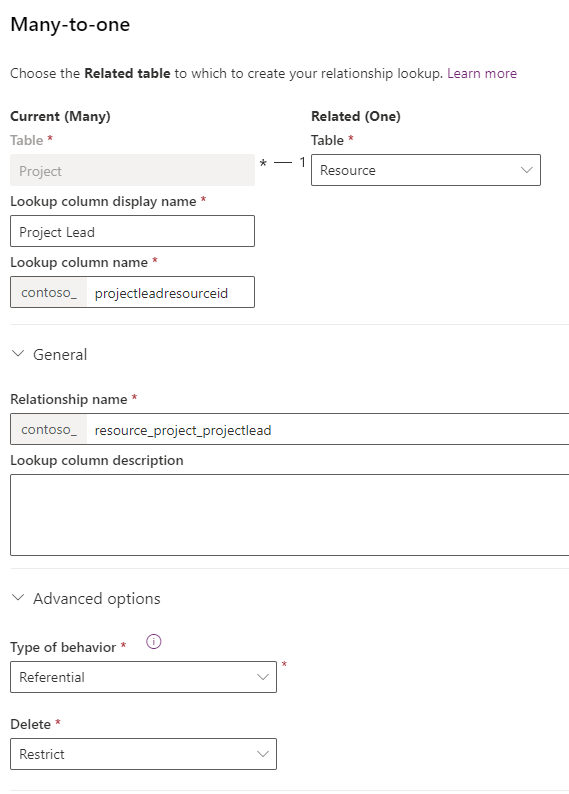
Click + New relationship and then select Many-to-one.
-
In the Many-to-one pane that appears on the right-hand side of the screen, select Resource in the Related (One) drop-down.
-
Enter Project Lead for Lookup column display name.
-
Enter projectleadresourceid for Lookup column name.
-
Expand General.
-
Enter resource_project_projectlead for Relationship name.
-
Expand Advanced options.
-
Change the Delete drop-down to Restrict.
-
Click Done.
-
In the Objects pane on the left, click Columns for the Project table.
-
Select the Project Lead column.
-
In the Edit column pane that appears on the right-hand side of the screen, expand Advanced options and scroll down.
-
Check the Enable auditing box.
-
Click Save.
Exercise 3 – Hierarchical relationship
In this exercise, you will create a new hierarchical relationship on the region table.
Task 3.1 – Create new hierarchical relationship
-
Navigate to the Power Apps Maker portal https://make.powerapps.com.
-
Make sure you are in your Practice environment.
-
Select Solutions.
-
Click to open the Fabrikam Environmental solution.
-
In the Objects pane on the left, click and expand Tables.
-
Select the Region table.
-
Click + New, and then select Relationship and then select + One-to-many.
-
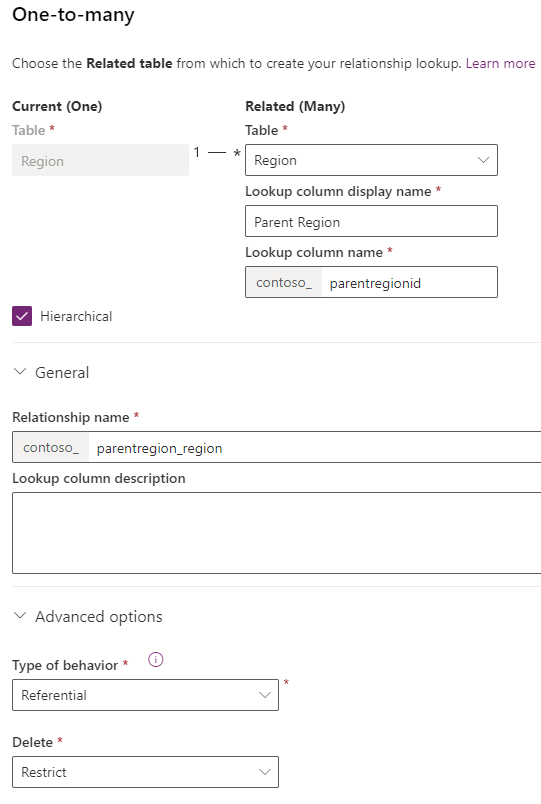
In the One-to-many pane that appears on the right-hand side of the screen, select Region in the Related (Many) drop-down.
-
Enter Parent Region for Lookup column display name.
-
Enter parentregionid for Lookup column name.
-
Check the Hierarchical box.
-
Expand General.
-
Enter parentregion_region for Relationship name.
-
Expand Advanced options.
-
Change the Delete drop-down to Restrict.
-
Click Done.
Exercise 4 – Project Outcome relationships
In this exercise, you will create two many-to-one relationships for the Project Outcome table to the Project and Outcome tables. These relationships will be used to replace the many-to-many relationship between the Project and Outcome tables.
Task 4.1 – Create new relationship to Project
-
Navigate to the Power Apps Maker portal https://make.powerapps.com.
-
Make sure you are in your Practice environment.
-
Select Solutions.
-
Click to open the Fabrikam Environmental solution.
-
In the Objects pane on the left, click and expand Tables.
-
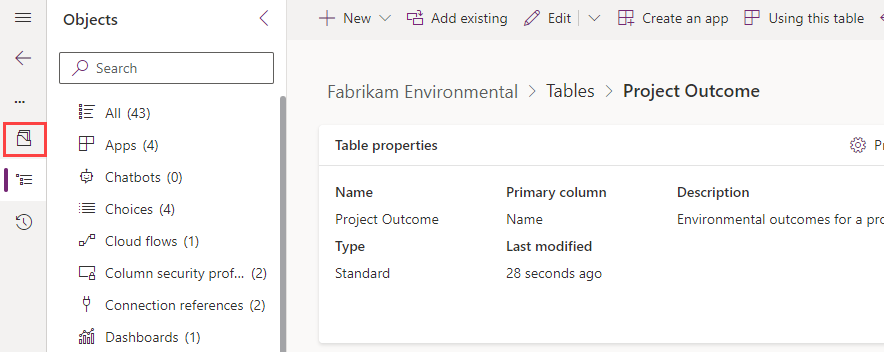
Select the Project Outcome table.
-
Under Schema, click on Relationships.
-
Click + New relationship and then select Many-to-one.
-
In the Many-to-one pane that appears on the right-hand side of the screen, select Project in the Related (One) drop-down.
-
Enter Project for Lookup column display name.
-
Enter projectid for Lookup column name.
-
Expand General.
-
Enter project_projectoutcome for Relationship name.
-
Expand Advanced options.
-
Change the Type of behavior drop-down to Parental.
-
Click Done.
Task 4.2 – Create new relationship to Outcome
-
Click + New relationship and then select Many-to-one.
-
In the Many-to-one pane that appears on the right-hand side of the screen, select Outcome in the Related (One) drop-down.
-
Enter Outcome for Lookup column display name.
-
Enter outcomeid for Lookup column name.
-
Expand General.
-
Enter outcome_projectoutcome for Relationship name.
-
Expand Advanced options.
-
Change the Type of behavior drop-down to Parental.
-
Click Done.
NOTE: An error will be shown saying that you cannot create another parental relation with the contoso_outcome table.
-
Change the Type of behavior drop-down to Referential.
-
Change the Delete drop-down to Restrict.
-
Click Done.
Task 4.3 – Set required and enable auditing on new lookup columns
-
In the Objects pane on the left, select Columns for the Project Outcome table.
-
Select the Project column.
-
In the Edit column pane that appears on the right-hand side of the screen, expand Advanced options and scroll down.
-
Change the Required drop-down to Business required.
-
Check the Enable auditing box.
-
Click Save.
-
Select the Outcome column.
-
In the Edit column pane that appears on the right-hand side of the screen, expand Advanced options and scroll down.
-
Change the Required drop-down to Business required.
-
Check the Enable auditing box.
-
Click Save.
Exercise 5 – Connections
In this exercise, you will enable connections for the resource and milestone tables.
Task 5.1 – Enable connections on Resource
-
Navigate to the Power Apps Maker portal https://make.powerapps.com.
-
Make sure you are in your Practice environment.
-
Select Solutions.
-
Click to open the Fabrikam Environmental solution.
-
In the Objects pane on the left, click and expand Tables.
-
Select the Resource table.
-
Click on Properties.
-
In the Edit table pane that appears on the right-hand side of the screen, expand Advanced options and scroll down.
-
Check the Can have connections box.
-
Click Save.
Task 5.2 – Enable connections on Milestone
-
Navigate to the Power Apps Maker portal https://make.powerapps.com.
-
Make sure you are in your Practice environment.
-
Select Solutions.
-
Click to open the Fabrikam Environmental solution.
-
In the Objects pane on the left, click and expand Tables.
-
Select the Milestone table.
-
Click on Properties.
-
In the Edit table pane that appears on the right-hand side of the screen, expand Advanced options and scroll down.
-
Check the Can have connections box.
-
Click Save.
Task 5.3 – Publish changes
-
In the solution select the Overview page.
-
Click on Publish all customizations.
Task 5.4 – Add connection roles
-
Within the solution, select the Objects page and select All.
-
Click + New, and then select More and then select Connection Role.
-
Enter Contributor for Name.
-
Select the Only these record types radio button.
-
Select Resource.
-
Click the Save icon.

-
Under Matching connection roles, click New.
NOTE: You may need to disable the pop-up blocker in your browser.
-
Enter Contributed to for Name.
-
Select the Only these record types radio button.
-
Select Milestone.
-
Click the Save and Close icon.
-
Click the Save and Close icon.
-
Click Done.
-
Click + New, and then select More and then select Connection Role.
-
Enter Advisor for Name.
-
Select the Only these record types radio button.
-
Select Resource.
-
Click the Save icon.
-
Under Matching connection roles, click Add Existing.
-
Check Contributed to and click Select.
-
Click Add.
-
Click the Save and Close icon.
-
Click Done.
Exercise 6 – Calculated and rollup columns
In this exercise, you will use relationships to create calculated and rollup fields. The calculated column will add the email address for the approver to the outcome table. The rollup column will sum the funding values of projects.
Task 6.1 – Calculated column for a many-to-one relationship
-
Navigate to the Power Apps Maker portal https://make.powerapps.com.
-
Make sure you are in your Practice environment.
-
Select Solutions.
-
Click to open the Fabrikam Environmental solution.
-
In the Objects pane on the left, click and expand Tables.
-
Select the Outcome table.
-
Click + New, and then select Column.
-
Enter Approver Email for Display Name.
-
Enter Email address for approver for Description.
-
Select Single line of text in the Data type drop-down.
-
Select Text in the Format drop-down.
-
Change the Behavior drop-down to Calculated.
-
Click on Save and edit.
-
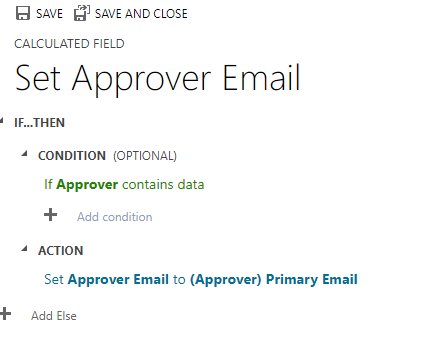
When the new browser window opens, click + Add condition.
-
Select Approver for Field.
-
Select Contains data for Operator.
-
Click the green check mark.
NOTE: You may need to resize the window to see the check marks.
-
Click + Add Action.
-
Enter the following formula:
contoso_approveruserid.internalemailaddressNOTE: You can use intellisense to type and select the elements in the formula.
-
Click the blue check mark.
-
Click SAVE AND CLOSE.
Task 6.2 – Rollup column for the project one-to-many relationship
-
In the Objects pane on the left, click and expand Tables.
-
Select the Project table.
-
Click + New, and then select Column.
-
Enter Total Project Funding for Display Name.
-
Select Currency in the Data type drop-down.
-
Change the Behavior drop-down to Rollup.
-
Click on Save and edit.
-
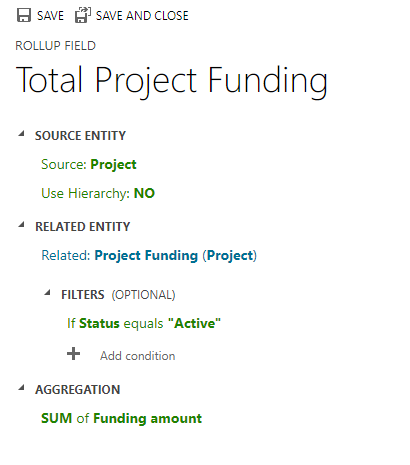
When the new browser window opens, click + Add related entity.
-
Select Project Funding (Project) for Related.
-
Click the blue check mark.
-
Click + Add condition.
-
Select Status for Field.
-
Select Equals for Operator.
-
Verify Active is selected for Value.
-
Click the green check mark.
-
Click + Add aggregation.
-
Select SUM for Aggregate Function.
-
Select (Project Funding) Funding amount for Aggregate Related Entity Field.
-
Click the green check mark.
-
Click SAVE AND CLOSE.
Task 6.3 – Publish changes
-
In the solution select the Overview page.
-
Click on Publish all customizations.
Exercise 7 – Solutions
In this exercise, you will export the solution from the Practice environment and import it into the MOD Administrator’s environment.
Task 7.1 – Solution checker
-
Navigate to the Power Apps Maker portal https://make.powerapps.com.
-
Make sure you are in the Practice environment.
-
Select Solutions.
-
Select the Fabrikam Environmental solution but do not open it.
-
Select the caret to the right of Solution checker and then select Run.
-
Wait a few minutes for the checker to complete.
-
Select the caret to the right of Solution checker and then select View results.
-
You should see several warnings for the canvas app in the solution.
-
Click the back arrow to return to solutions.
Task 7.2 – Export managed solution
-
Select the Fabrikam Environmental solution.
-
Select Export Solution.
-
Click Next.
-
The version number should have been incremented to 1.1.11.4.
-
Select Managed for Export As.
-
Click Export.
-
The export will be prepared in the background, when the solution is ready click the Download button.
Task 7.3 – Export unmanaged solution
-
Select the Fabrikam Environmental solution.
-
Select Export Solution.
-
Click Next.
-
The version number should have been incremented to 1.1.11.5.
-
Select Unmanaged for Export As.
-
Click Export.
-
The export will be prepared in the background, when the solution is ready click the Download button.
Task 7.4 – Import managed solution
-
Switch environments by using the Environment Selector in the upper right corner of the Maker portal.
-
Select the MOD Administrator’s Environment environment from the list.
-
Select Solutions.
-
Select Import solution.
-
Select Browse, change to the Downloads folder and select FabrikamEnvironmental_1_1_11_4_managed.zip and select Open.
-
Click Next.
-
Click Next.
-
You need to create connections for the solution.
-
For the Approvals connection click Select a connection and then + New connection.
-
A new tab will open in the browser. Click Create.
-
Switch back to the tab where you are importing the solution and click Refresh.
-
For the Microsoft Dataverse connection click Select a connection and then + New connection.
-
A new tab will open in the browser. Click Create. If prompted, sign in with your Microsoft 365 credentials.
-
Switch back to the tab where you are importing the solution and click Refresh.
-
Both connections should be selected.
-
Click Import. The solution will import in the background.
Challenge (Optional)
Under Processes, examine the classic workflow, Project Funding Name, and create a new workflow to set the Title column on the Project Outcome table, when a new record is created or when a project or an outcome lookup column is changed.