Practice Lab 1.4 – Tables
Scenario
You are a Power Platform functional consultant and have been assigned to the Fabrikam project for the next stage of the project.
You need to familiarize yourself with the data model and then make changes to tables and their properties for this phase of the project.
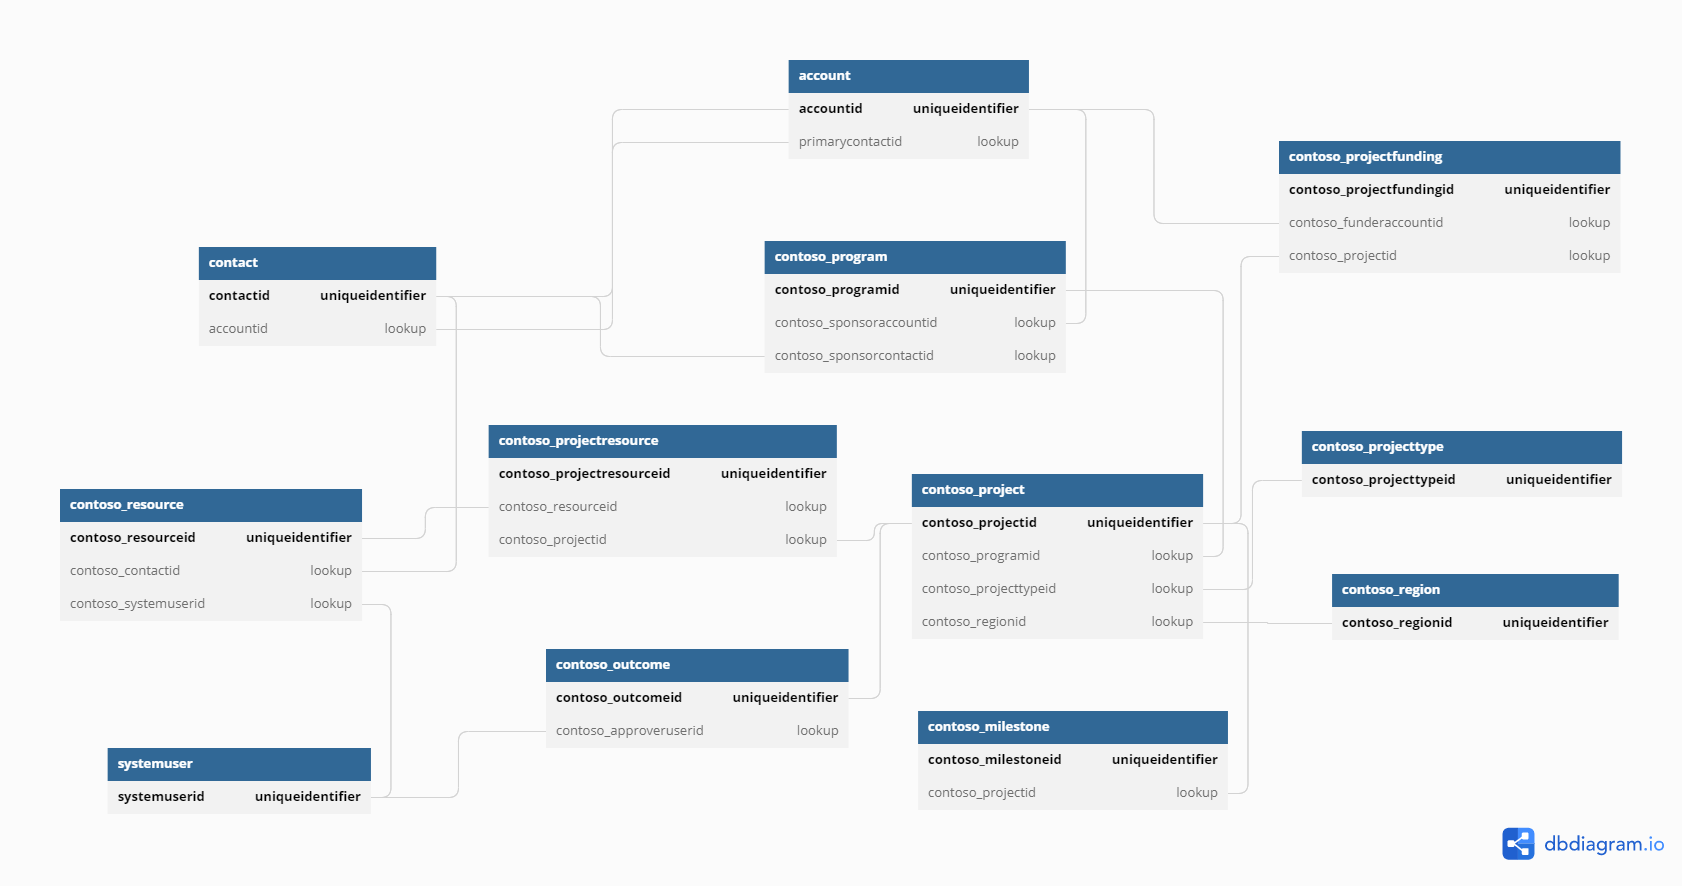
This file (Fabrikam Environmental Data Model.png) is located in the Documents\PL-200 folder on your machine.
In this practice lab, you will be modifying table properties and creating a new custom table.
Exercise 1 – Explore the data model
In this exercise, you will be examining the tables in the Fabrikam Environmental solution. Take some time to familiarize yourself with your client, Fabrikam’s, data model and existing business rules.
Task 1.1 – Examine tables
-
Navigate to the Power Apps Maker portal https://make.powerapps.com.
-
Make sure you are in your Practice environment.
-
Select Solutions.
-
Click to open the Fabrikam Environmental solution.
-
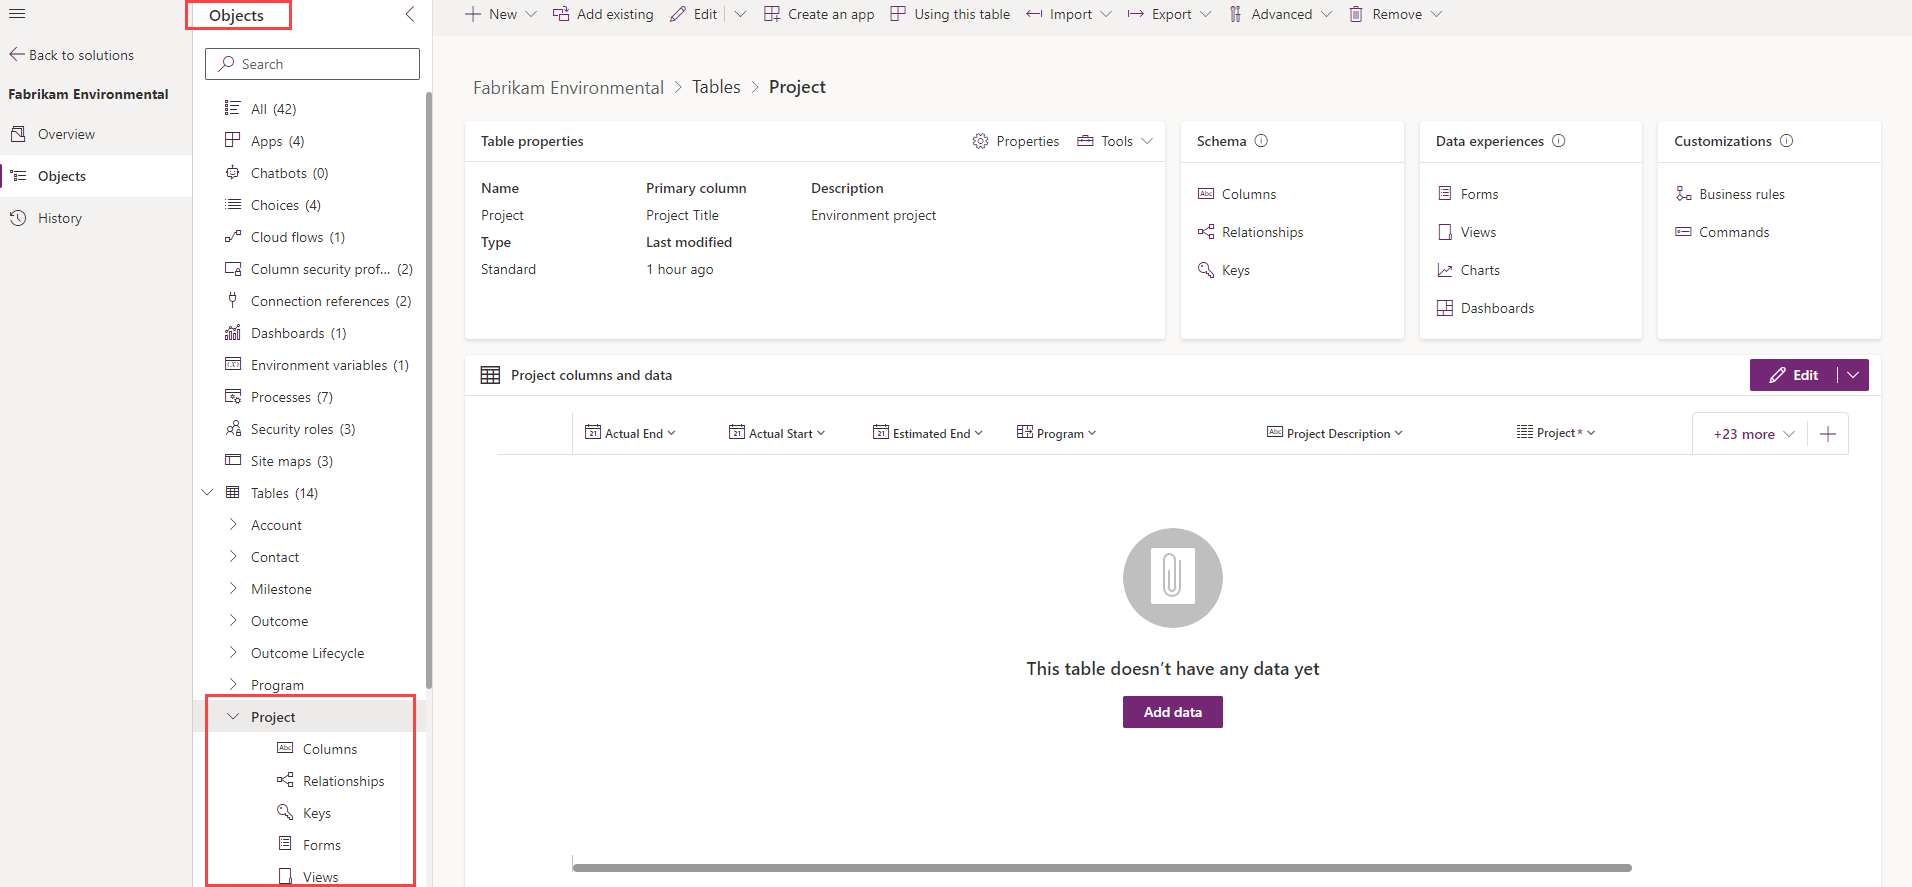
In the Objects pane on the left, click to expand Tables.
-
Click and expand the Project table.
-
Under Schema, click on Columns. You will see columns including Project Title, Project Type, Estimated End, and Program.
-
In the Objects pane on the left, click on Relationships. You will see multiple One-to-many, Many-to-one, and a many-to-many relationships.
-
Click and expand the Milestone table and examine its columns and relationships.
-
Click and expand the Project Funding table and examine its columns and relationships.
-
Click on Business rules under the Project Funding table. There is a rule for the funding percentage. Open the business rule and examine how it works.
-
Close the busisiness rule
-
Click and expand the Project Resource table and examine its columns and relationships.
Exercise 2 – Change table properties
In this exercise, you will be updating the properties on the Project table to allow users to add attachments and use activities with project records. You will also enable audit and other search on other tables in the solution.
Task 2.1 – Enable attachments and activities on the project table
-
Navigate to the Power Apps Maker portal https://make.powerapps.com.
-
Make sure you are in the Practice environment.
-
Select Solutions.
-
Click to open the Fabrikam Environmental solution.
-
In the Objects pane on the left, click and expand Tables.
-
Select the Project table.
-
Click on Properties.
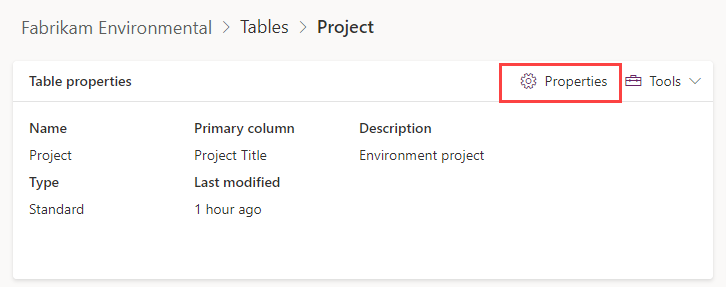
Note: If Properties is not shown, maximize your browser and/or zoom in until Properties appears.
-
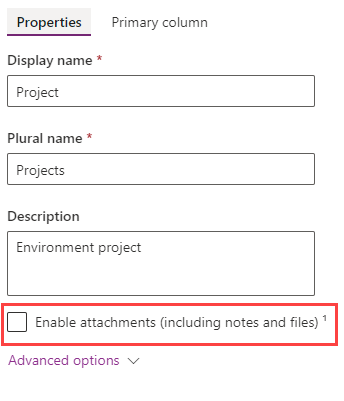
In the Edit table pane that appears on the right-hand side of the screen, check the Enable attachments (including notes and files) box.
-
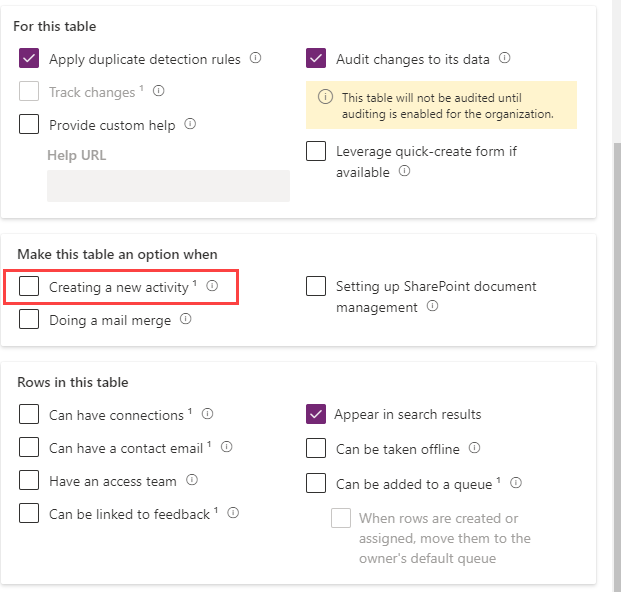
Expand Advanced options and scroll down.
-
Check the Creating a new activity box.
-
Click Save.
Task 2.2 – Enable audit and search on the Milestone table
-
Select the Milestone table.
-
Click on Properties.
-
In the Edit table pane that appears on the right-hand side of the screen, expand Advanced options and scroll down.
-
Check the Audit changes to its data box.
-
Check the Appear in search results box.
-
Click Save.
Task 2.3 – Enable audit on the Outcome table
-
Select the Outcome table.
-
Click on Properties.
-
In the Edit table pane that appears on the right-hand side of the screen, expand Advanced options and scroll down.
-
Check the Audit changes to its data box.
-
Click Save.
Task 2.4 – Enable audit on the Project Funding table
-
Select the Project Funding table.
-
Click on Properties.
-
In the Edit table pane that appears on the right-hand side of the screen, expand Advanced options and scroll down.
-
Check the Audit changes to its data box.
-
Click Save.
Exercise 3 – Create a custom table
In this exercise, you will be creating a new custom table named Project Outcome. This table will link outcomes to projects. Currently there is a many-to-many relationship between Project and Outcome. This table will be used in place of this relationship.
In later labs you will be adding columns and relationships to this custom table.
Task 3.1 – Create custom table
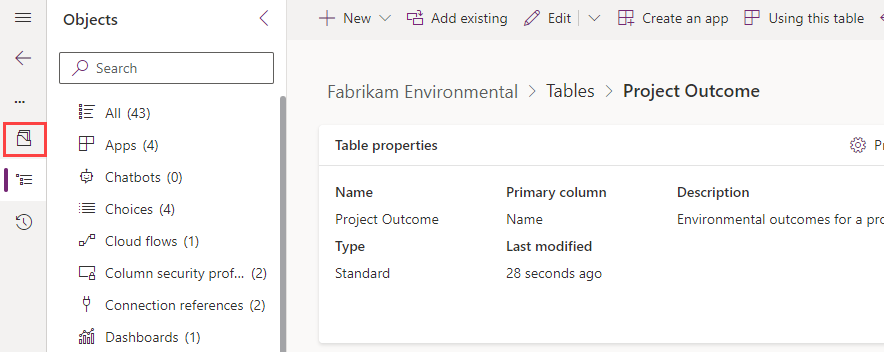
-
In the Objects pane on the left, click on Tables.
-
Click + New and select Table.
-
Enter Project Outcome for Display Name. The plural name will be automatically populated.
-
Enter Environmental outcomes for a project for Description.
-
Expand Advanced options.
-
Uncheck the Apply duplicate detection rules box.
-
Uncheck the Doing a mail merge box.
-
Check the Audit changes to its data box.
-
Scroll up, and select the Primary column tab.
-
Enter Title for Display Name.
-
Expand Advanced options.
-
Change the Column requirement drop-down to Optional.
-
Change the Maximum character count to 200.
-
Click Save.
Task 3.2 – Publish changes
-
In the solution select the Overview page.
-
Click on Publish all customizations.