Lab 3: How to build a model-driven app
Scenario
Bellows College is an educational organization with multiple buildings on campus. Campus visitors are currently recorded in paper journals. The information is not captured consistently, and there are no means to collect and analyze data about the visits across the entire campus.
Campus administration would like to modernize their visitor registration system where access to the buildings is controlled by security personnel and all visits are required to be pre-registered and recorded by their hosts.
Throughout this course, you will build applications and perform automation to enable the Bellows College administration and security personnel to manage and control access to the buildings on campus.
In this lab, you will build a Power Apps model-driven app to allow the backoffice campus staff to manage visit records across the entire campus.
High-level lab steps
As part of creating the model-driven app, you will complete the following:
-
Create a new model-driven app named Bellows Campus Management
-
Edit the app navigation to reference the required tables
-
Customize the forms and views of the required tables for the app
We will work with the following components:
-
Views: Views allow the user to display the existing data in the form table.
-
Forms: This is where the user creates/updates new rows in the tables.
Both will be integrated to the model-driven app for a better user-experience.
Prerequisites
- Completion of Module 0 Lab 0 - Validate lab environment
- Completion of Module 2 Lab 1 - Data Modeling
Things to consider before you begin
- What changes should we make to improve the user experience?
- What should we include in a model-driven app based on the data model we have built?
- What customizations can be made on the sitemap of a model-driven app?
Exercise 1: Customize Views and Forms
Objective: In this exercise, you will customize views and forms of the custom created tables that will be used in the model-driven app.
Task #1: Edit Visit Form
-
Sign in to https://make.powerapps.com if you are not already signed in.
-
Select your [my initials] Practice environment at the top right if it is not already selected.
-
Using the navigation on the left, expand Dataverse, select Tables, and click to open your Visit table.
If you do not see the Visit table, make sure you are in the correct environment (step 2).
- Under the Data experiences section, select Forms and click to open the Information form with Main form type.
IMPORTANT: Since by default all forms are named Information, make sure to verify that the form you select has a Form Type of Main and not something else. By default, the form has two fields: Name and Owner.
-
On the right side of the screen on the Properties panel, select the Display Name field, and change it to Main Information.
-
Select the Table Columns from the left navigation pane and add the following fields below the Owner field by dragging columns to the form or simply clicking column names:
-
Visitor
-
Scheduled Start
-
Scheduled End
-
Actual Start
-
Actual End
-
-
Drag the Code column and drop it in the form header.
The header is the top right area of the form. You may need to collapse the Properties panel on the right side of the screen to see the field on the form.
-
With the Code field still selected, check the checkbox for Read-only in the Properties panel on the right side of the screen.
-
Select Owner field. In the Properties panel, change the Label to Host
-
Click Save at the top right and wait for the save to complete.
-
Click Publish at the top right and wait for the publishing to complete.
-
If the edit view opened in a new browser tab or window, close it. Otherwise, click Back at the top left of the screen. You should now be back to the Visit tables Forms.
-
Using the breadcrumbs in the upper left (Tables>Visit>Forms). Select Visit to return to the Visit table main screen.
Task #2: Edit Active Visits view
In this task, we will modify the default Active Visits view and create a new view for today’s visits.
-
Under the Data experiences section, select Views and click to open your Active Visits view.
-
Add the following fields to the view by either clicking or dragging and dropping the fields:
-
Code
-
Visitor
-
Scheduled Start
-
Scheduled End
-
-
Click the Created On column and select Remove. Field Created On will now be removed from the view.
-
Resize the individual column widths to fit the data.
-
Click Save and wait until the changes are saved.
-
Click Publish and wait for the publishing to complete.
Task #3: Create new view for today’s visits
Now, we will clone the view to create a new view for today’s visits.
IMPORTANT: Make sure that you do not close the Active Visits view, as we will be leveraging it to create the new today’s visits view.
-
Click on the dropdown arrow by the Save button (be careful not to press the button itself) and select Save As.
-
Change the name to Today’s Visits and press Save.
-
Click Edit filters link in the Properties panel.
-
Click Add, select Add row.
-
Select Scheduled Start as a field, then select Today as the condition in the drop-down.
-
Click the … on the Status row and click Delete to delete that filter condition.
-
Press Ok to save the condition. The view is now filtered to show only records where the Scheduled Start date is today.
-
Add Actual Start and Actual End fields to the view.
Note: Since we no longer filter on the view status, we will get all today’s visits including completed ones. These fields will help to differentiate completed visits and visits in progress.
-
Click Save.
-
Click Publish and wait for the publishing to complete.
Exercise 2: Create Model-driven app
Objective: In this exercise, you will create a model-driven app, customize the sitemap, and test the app.
For simplicity and time’s sake, we will not be addressing some of the Visit columns in this lab.
Task #1: Create app
-
Sign into https://make.powerapps.com (if you are not already signed in).
-
Select your [my initials] Practice environment at the top right if it is not already selected.
-
If necessary, click the Home icon on the left side of the screen.
-
Create the Model-Driven Application:
-
Select Blank app in the Start from section of the Home screen.
-
Under Blank app based on Dataverse, select Create.
-
Enter Bellows Campus Management for Name and select Create.
-
-
After your new model-driven application loads, select the + Add Page button.
-
On the Add Page screen, choose Table based view and form, and then select the Next button.
-
Add the following tables:
-
Visit
-
Contact
-
-
After you have selected the 2 tables, select Add.
-
Using the navigation icons on the left side of the screen, select Navigation.
-
In the Navigation Pane, select Group 1 below where it says Navigation bar. You may need to expand the menu on the left.
-
On the right side of the screen, in the Display Options section, change the Title property to Security.
Task #2: Edit your app
Now that we have all the necessary components added to your model-driven application, we will now organize items.
-
In the Navigation Pane, under the security group, select SubArea1.
-
Select the Ellipsis, and from the menu that appears, select Remove SubArea1.
-
Using the navigation on the left side of the screen, select Pages.
-
Locate and expand Visit on the Pages pane.
-
Select Visit form.
-
On the right side of the screen, select Add form.
-
Select the Main Information form.
-
Under Visit on the Pages pane, select Visit view.
-
On the right side of the screen, select Add view.
-
Select the Today’s Visits view.
-
Select Add view again.
-
Select the Active Visits view.
-
Select Save.
-
Once the Save is complete, select the Publish button to publish your changes.
Task #3: Test Application
-
Start the application
- Select Play to open your app in a new window.
-
Create new Contact
-
The app should open to the My Active Contacts view. If it does not, select Contacts on the left-hand navigation.
-
Click New from the top menu.
-
Provide First Name as John and Last Name as Doe.
-
Provide your personal email as Email. This will be used in a future lab where you will receive an email.
-
Click Save & Close.
-
You should now see the created contact on the My Active Contacts view.
-
-
Create new Visit
-
Select Visits from the left-hand navigation of the sitemap.
-
Click + New.
-
Enter the fields as following
-
Name: New test visit
-
Visitor: select John Doe
-
Scheduled Start: select tomorrow’s date and 2:00 PM as start time
-
Scheduled End: select tomorrow’s date and 3:30 PM as end time
-
-
-
Click Save & Close. This will create the Visit and you should be able to see it on the Active Visits View.
-
Change view to Today’s Visits by using th drop down next to Active Visits. You should no longer see the new visit in the view, since it is scheduled for tomorrow.
- You may add more test records.
Your running app should look approximately like the following:
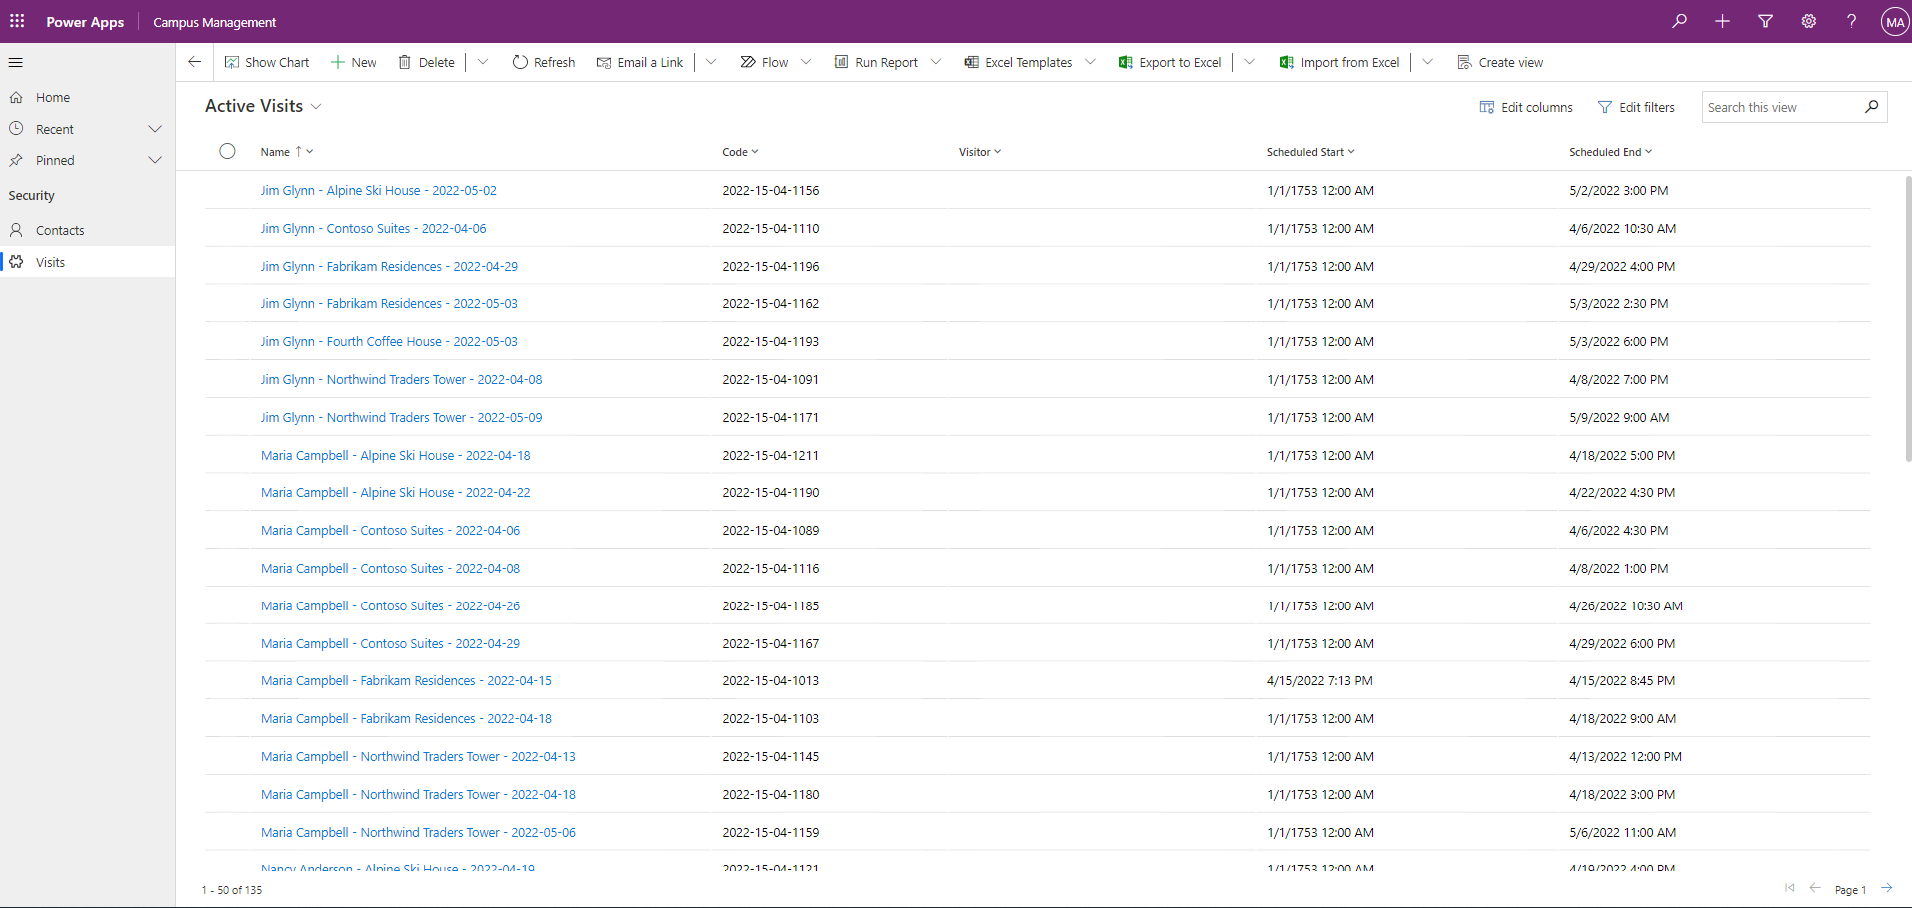
Congratulations! You have created and configured your first model-driven app.
Challenges
- Select specific views and forms for Contacts