Lab 07 – Azure Functions
Scenario
A regional building department issues and tracks permits for new buildings and updates for remodeling of existing buildings. Throughout this course you will build applications and automation to enable the regional building department to manage the permitting process. This will be an end-to-end solution which will help you understand the overall process flow.
In this lab you will create an Azure Function that will handle routing inspections. Every morning people call in to request inspections on their permits. They must call before 9:30 AM and once that period ends all the inspections for the day must be assigned and sequenced for the inspectors. To accomplish this, you will build an Azure Function that runs on a schedule, queries pending inspections and assigns them to inspectors. Given the limited time to complete the lab, we’ve simplified the routing and sequencing decisions.
High-level lab steps
As part of building the Azure Function, you will complete the following:
-
Configure an application user for the app along with a security role
-
Build the function logic to route the requests
-
Deploy the Azure Function
Things to consider before you begin
-
Could we have used Dynamics 365 Universal Resource Scheduling instead of custom code?
-
Could we have used Power Automate instead of custom code?
-
Remember to continue working in your DEVELOPMENT environment. We’ll move everything to production soon.
Exercise #1: Configure an application user
Objective: In this exercise, you will configure an application user that will be used to connect the Azure Function back to Microsoft Dataverse.
Task #1: Register Azure AD Application
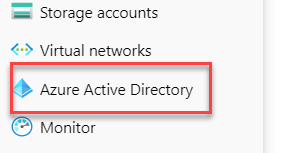
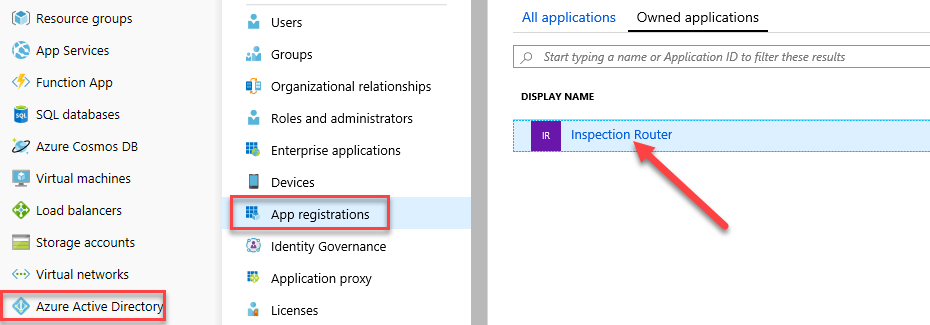
- Navigate to Azure Active Directory
- Sign in to Azure Portal.
Note: You must be logged in with an organization account in the same tenant as your Microsoft Dataverse Environment. This does NOT have to be the account that has your Azure subscription.
- Select Show portal menu.

- Select Azure Active Directory.
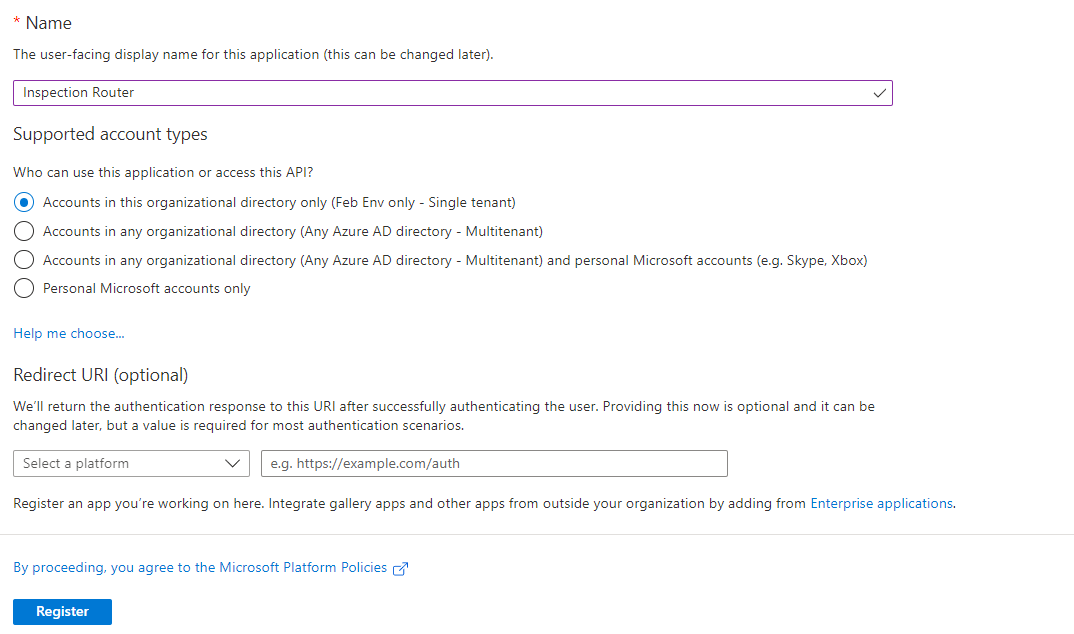
- Select + Add and then select App registration.

- Enter Inspection Router for Name, select Accounts in this Organizational Directory Only for Supported Account Types, and then select Register.
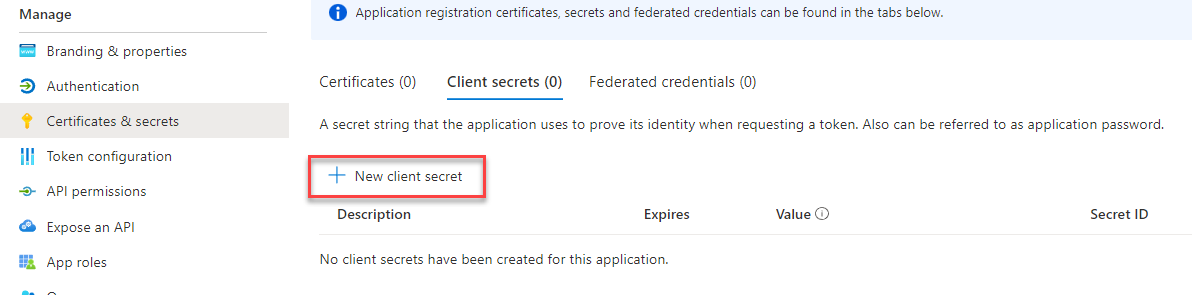
- Add Client Secret.
Note: In this lab we are using a secret, however, you can also use a certificate. With either of these options you need to have a plan in place to handle rollover when they expire to ensure that the app keeps running.
-
Select Certificates & Secrets.
-
Select + New Client Secret.
- Enter Inspection Routing for Description, select 12 months for Expires, and then select Add.
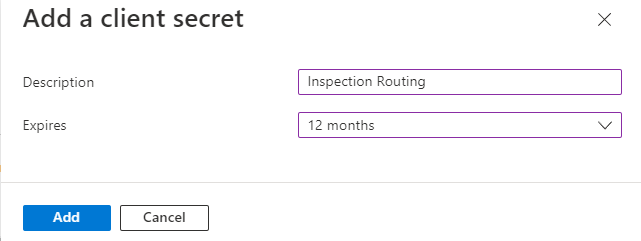
- Copy the Value and save it on a notepad. You will need this value in future tasks.

Task #2: Create Application User and Security Role
In this task, you will create the application user and associate it with the Azure AD app that you just registered. You will also create a security role needed to run the routing logic.
- Create New Security Role
-
Navigate to https://make.powerapps.com/ and make sure you have your Dev environment selected.
-
Select Solutions and open the Permit Management solution.
-
Select + New and then select Security > Security role
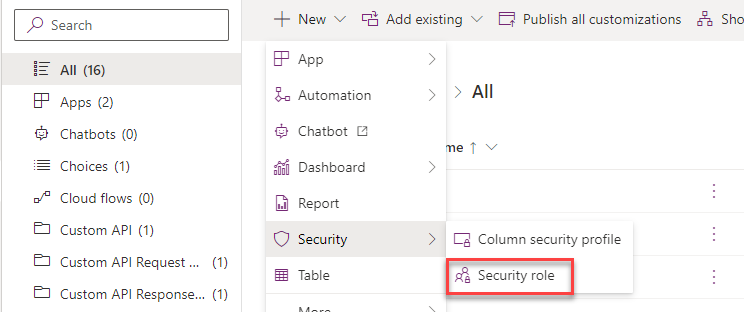
-
Enter Inspection Router for Role Name and then select Save.
-
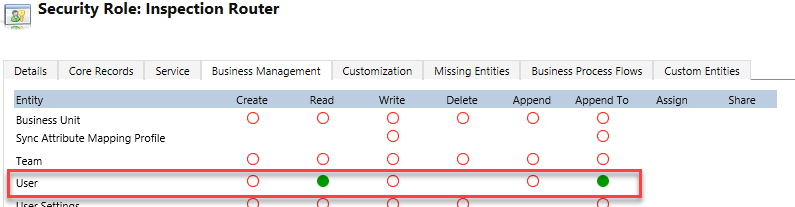
Select the Business Management tab.
-
Locate the User table and set Read and Append To privileges to Organization.
-
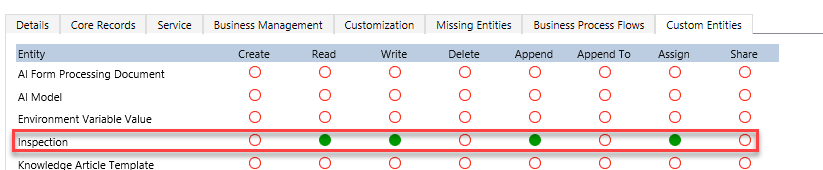
Select the Custom Entities tab.
-
Locate the Inspection table and set Read, Write, Append, and Assign privileges to Organization.
-
Select Save and Close.
-
Select Done.
- Add Application User.
-
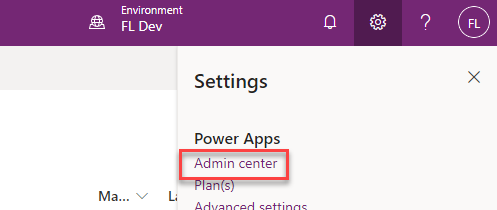
Select Settings and then select Admin center.
-
Select your Dev environment and then select Settings.
-
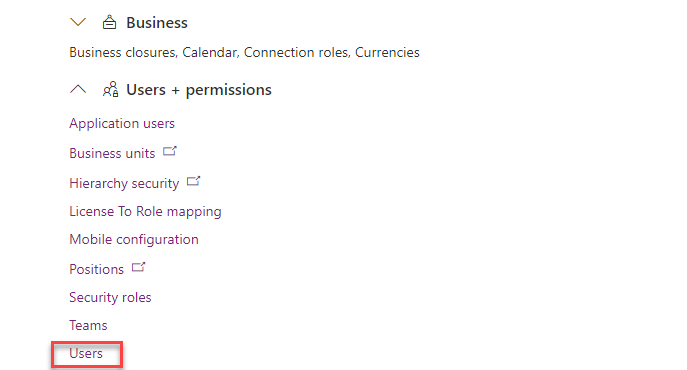
Expand Users + permissions.
-
Select Users.
-
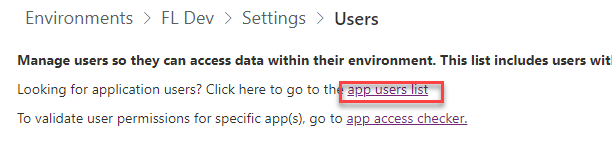
Select App users list.
-
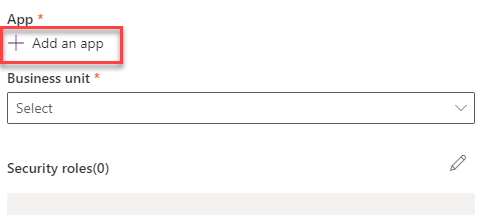
Select + New app user.
-
Select + Add an app.
-
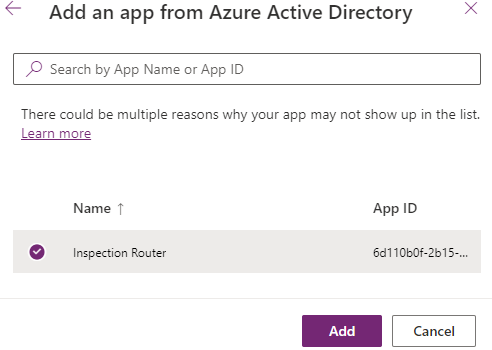
Select the Inspection Router you created and then select Add.
-
Select your Business Unit and then select edit Security roles.
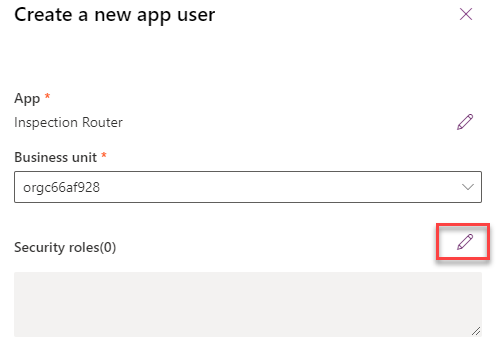
-
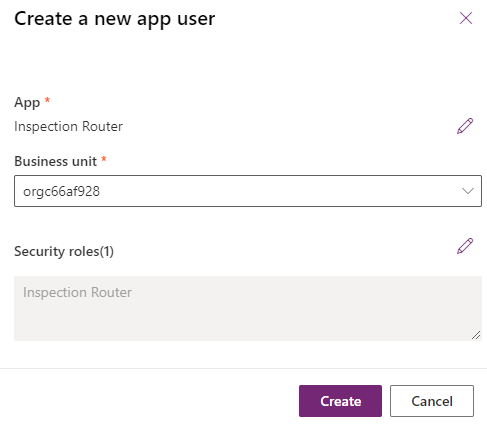
Select the Inspection Router security role and then select Save.

- Select Create.
Exercise #2: Create Azure Function for Inspection Routing
Objective: In this exercise, you will create the Azure function that will route the inspections.
Task #1: Create the Function
- Create Azure Function project
-
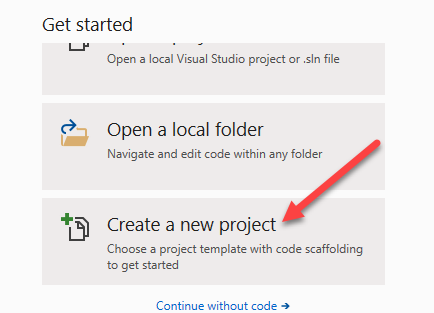
Start Visual Studio.
-
Select Create a New Project.
- Select Azure Functions and then select Next.
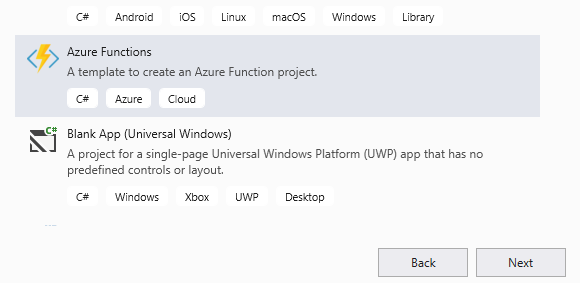
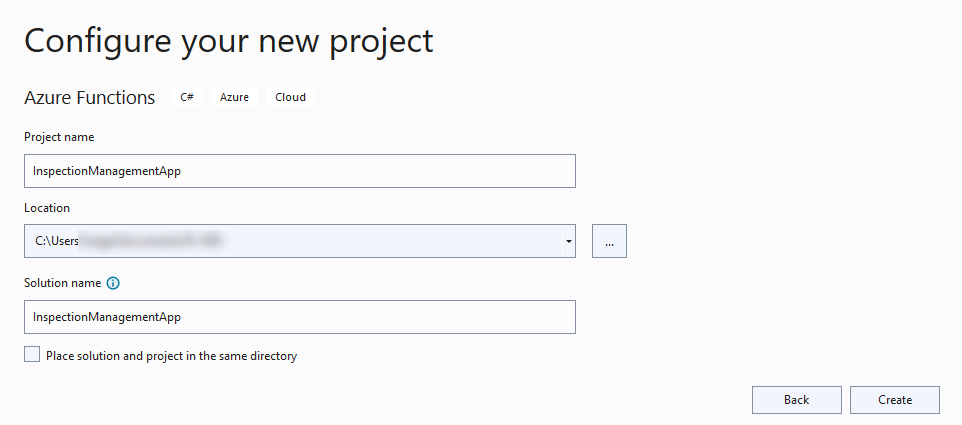
- Enter InspectionManagementApp for Name and then select Create.
-
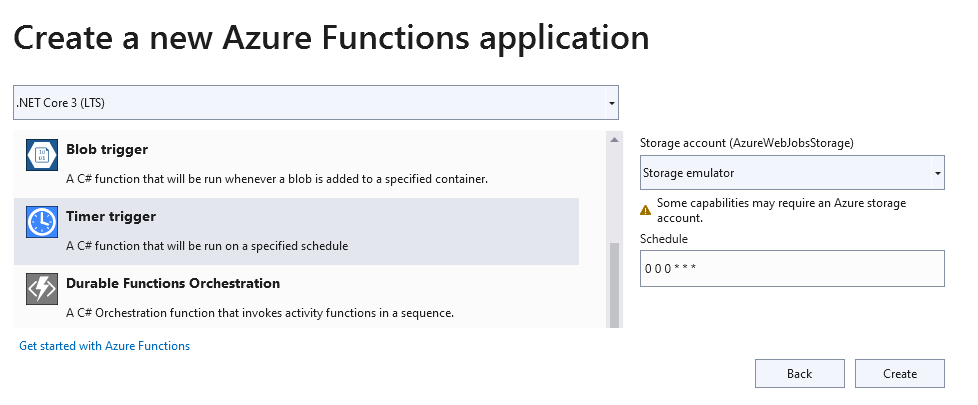
Select NET Core3 and select Timer Trigger.
-
Change the Schedule to 0 0 0 * * * (Midnight Every Day) and select Create.
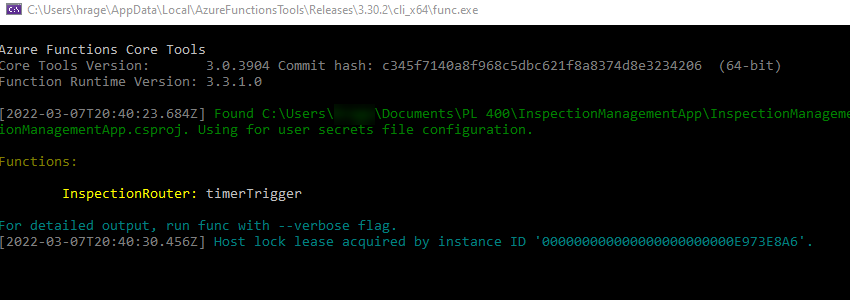
- Rename and run the Function
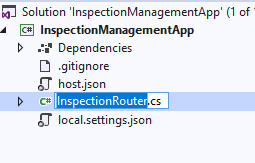
- Rename the function file InspectionRouter.
-
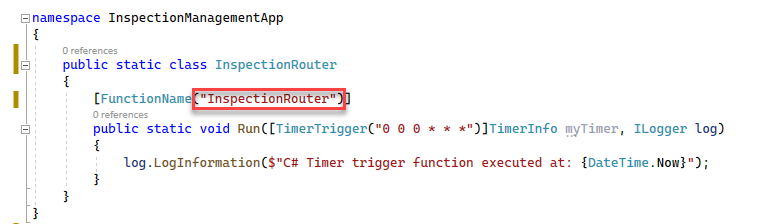
Select Yes to rename references.
-
Change the function FunctionName to InspectionRouter.
- Select Run.

- Azure functions tools should start.
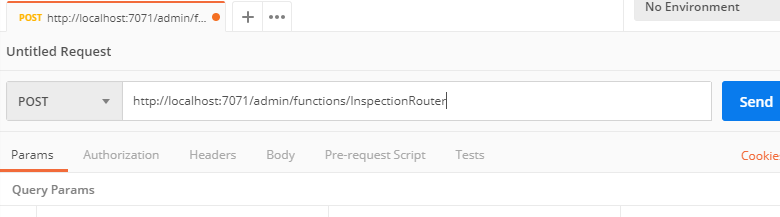
- Trigger the function with Postman
-
If you don’t have Postman installed, get it from here Postman and install it on your machine. Or you can use any similar tool of your preference that allows you to construct an HTTP POST request.
-
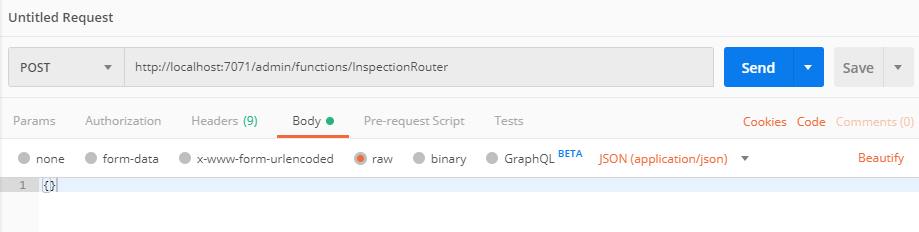
Start Postman.
-
Select POST and enter the URL: http://localhost:7071/admin/functions/InspectionRouter
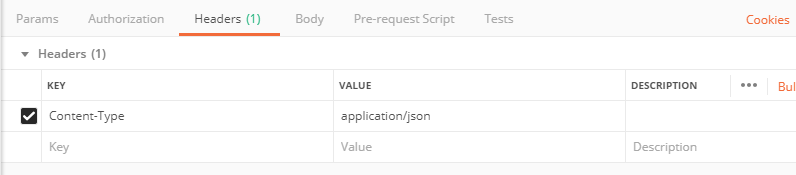
-
Select the Headers tab.
-
Add Content-Type and set it to application/json.
-
Select the Body tab.
-
Select Raw and set it to empty json {}.
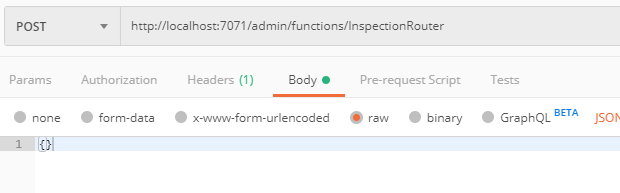
-
Select Send.
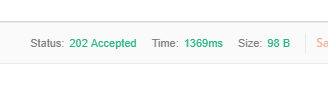
-
You should get 202 Accepted Status.
-
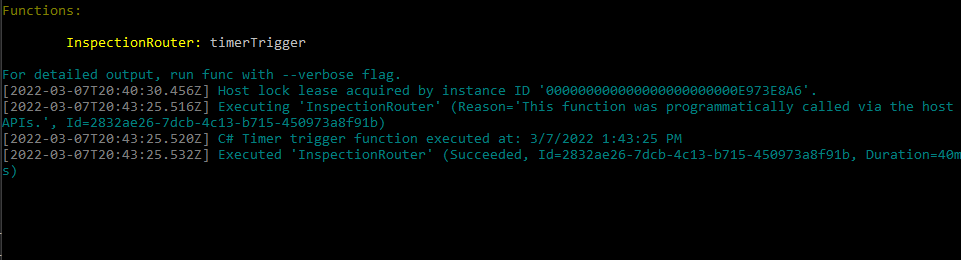
Go to the output console.
-
The function should get triggered.
- Go back to Visual Studio and stop debugging.
- Add NuGet packages
-
Right Click on the project and select Manage NuGet Packages.
-
Select the Browse tab and search for Microsoft.IdentityModel.Clients.ActiveDirectory.
-
Select the latest stable version and then select Install.

-
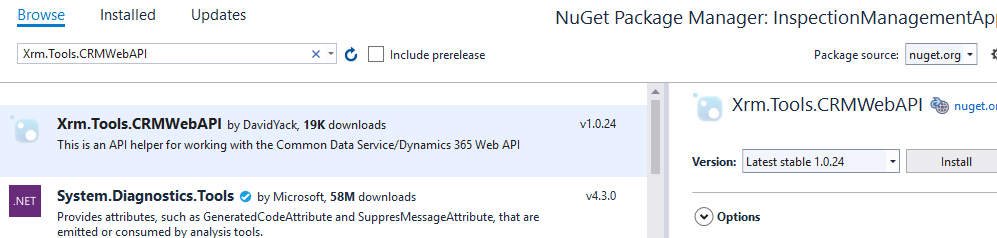
Search for Xrm.Tools.CrmWebAPI. Note: This is a community library designed to work with the Microsoft Dataverse Web API. When you are building this type of extension you can use any oData V4 library you prefer. Make sure you select the one developed by DavidYack.
-
Select the latest stable version and then select Install.
- Close the NuGet Package Manager.
- Edit the local settings file
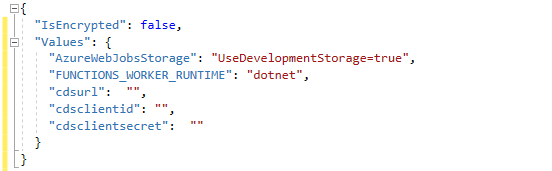
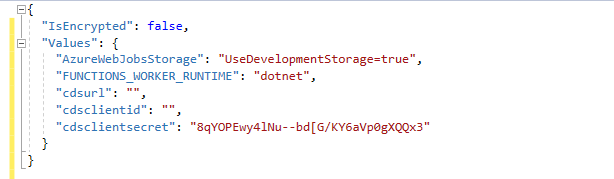
- Open the local.settings.json file

-
Add the Values below to local.settings
  "cdsurl": "",

  "cdsclientid": "",

  "cdsclientsecret": ""
- Find the client secret you saved in the notepad and paste as the cdsclientsecret.
- Copy the App ID
-
Go back to your Azure portal.
-
Select Azure Active Directory.
-
Select App Registrations.
-
Open the registration you created.
- Copy the Application (Client ID).
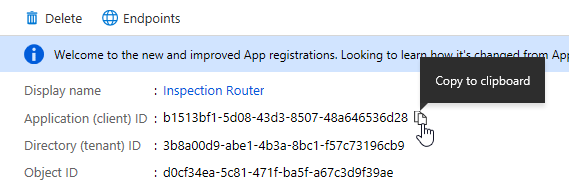
- Go back to Visual Studio and paste the Application ID as the cdsclientid.
- Find the your Microsoft Dataverse URL
-
Sign in to https://admin.powerplatform.microsoft.com
-
Select Environments and open the Dev environment.
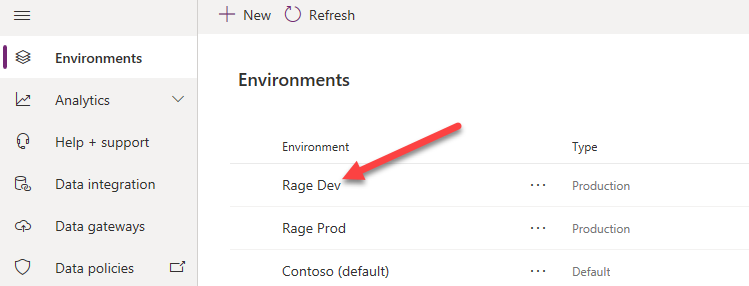
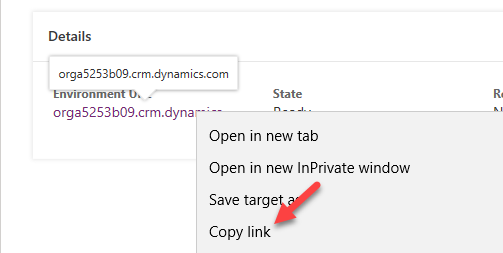
- Copy the Environment URL.
- Go back to Visual Studio and paste the URL you copied as the cdsurl.
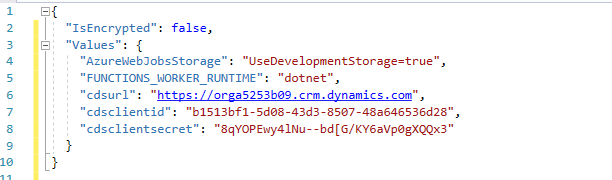
- Save and close the file.
- Add using statements to the function class.
-
Open the InspectionRouter.cs file
-
Add the using statements below
  using System.Threading.Tasks;
  using Xrm.Tools.WebAPI;
  using Microsoft.IdentityModel.Clients.ActiveDirectory;
  using Xrm.Tools.WebAPI.Results;
  using System.Dynamic;
  using Xrm.Tools.WebAPI.Requests;
  using System.Collections.Generic;
- Create a method that will create the web API.
-
Add the method below inside the class.
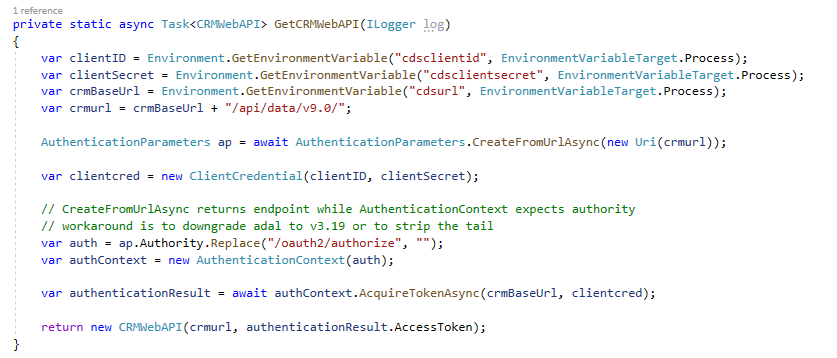
private static async Task<CRMWebAPI> GetCRMWebAPI(ILogger log) { return null; } -
Add the local variables below before the return line on the GetCRMWebAPI method.
var clientID = Environment.GetEnvironmentVariable("cdsclientid", EnvironmentVariableTarget.Process); var clientSecret = Environment.GetEnvironmentVariable("cdsclientsecret", EnvironmentVariableTarget.Process); var crmBaseUrl = Environment.GetEnvironmentVariable("cdsurl", EnvironmentVariableTarget.Process); var crmurl = crmBaseUrl + "/api/data/v9.0/"; -
Create Authentication Parameters.
AuthenticationParameters ap = await AuthenticationParameters.CreateFromUrlAsync(new Uri(crmurl)); -
Create Client Credential passing your Client Id and Client Secret.
var clientcred = new ClientCredential(clientID, clientSecret); -
Get Authentication Context.
// CreateFromUrlAsync returns endpoint while AuthenticationContext expects authority // workaround is to downgrade adal to v3.19 or to strip the tail var auth = ap.Authority.Replace("/oauth2/authorize", ""); var authContext = new AuthenticationContext(auth); -
Get Token.
var authenticationResult = await authContext.AcquireTokenAsync(crmBaseUrl, clientcred); -
Return the web API. Replace the return line with the code below.
return new CRMWebAPI(crmurl, authenticationResult.AccessToken);
- Test the web API you created
-
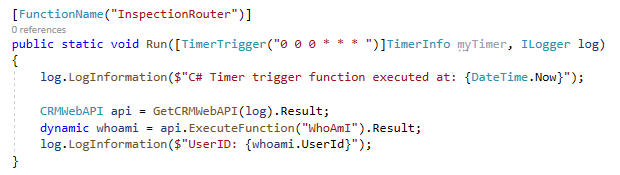
Call the GetCRMWebAPI method. Add the code below to the Run method.
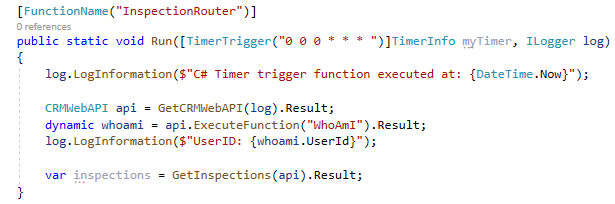
CRMWebAPI api = GetCRMWebAPI(log).Result; -
Execute WhoAmI function and log the User Id.
  dynamic whoami = api.ExecuteFunction("WhoAmI").Result;
  log.LogInformation($"UserID: {whoami.UserId}");
- Debug
-
Select Run.
-
Go back to Postman and select Send.
-
Go to the output console.
-
You should see the User ID.

Go back Visual Studio and stop debugging.
Task #2: Get Inspections and Users and Assign Inspections
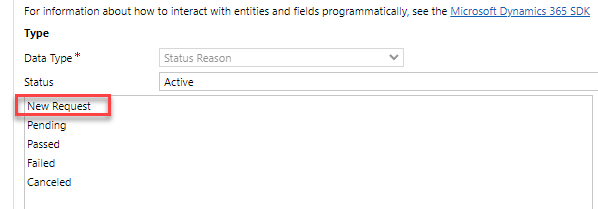
- Get the New Request and Pending option values for the Inspection table Status Reason column.
- Navigate to https://make.powerapps.com/ and make sure you have your Dev environment selected.
-
Select Solutions and open the Permit Management solution.
-
Select Tables and open the Inspection table.
-
Select Switch to classic.
-
Select Fields.
-
Locate and open the Status Reason field,
-
Scroll down and double open the New Request option.
-
Copy the Value and keep it in a notepad.
-
Select OK.
-
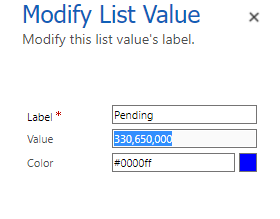
double click to open the Pending option.
-
Copy the Value and keep it in a notepad.
-
Select OK.
-
Close the field editor.
-
Close the classic table editor.
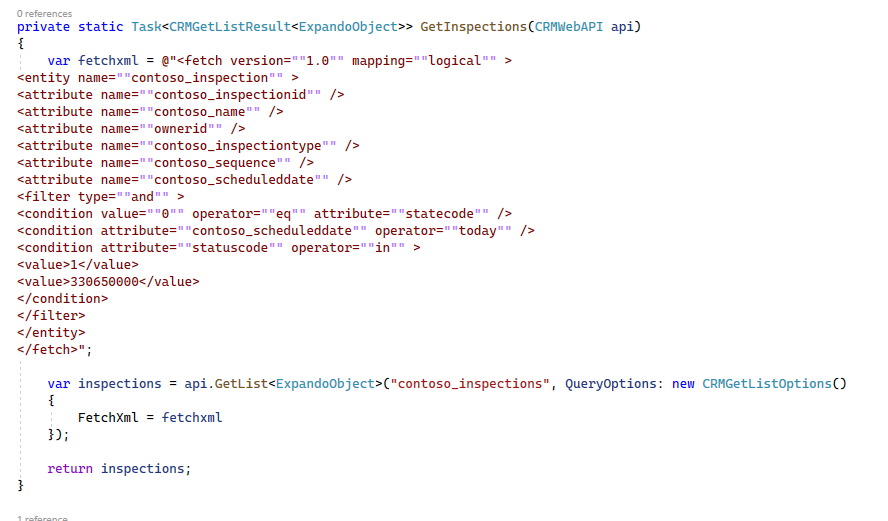
- Create a method that will get all active inspections that are New Request or Pending, and schedule them for today
-
Add the method below inside the class.
private static Task<CRMGetListResult<ExpandoObject>> GetInspections(CRMWebAPI api) { return null; } -
Create Fetch XML. Add the code below before the return line of the GetInspections method. replace [New Request] and [Pending] with the option values you copied without the commas.
var fetchxml = @"<fetch version=""1.0"" mapping=""logical"" > <entity name=""contoso_inspection"" > <attribute name=""contoso_inspectionid"" /> <attribute name=""contoso_name"" /> <attribute name=""ownerid"" /> <attribute name=""contoso_inspectiontype"" /> <attribute name=""contoso_sequence"" /> <attribute name=""contoso_scheduleddate"" /> <filter type=""and"" > <condition value=""0"" operator=""eq"" attribute=""statecode"" /> <condition attribute=""contoso_scheduleddate"" operator=""today"" /> <condition attribute=""statuscode"" operator=""in"" > <value>[New Request]</value> <value>[Pending]</value> </condition> </filter> </entity> </fetch>"; -
Get the list of Inspections.
var inspections = api.GetList<ExpandoObject>("contoso_inspections", QueryOptions: new CRMGetListOptions() { FetchXml = fetchxml }); -
Return the Inspections. Replace the return line with the code below.
return inspections;
- Call the GetInspections method from the Run method.
-
Go back to the Run method.
-
Call the GetInspections method.
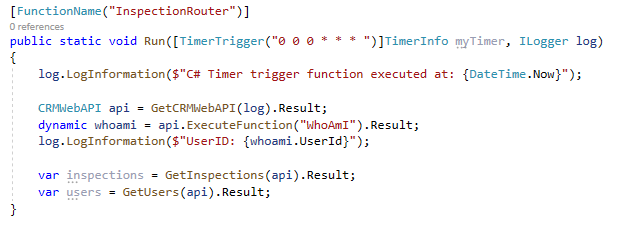
var inspections = GetInspections(api).Result;
- Create a method that will get all users.
-
Add the method below inside the class.
private static Task<CRMGetListResult<ExpandoObject>> GetUsers(CRMWebAPI api) { var users = api.GetList<ExpandoObject>("systemusers"); return users; } -
Call the GetUsers method from the Run method.
var users = GetUsers(api).Result;
- Create a method that will assign inspections to users
-
Add the method below to the class.
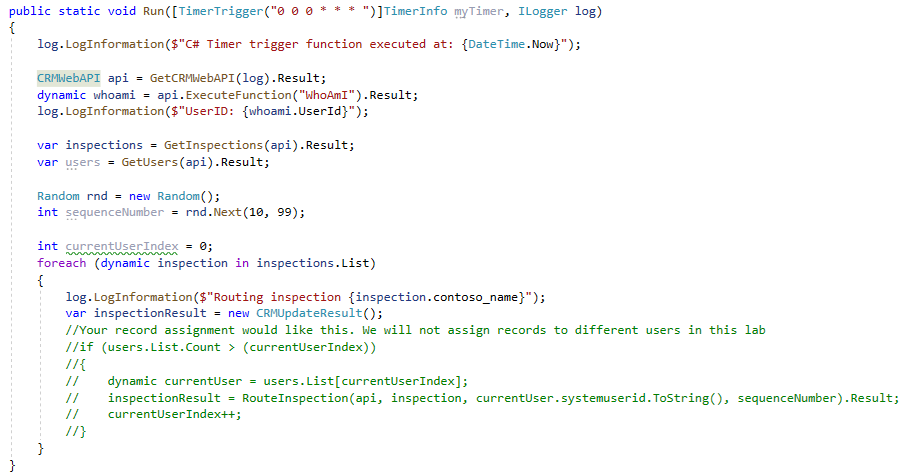
  private static async Task<CRMUpdateResult> RouteInspection(CRMWebAPI api, dynamic inspection, string userId, int sequenceNumber)
  {
  dynamic updateObject = new ExpandoObject();
  ((IDictionary<string, object>)updateObject).Add
  ("ownerid@odata.bind", "/systemusers(" + userId + ")");
  updateObject.contoso_sequence = sequenceNumber.ToString();
  return await api.Update("contoso_inspections", new Guid(inspection.contoso_inspectionid), updateObject);
  }
- Create two-digit random number.
-
Add the code below to the Run method.
  Random rnd = new Random();
  int sequenceNumber = rnd.Next(10, 99);
- Assign Inspections
-
Go through the Inspections and call the RouteInspection method.
int currentUserIndex = 0; foreach (dynamic inspection in inspections.List) { log.LogInformation($"Routing inspection {inspection.contoso_name}"); var inspectionResult = new CRMUpdateResult(); //Your record assignment would look like this. We will not assign records to different users in this lab // if (users.List.Count > (currentUserIndex)) //{ // dynamic currentUser = users.List[currentUserIndex]; // inspectionResult = RouteInspection(api, inspection, currentUser.systemuserid.ToString(), sequenceNumber).Result; //currentUserIndex++; //} } -
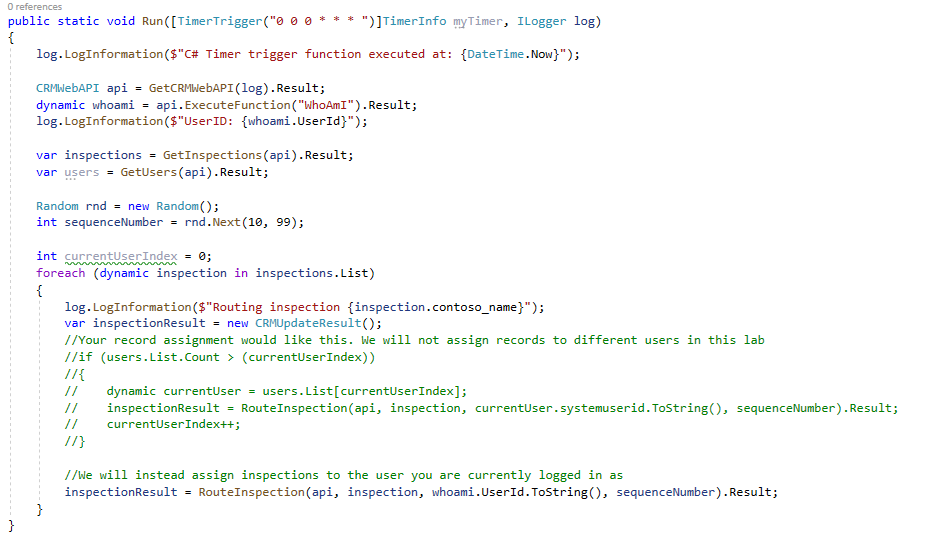
We will not assign inspection records to other users in this lab.
-
Assign inspections to the Inspection Router. Add the code below inside foreach.
  //We will instead assign inspections to the user you are currently logged in as
  inspectionResult = RouteInspection(api, inspection, whoami.UserId.ToString(), sequenceNumber).Result;
Build the project and make sure that the build succeeds.
Exercise #3: Publish and Test
Objective: In this exercise, you will publish the Azure function to Azure, update the app settings, and test the function.
Task #1: Publish to Azure
- Publish the function
- Right click on the project and select Publish.
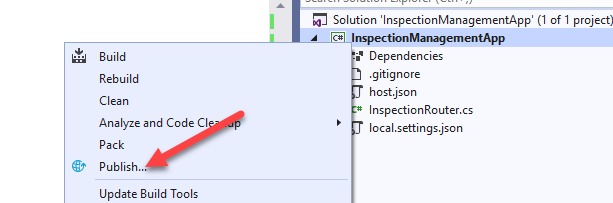
-
Select Azure and then select Next.
-
Select Azure Function App (Windows) and then select Next.
-
Sign in with user that has an Azure subscription.
-
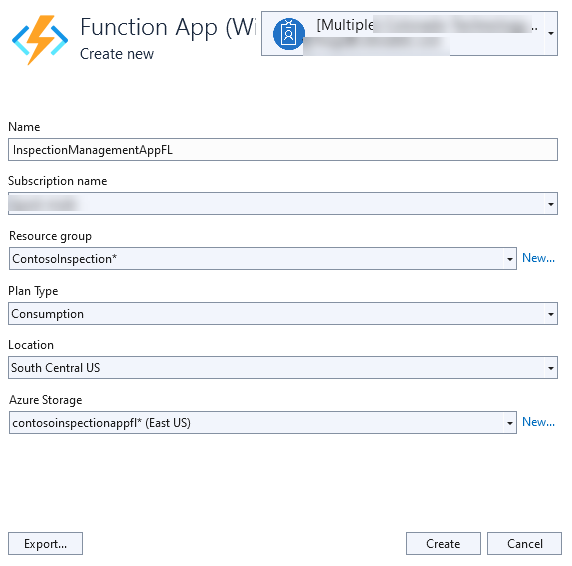
Select your Azure subscription and then select + create new Azure function app.

- Provide a unique name for App Name, select your subscription name, create new resource group, create new Azure storage, select Consumption for Plan type, select Location, and then select Create.
-
Wait for the app service to be created.
-
Select Finish.
-
Select Publish.
-
Wait for the function application to be configured and published.
- Open the function application settings
-
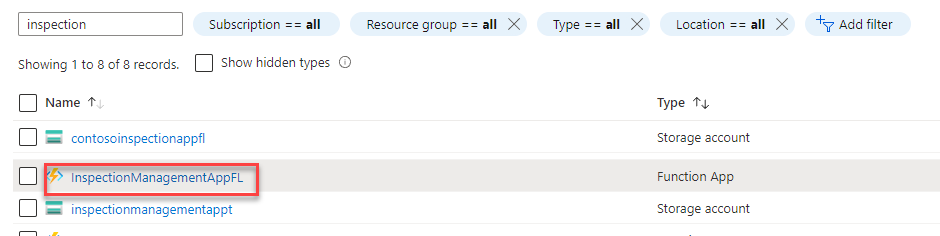
Go back to you Azure portal.
-
Select All Resources, search for InspectionManagement, and open the function you published.
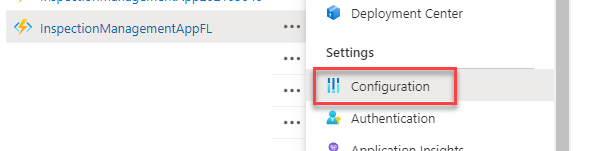
- Scroll down to Settings and select Configuration.
- Update App Settings
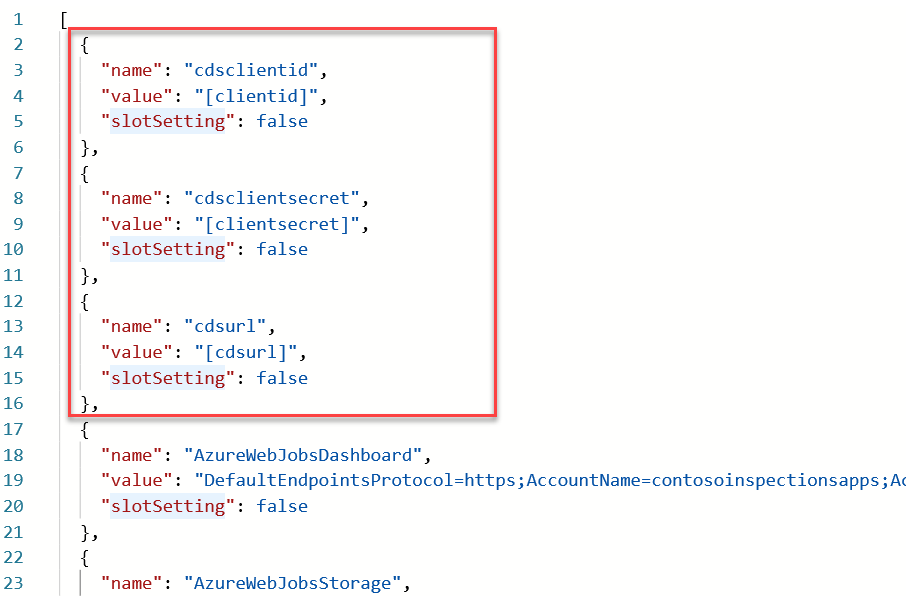
- Select Advanced Edit.
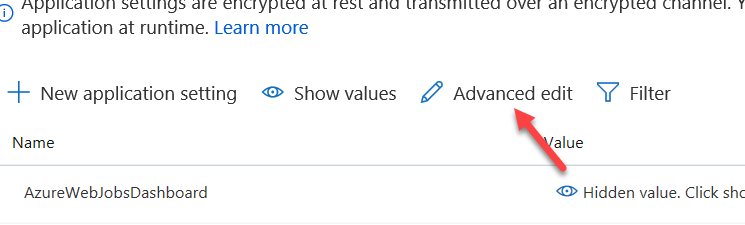
-
Paste the json below at the top of the settings.
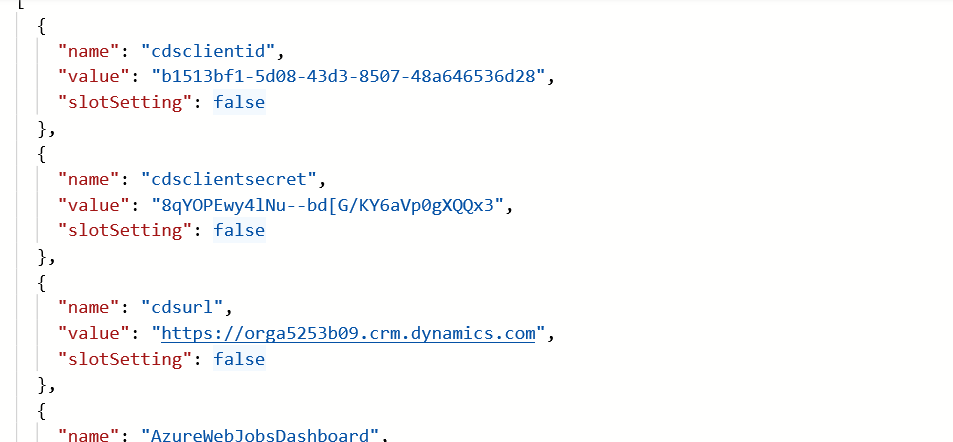
  {

  "name": "cdsclientid",

  "value": "[clientid]",

  "slotSetting": false

  },

  {

  "name": "cdsclientsecret",

  "value": "[clientsecret]",

  "slotSetting": false

  },

  {

  "name": "cdsurl",

  "value": "[cdsurl]",

  "slotSetting": false

  },
-
Go back to Visual Studio and open the local.settings.json file.
-
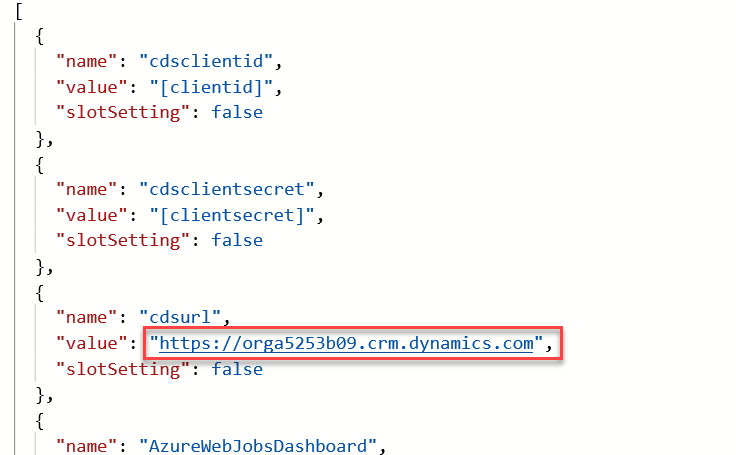
You will copy the cdsurl, cdsclientid, and cdsclientsecret. Copy the cdsurl value.
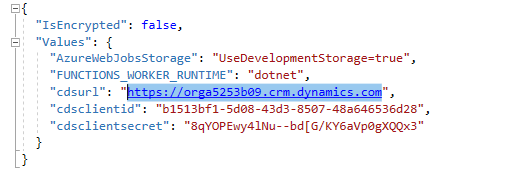
- Go back to Azure and replace [cdsurl] with the URL you copied.
- Copy the cdsclientid and cdsclientsecret values from the local.settings.json file and replace [cdsclientid] and [cdsclientsecret].
-
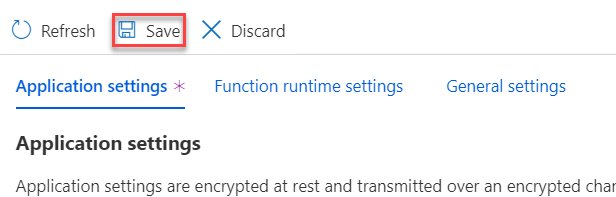
Select OK.
-
Select Save.
-
Select Continue.
-
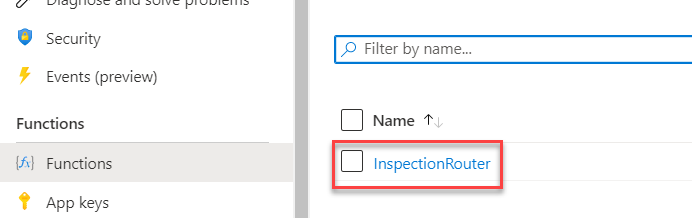
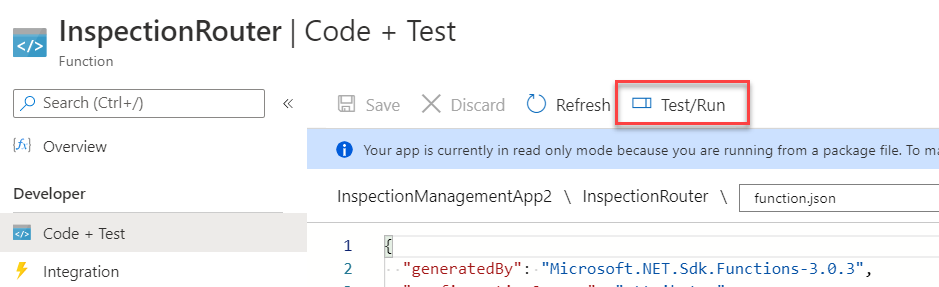
Select Functions and open the function you published.
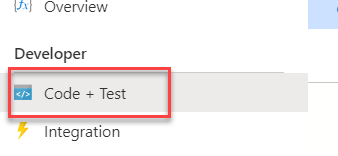
- Select Code + Test.
- Prepare test record
-
Start a new browser window and sign in to Power Apps maker portal
-
Make sure you are in the Dev environment.
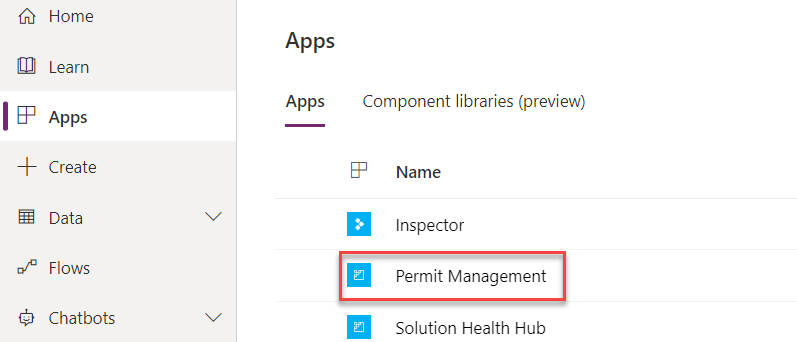
- Select Apps and open the Permit Management application.
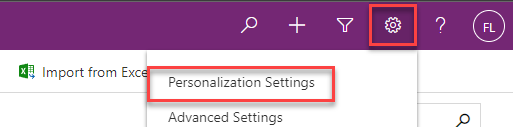
- Select Settings and then select Personalization and Settings.
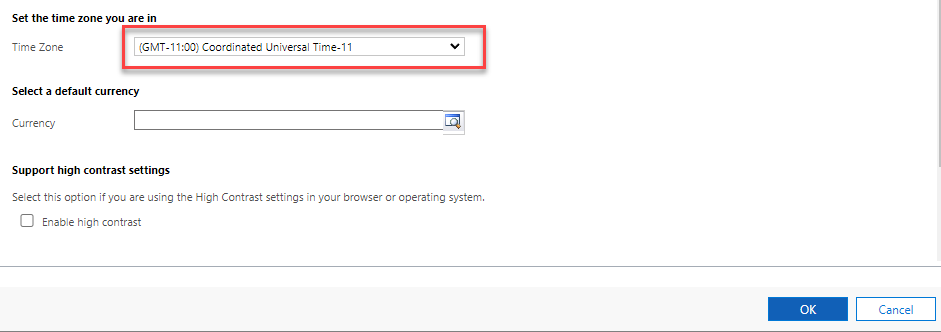
- Change the Time Zone to (GMT-11:00) Coordinated Universal Time-11 and then select OK. This will ensure the query results will produce the same results regardless of your time zone.
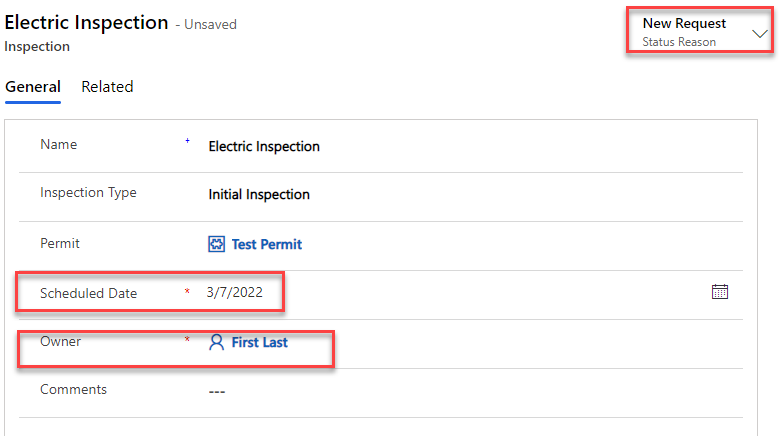
- Select Inspections and open one of the Inspection records or create a new record.
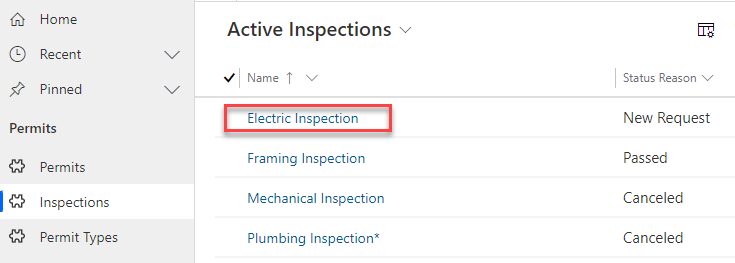
- Set the Status Reason to New Request or Pending, change the Scheduled Date to today’s date, and make a note of the current Owner of the record.
- Select Save.
- Run the function
-
Go to your Azure portal.
-
Select Test/Run.
-
Select Run.
-
The function should run and succeed.

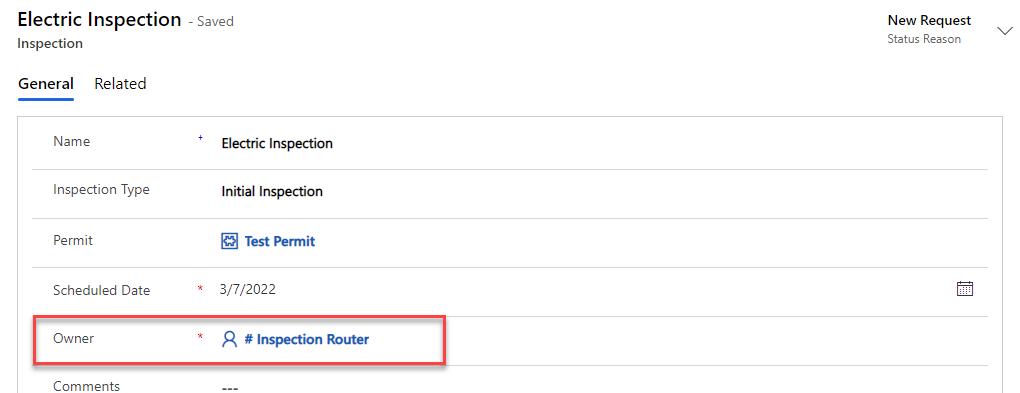
- Confirm record assignment
-
Go back to the Permit Management application.
-
Select Refresh.

- The record Owner should now be the Inspection Router.
Exercise #4: Promote to production
Objective: In this exercise, you will export the Permit Management solution form your Dev environment and import it into your Production environment. In this lab, you have added a security role to the solution that must be promoted.
Task #1: Export Solution
- Export Permit Management managed solution
-
Sign in to Power Apps maker portal and make sure you are in the Dev environment.
-
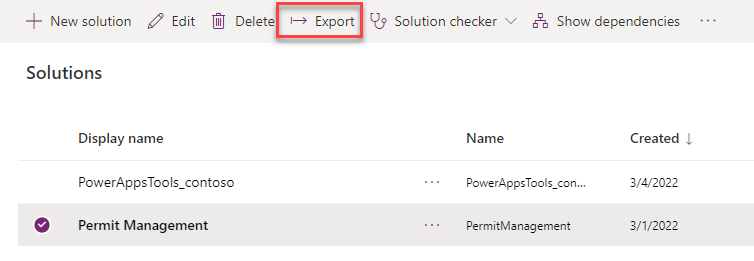
Select Solution.
-
Select the Permit Management solution and then select Export.
- Select Publish and wait for the publishing to complete.
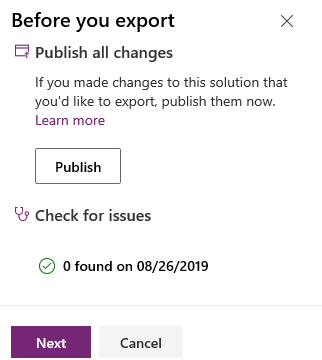
-
Select Next.
-
Select Managed and then select Export.

- Save the Exported solution on your machine.
- Export Permit Management unmanaged solution
- Select Solution again.
- Select the Permit Management solution and then select Export.
- Select Next.
-
Select Unmanaged, edit the version number to match the Managed solution and then select Export.
- Save the Exported solution in your machine.
Task #2: Import Solution
- Import Permit Management managed solution
-
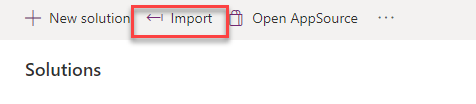
Sign in to https://make.powerapps.com and make sure you are in the Prod environment.
-
Select Solution.
-
Select Import.
-
Select Choose file.
-
Select the Managed solution you exported and then select Open.
-
Select Next.
-
Select Import.
-
Wait for the import to complete and then select Close.
-
Review and test your production environment.