NOTE
Effective November 2020:
- Common Data Service has been renamed to Microsoft Dataverse. Learn more
- Some terminology in Microsoft Dataverse has been updated. For example, entity is now table and field is now column. Learn more
Lab 02.1: Data model and model-driven app
In this lab you will be implementing the data model for the solution and building a model-driven app that will be used for fixing problems or managing the overall effort.
What you will learn
-
Create Tables, Columns, and relationships
-
Create a model-driven app
-
Create a site map
-
Create and configure Table forms
-
Create and configure Table views
High-level lab steps
-
Exercise 1 – Create publisher and solution
-
Exercise 2 – Implement the data model
-
Data Model
-
Building
-
Department
-
Problem Report
-
-
-
Exercise 3 – Configure forms and views
-
Exercise 4 – Compose a basic model-driven app
-
Exercise 5 – Input data and refine some views, import some problem reports
Detailed steps
Exercise 1: Create publisher and solution
In this exercise, you will create a custom solution publisher and a solution. This solution will be used in all the labs for this course to keep all the components together.
Task 1: Create publisher and solution
-
Navigate to the Power Apps maker portal and make sure you are in the practice environment you created.
-
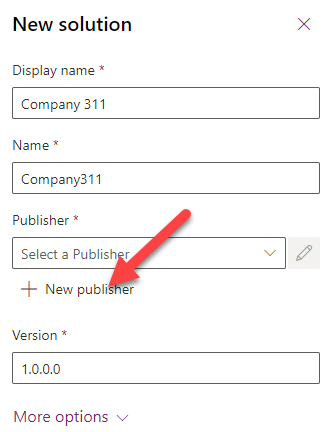
Select Solutions and click + New solution.
-
Enter Company 311 for Display name and click.
-
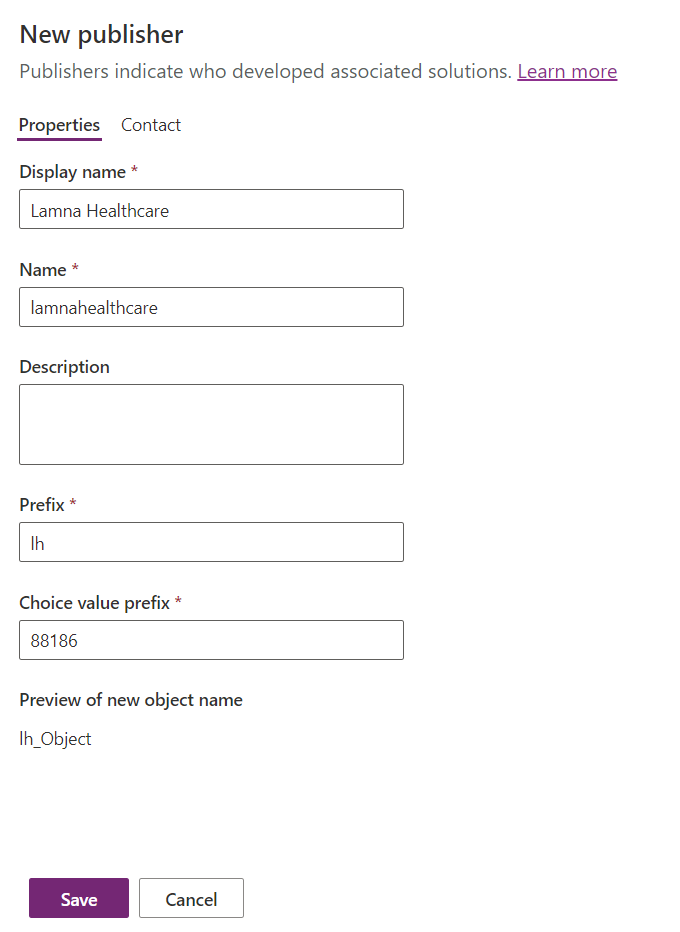
Click on the + New Publisher, under the Publisher option.
- Enter Lamna Healthcare for Display name, lamnahealthcare for Name, lh for Prefix, 88186 for Choice value prefix, and click Save.
-
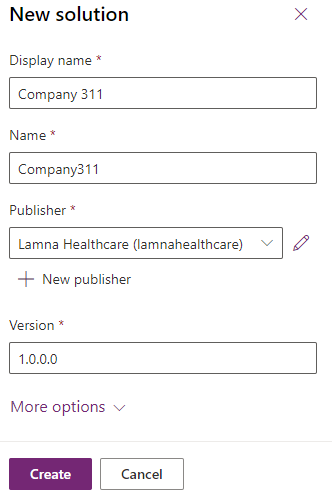
Click on the Publisher dropdown and select the Lamna Healthcare publisher you created.
-
Click Create.
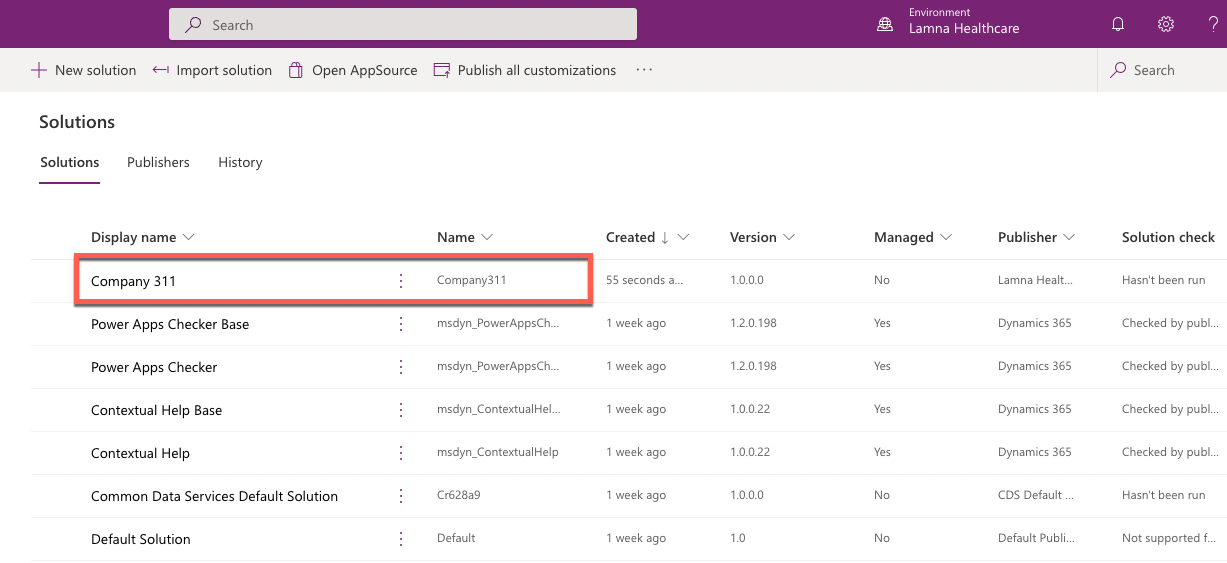
- You should now see the solution you created in the solution list.
Exercise 2: Implement data model
In this exercise, you will create Tables, Columns, and the Relationships you identified when you designed the data model for the Company 311 app.
Task 1: Create Tables
-
In the Power Apps maker portal select Solutions and click to open the Company 311 solution you created in Exercise 1.
-
Click + New and select Table.
-
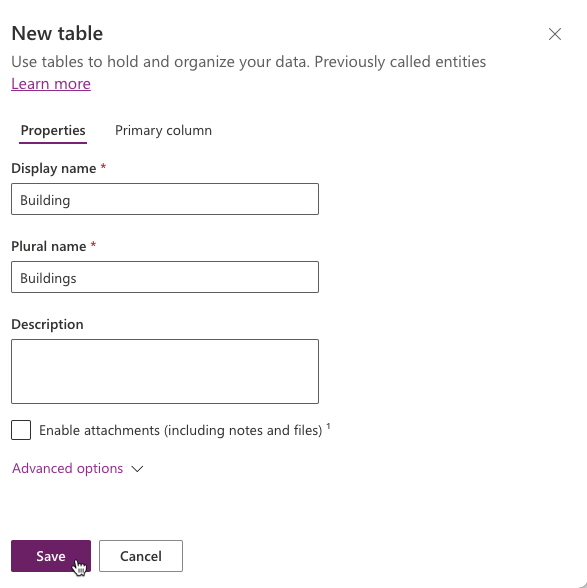
Enter Building for Display name and click Save.

-
Select All in the solution navigation tree to display all solution components.
-
Click + New and select Table again.
-
Enter Department for Display name and click Save.
- Select All in the solution navigation tree to display all solution components.
- Click + New and select Table one more time.
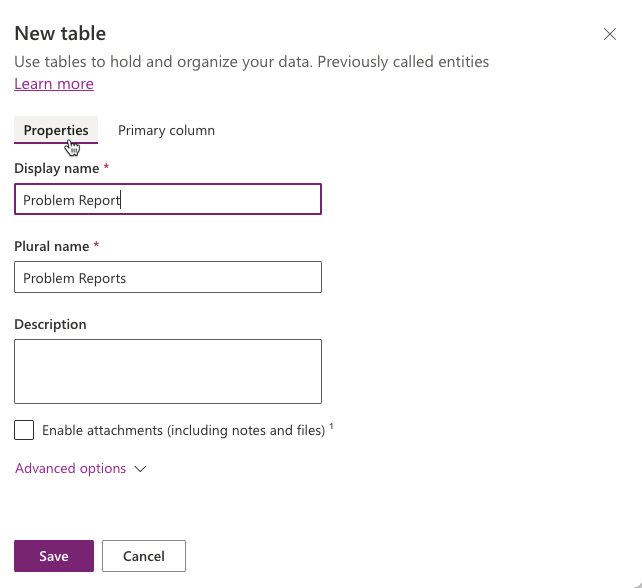
- Enter Problem Report for Display name.
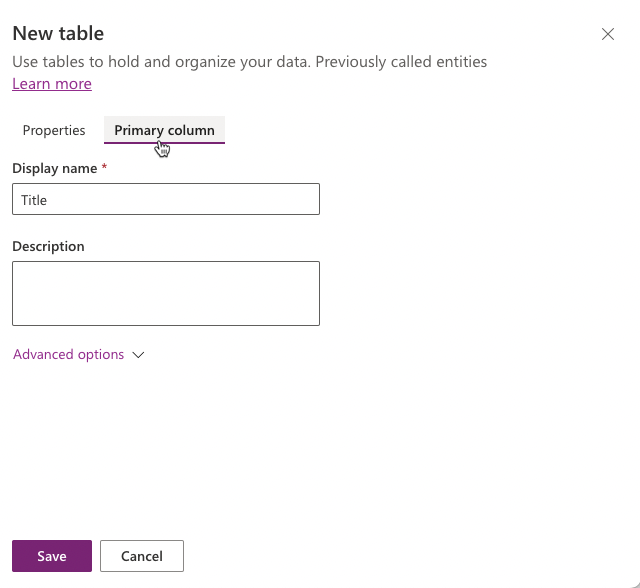
- Select Primary Column tab, enter Title for Display name.
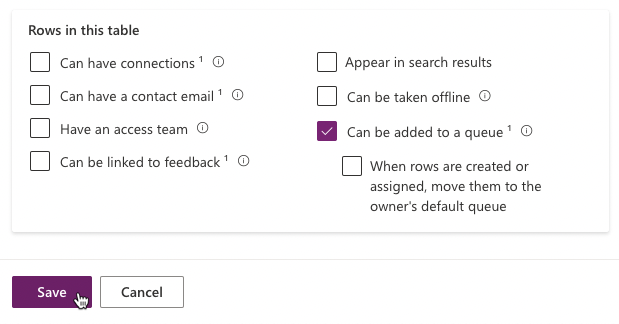
- Select Properties tab, click to expand Advanced Options, then scroll to Rows in this table section.
- Check the Can be added to a queue checkbox and click Save.
NOTE
Enabling queues for Problem Report table allows rows to be associated with one or more queues to help facilitate routing problem reports to the different departments. Once this option is enabled, it can’t be turned off.
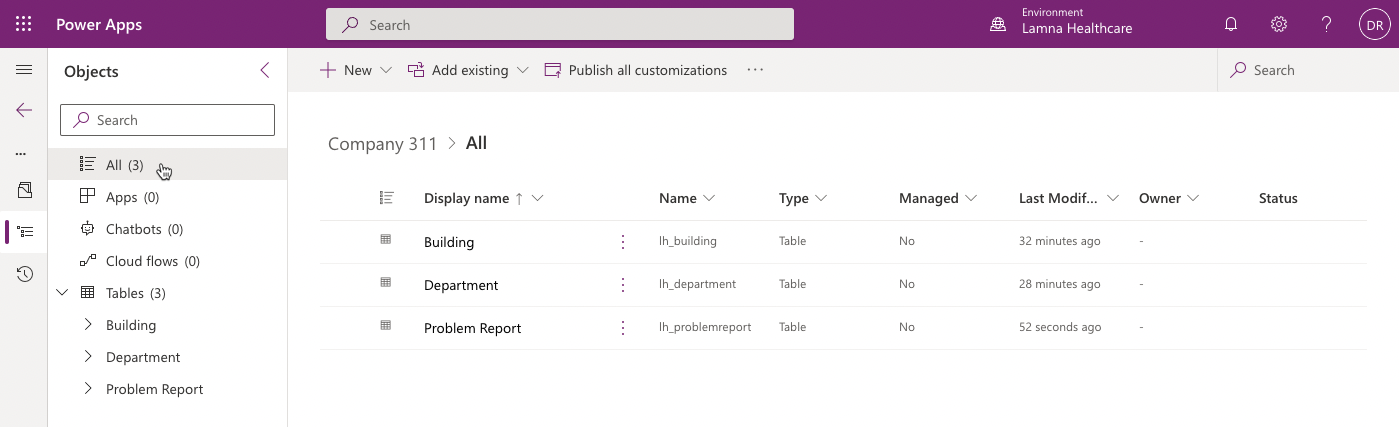
- Select All in the Objects navigation tree. The tables you created should now be visible in the list view and in the tree navigation.
Task 2: Add Columns
In this task, you will add Columns to the Problem Report Table.
-
Navigate to the Power Apps maker portal page and make sure you are in the correct environment.
-
Select Solutions and click to open the Company 311 solution you created in exercise 1.
-
Click to open the Problem Report Table.
-
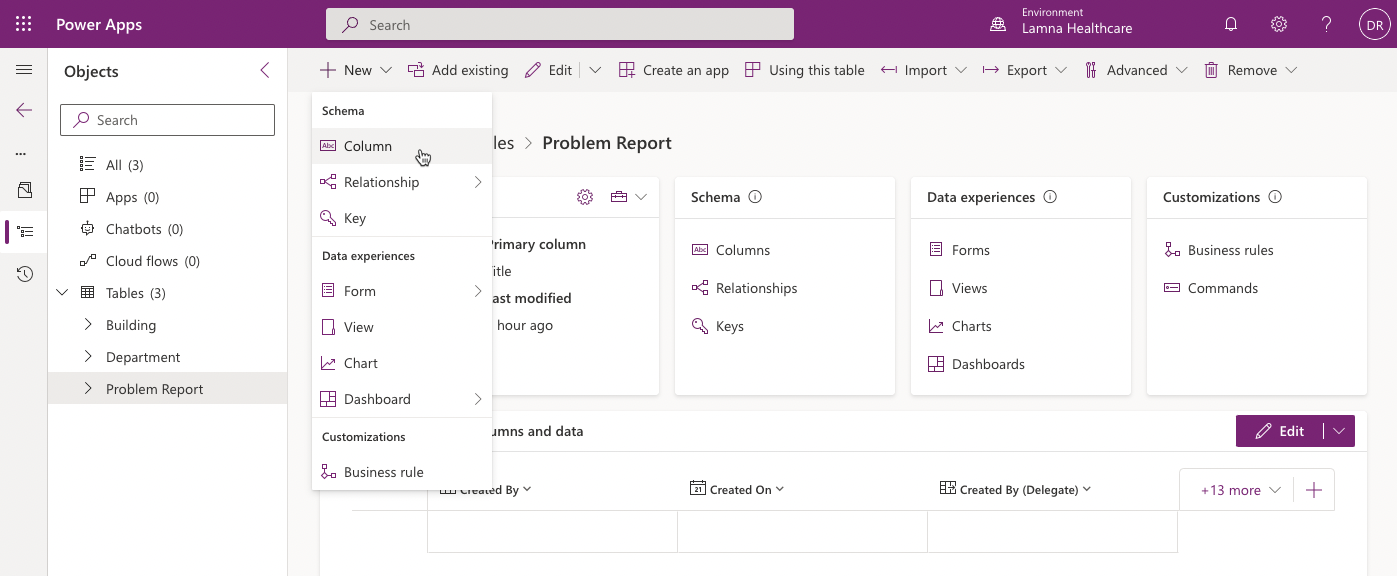
There are many ways to add a new column in the table. For this lab purpose select the + New menu, then select Column item.
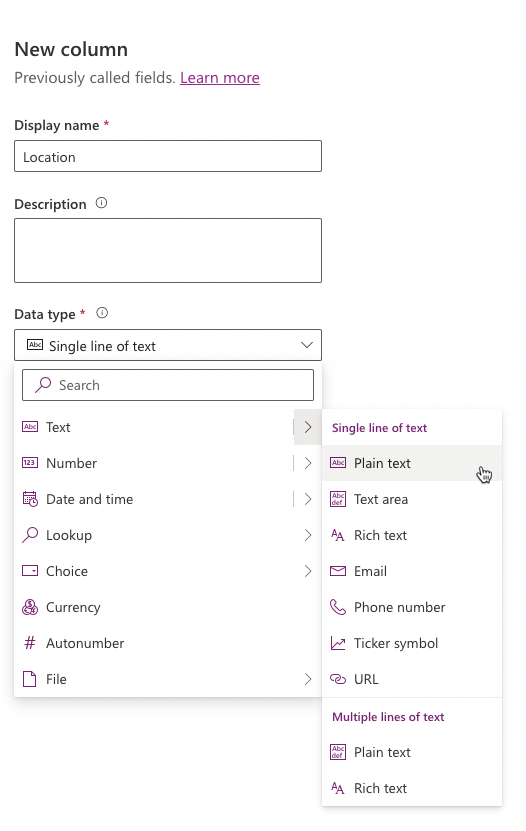
- Enter Location for Display name. Select Text > Single line of text > Plain text for Data type.
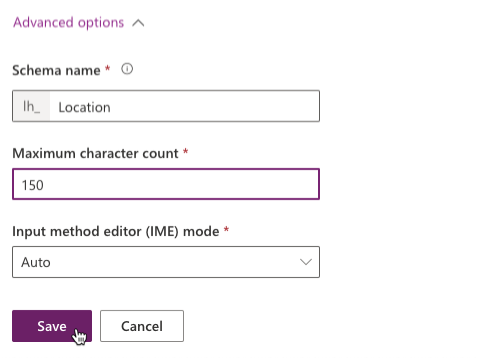
- Expand Advanced options section, change Maximum character count to 150, then click Save.
-
Click + New > Column in the top menu.
-
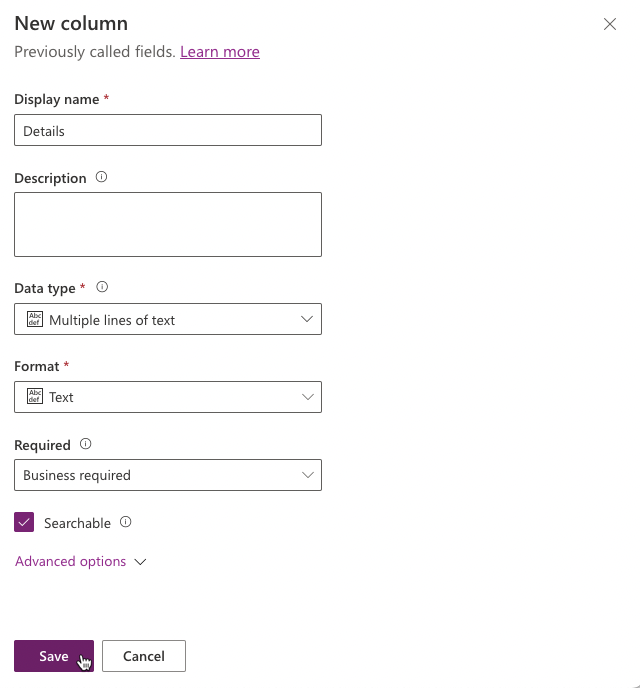
Enter Details for Display name, select Text > Multiline text > Plain Text for Data type, make the Column Business Required, and click Save.
- Click + New > Column again.
- Enter Photo for Display name, select File > Image for Data type, and click Save.
- Click + New > Column.
- Enter Resolution for Display name, select Text > Multiline text > Plain Text for Data type, and click Save.
- Click + New Column.
- Enter Resolved On for Display name, select Date and time for Data type, and click Save. Select the Back from the top menu option.
- Select All in the Objects navigation tree.
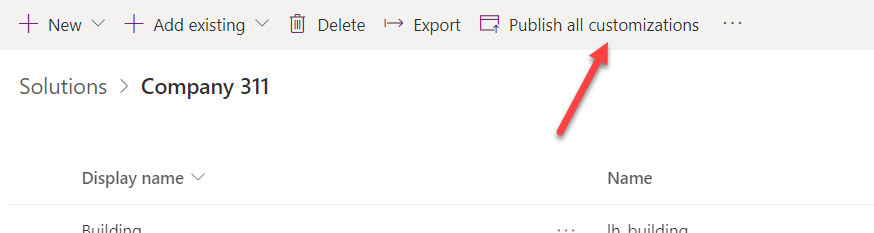
- Click Publish all customizations and wait for the publishing to complete.
IMPORTANT
Do not navigate away from this page until all customizations have been published successfully.
Task 3: Edit Status Reason Choice
In this task, you will edit the Status Reason column of the Problem Report table.
-
Make sure you are in the Company 311 solution.
-
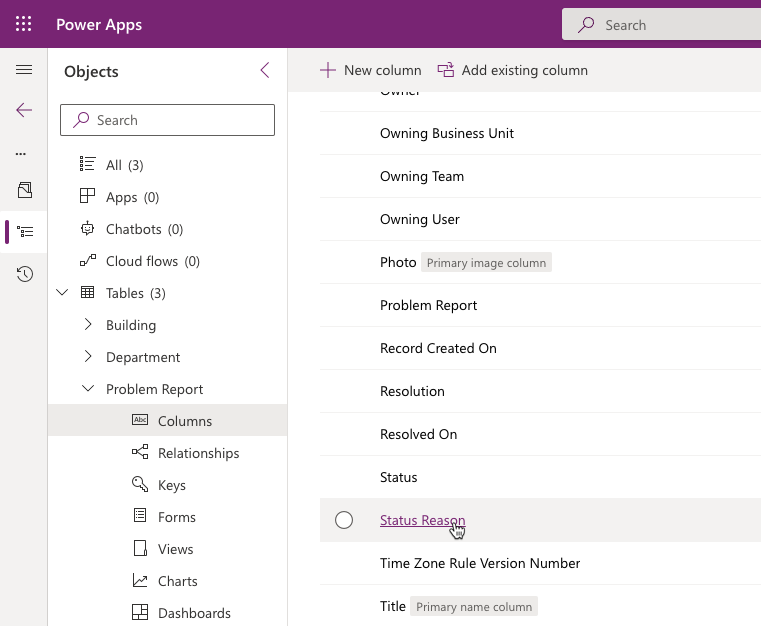
In the Objects navigation tree expand Tables, expand Problem Report, select Columns. Locate and click Status Reason column.
-
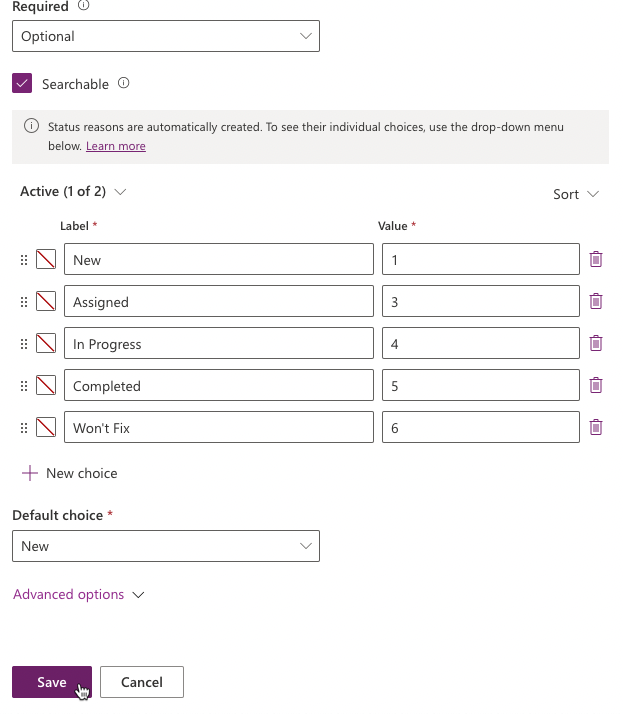
Change the label of Active option to New.
-
Click + New choice and enter Assigned for Label.
-
Click + New choice and enter In Progress for Label.
-
Click + New choice and enter Completed for Label.
-
Click + New choice and enter Won’t Fix for Label and click OK.
-
You should now have 5 options. Select New for Default choice and click Save.
- Select All in the Objects navigation tree.
- Click Publish all customizations and wait for the publishing to complete.
Task 4: Relationships
In this task, you will create many-to-one relationships between the Problem Report table and the Building and Department tables.
-
In the Objects navigation tree expand Tables, expand Problem Report table.
-
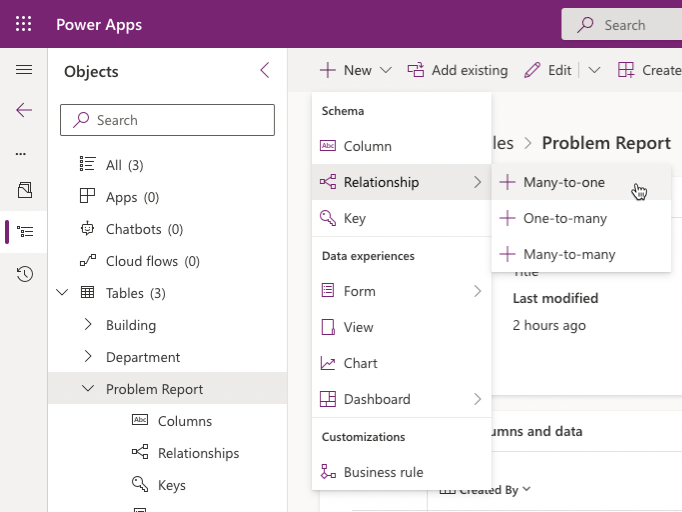
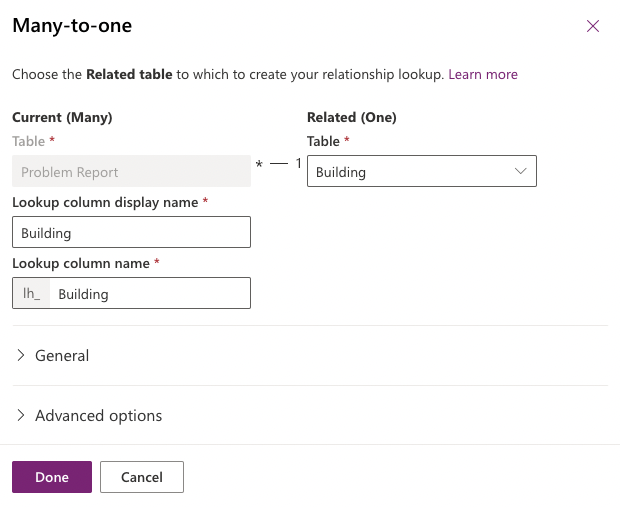
Click + New > Relationship > Many-to-one menu.
- Select Building for Related (One) table and click Done.
-
Click + New > Relationship > Many-to-one menu again.
-
Select Department for Related (One) table and click Done.
-
Select All in the Objects navigation tree.
-
Click Publish all customizations and wait for the publishing to complete.
Exercise 3: Configure form and views
In this exercise, you will configure form and views for the Problem Report table.
Task 1: Configure form
-
Navigate to the Power Apps maker portal and make sure you are in the correct environment.
-
Select Solutions and click to open the Company 311 solution.
-
In the Objects navigation tree expand Tables, expand Problem Report table.
-
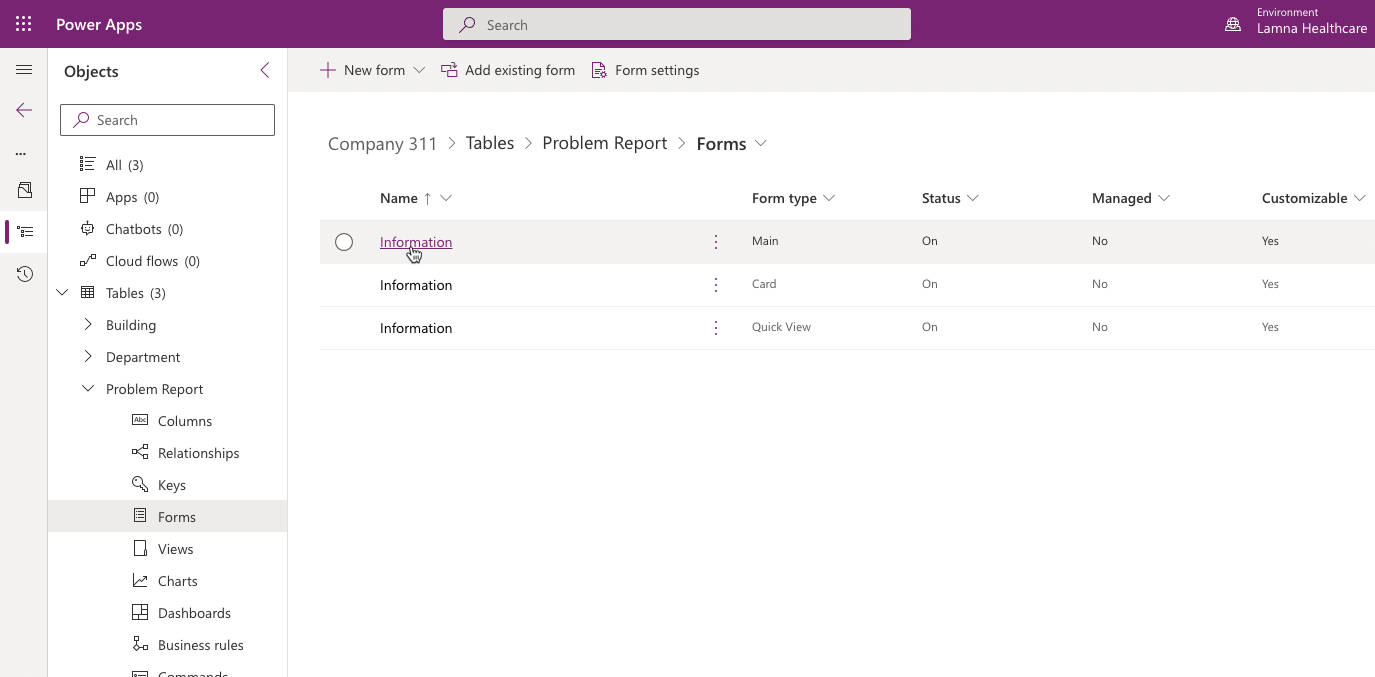
Select the Forms tab and click to open the Information form of type Main.
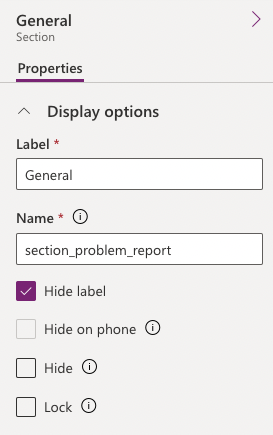
- Use the Zoom control at the bottom of the form to make the form large enough for you to work easily. Select the General form section.
- Go to the Properties pane, change the Label to Problem details, and enter section_problem_report for Name.
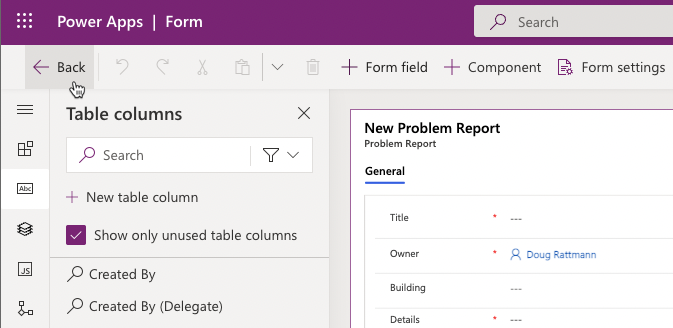
- While you still have the section selected, go to the Table Columns pane, and click on the Building Column. The Building Column will be added to the form.
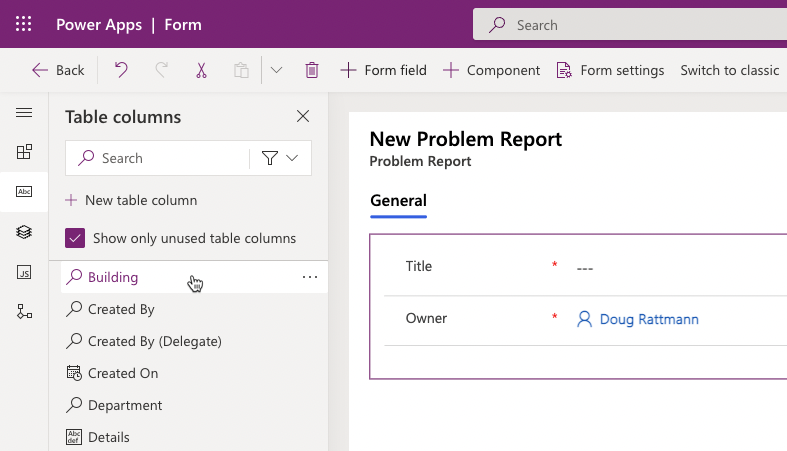
-
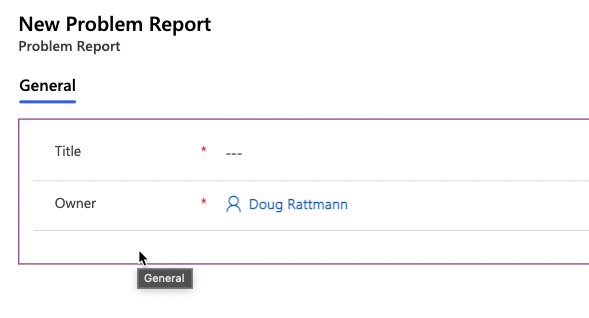
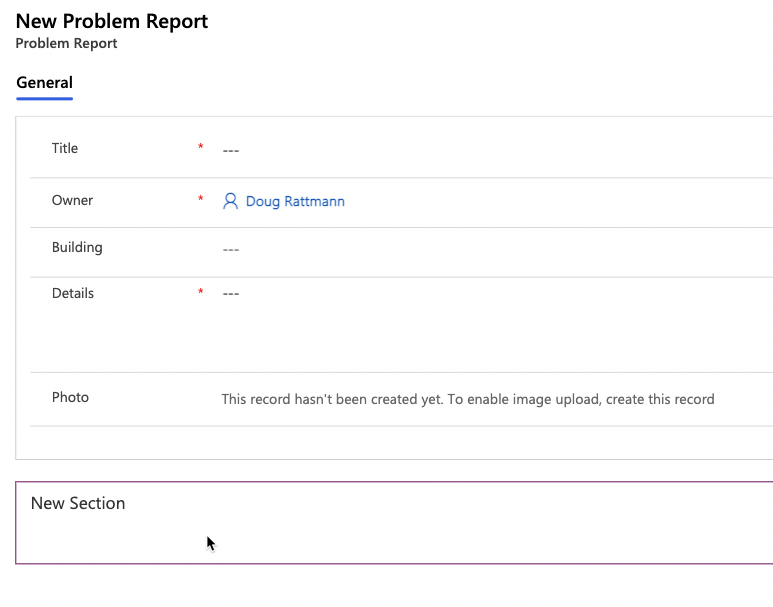
Add the Details, and Photo Columns to the form.
-
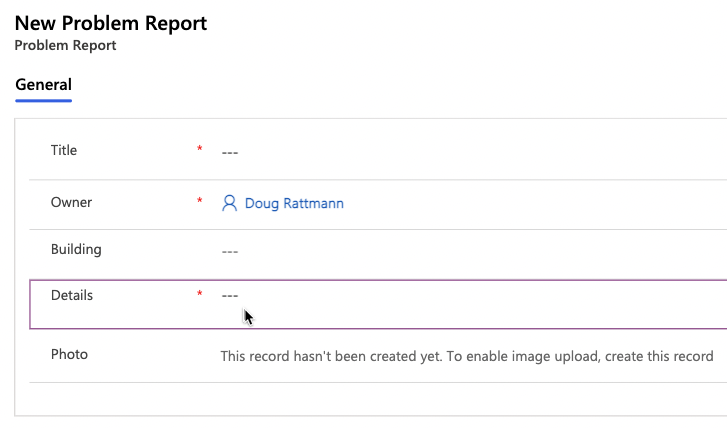
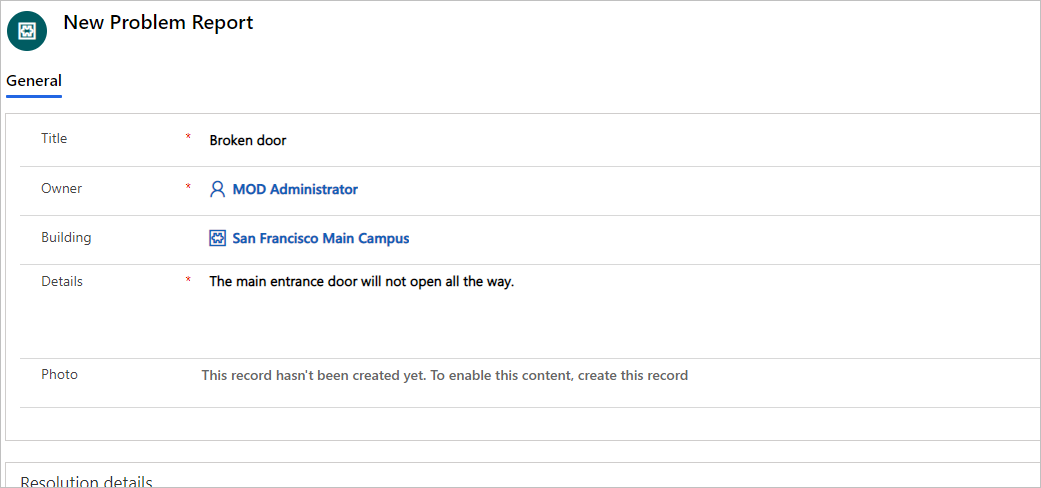
Your form should now look like the image below. Select the Details Column.
-
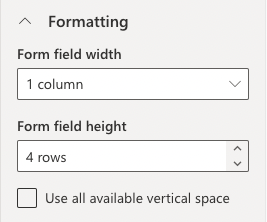
Go to the Properties pane and expand the Formatting section.
-
Change the Form field height to 4 rows.
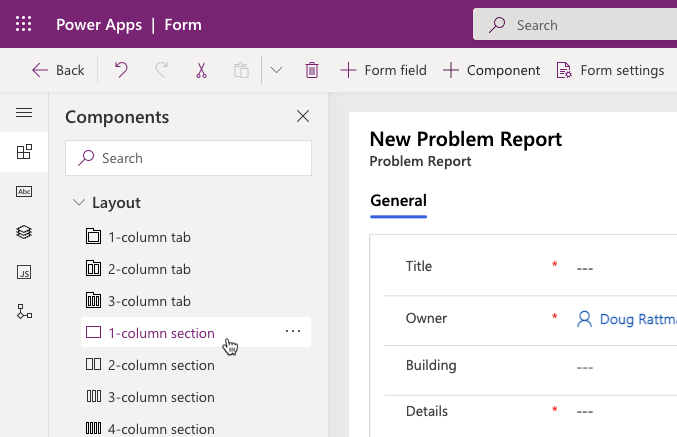
- Select the + Component from the menu then select 1-column section.
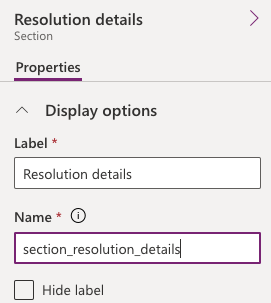
- A new section should be added to the form. Select the New Section.
- Go to the Properties pane, change the Section label to Resolution details, and enter section_resolution_details for Name.
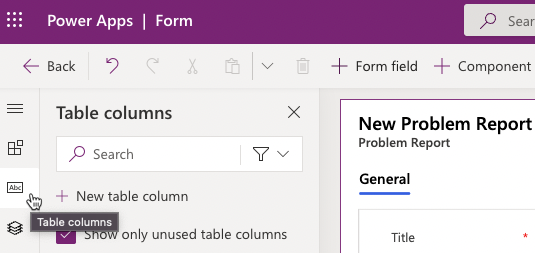
- Select Table columns from the toolbar.
-
Add Department, Status Reason, Resolved on, and Resolution columns to the Resolution details section.
-
Select the Resolution Column.
-
Go to the Properties pane and click to expand the Formatting section.
-
Change the Form field height to 4 rows.
-
You form should now look like the image below. Click Save.
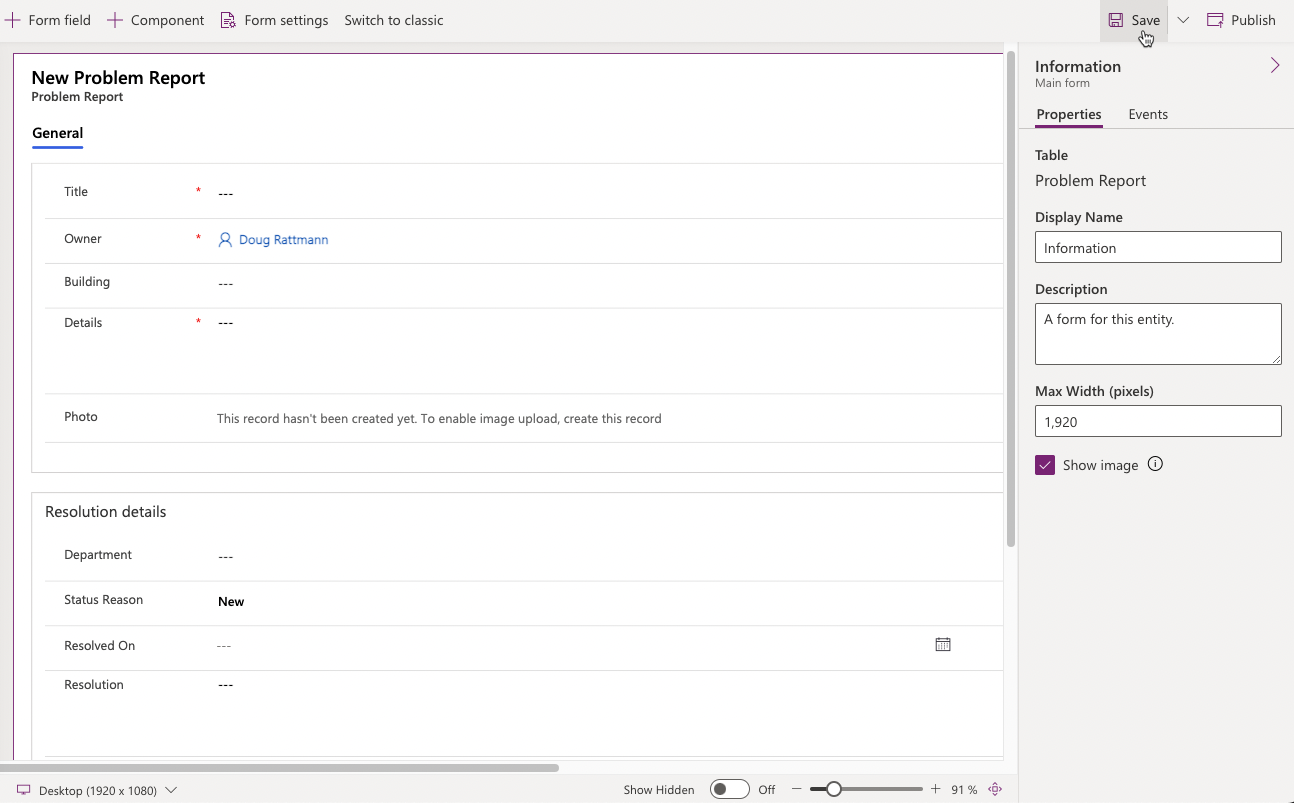
-
Click Publish and wait for the publishing to complete.
-
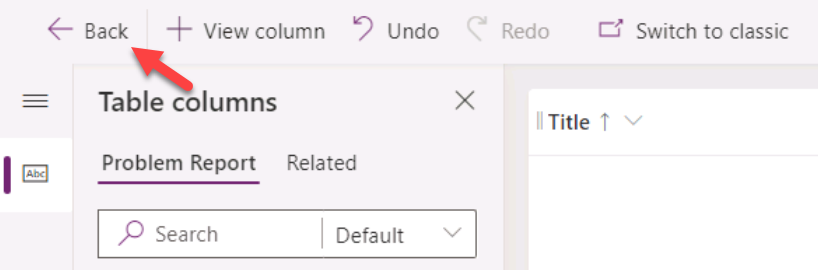
Click on the <- Back button.
- You should be back at the table designer screen.
Task 2: Edit view
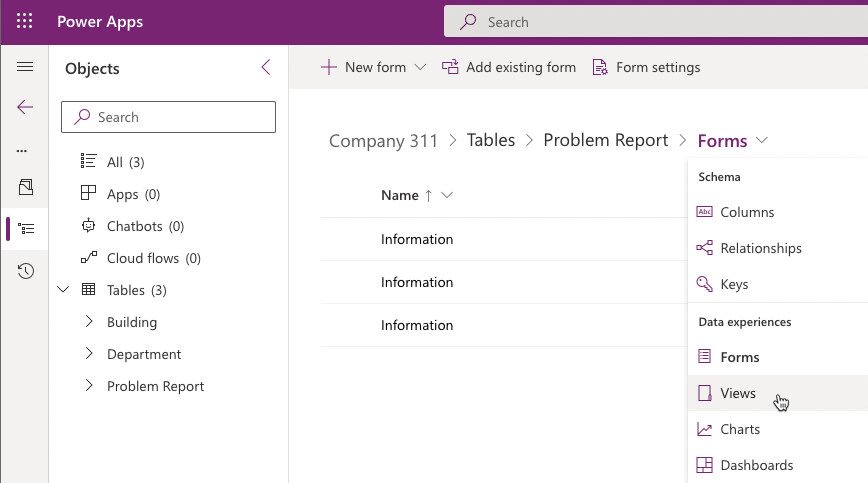
- Select Forms under Problem Report entry, then click Views.
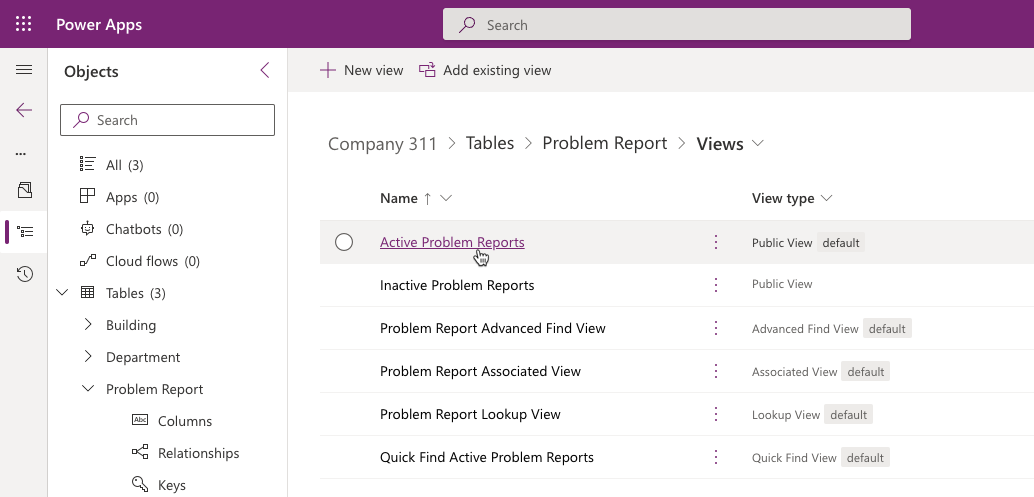
- Click to open the Active Problem Reports view.
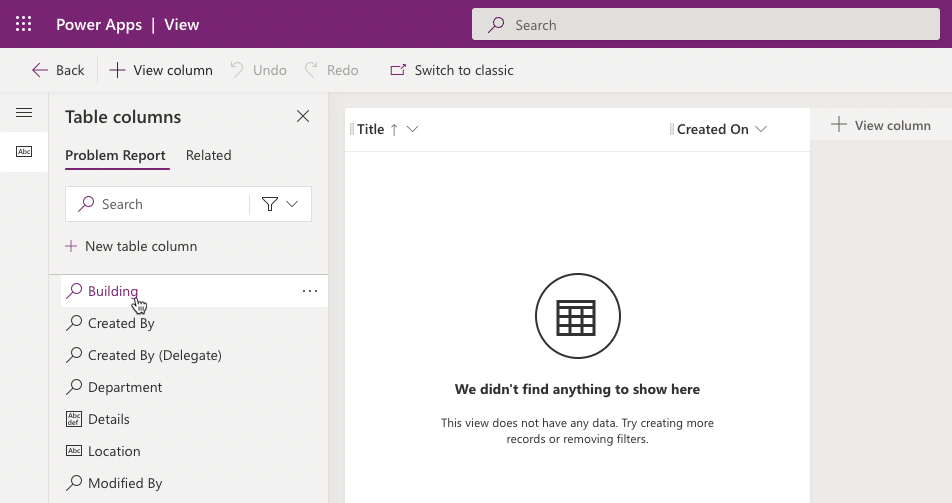
- Click on Building in the Table columns list to add the Building column to the view.
- Click on Location, Status Reason, and Owner columns to add them to the view.
- Go to the view properties pane and click Edit filters.
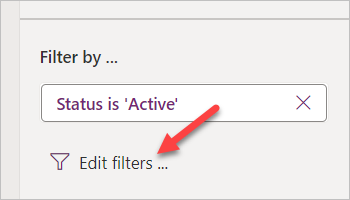
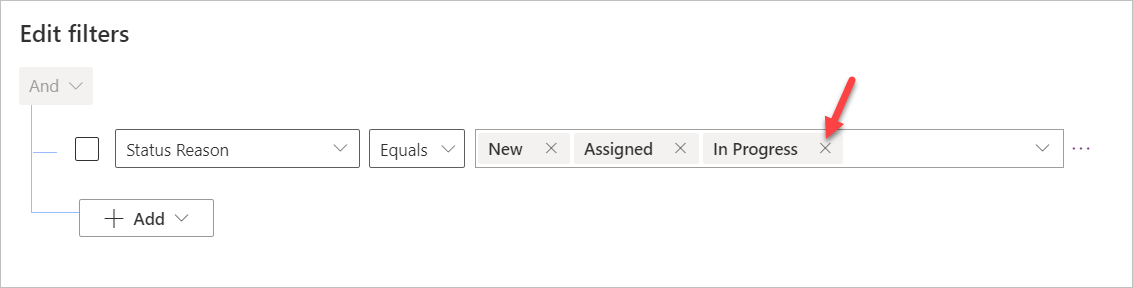
- Change the existing filter and set it to Status Reason Equals New.
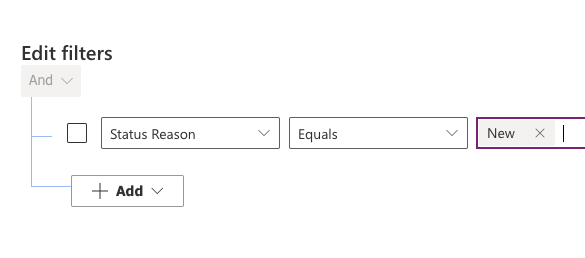
- Expand the values dropdown with Status Reason values where New is selected.
- Select Assigned.
- Click on the dropdown again and select In progress.
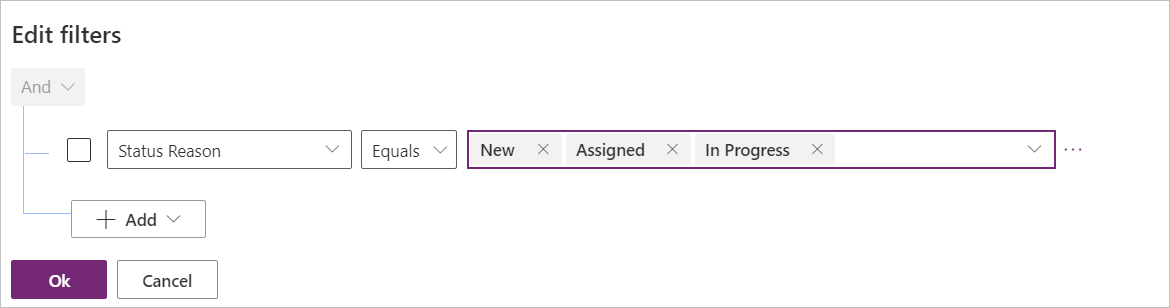
- The filter should now look like the image below. Click OK.
- Click Save.
Task 3: Create view from existing
In this task, you will create a new view from the Active Problem Reports view.
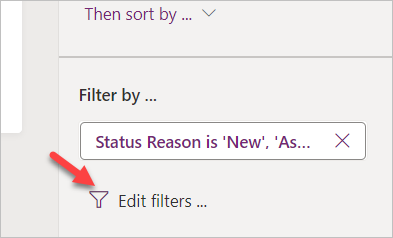
- Click Edit filters.
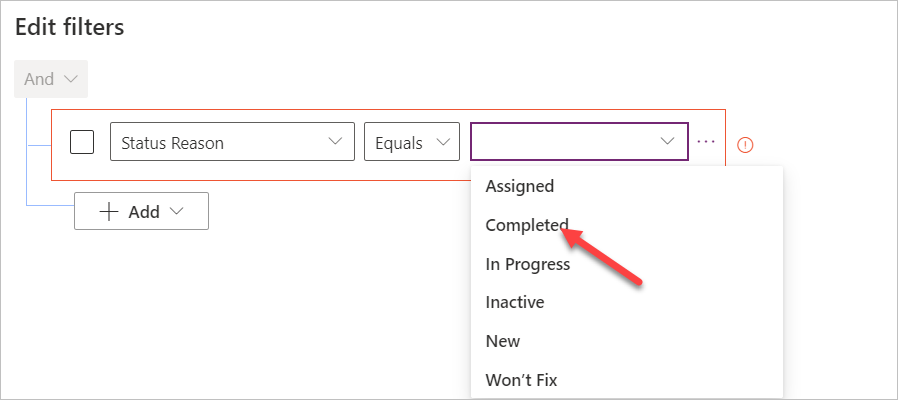
- Remove In Progress from the filter.
-
Remove Assigned, then remove New value form the filter.
-
Select the dropdown list, then select Completed.
-
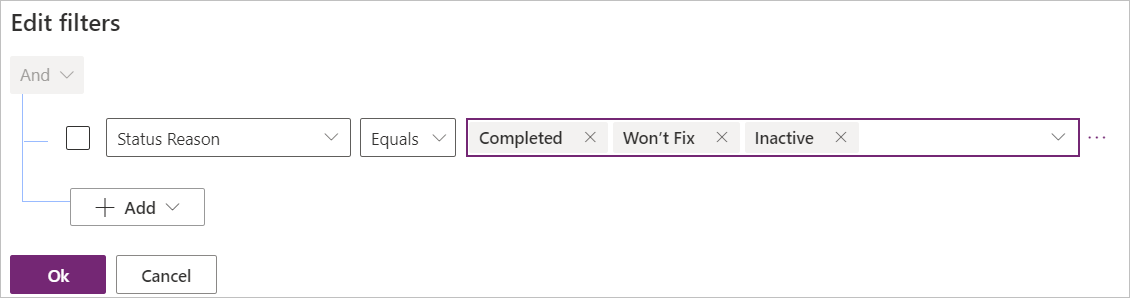
Add Won’t Fix and Inactive values to filter.
-
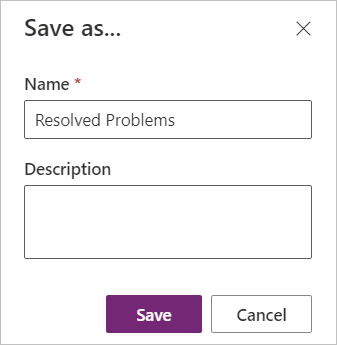
The filter should now look like the image below. Click OK.
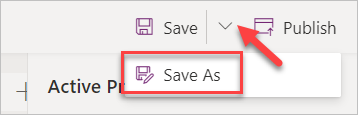
- Click on the chevron button next to the save button and select Save As.
- Enter Resolved Problems for Name and click Save.
- Click on the Back Button of your browser to go back to the solution explorer.
- Select All in the Objects navigation tree.
- Click Publish all customizations and wait for the publishing to complete.
Exercise 4: Compose model-driven application
In this exercise, you will create model-driven application.
Task 1: Create new model-driven application
-
Navigate to the Power Apps maker portal and make sure you are in the correct environment.
-
Select Solutions and click to open the Company 311 solution.
-
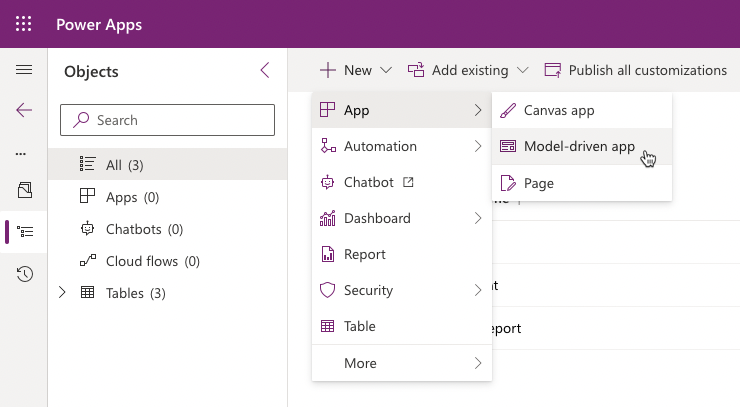
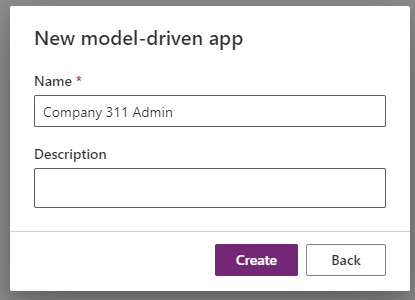
Click + New > App > Model-driven app.
- Enter Company 311 Admin for name and click Create.
-
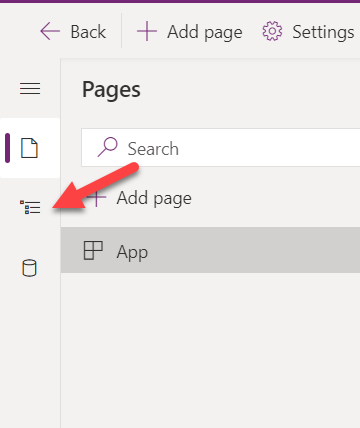
Select Navigation from left menu.
-
Select the Area1.
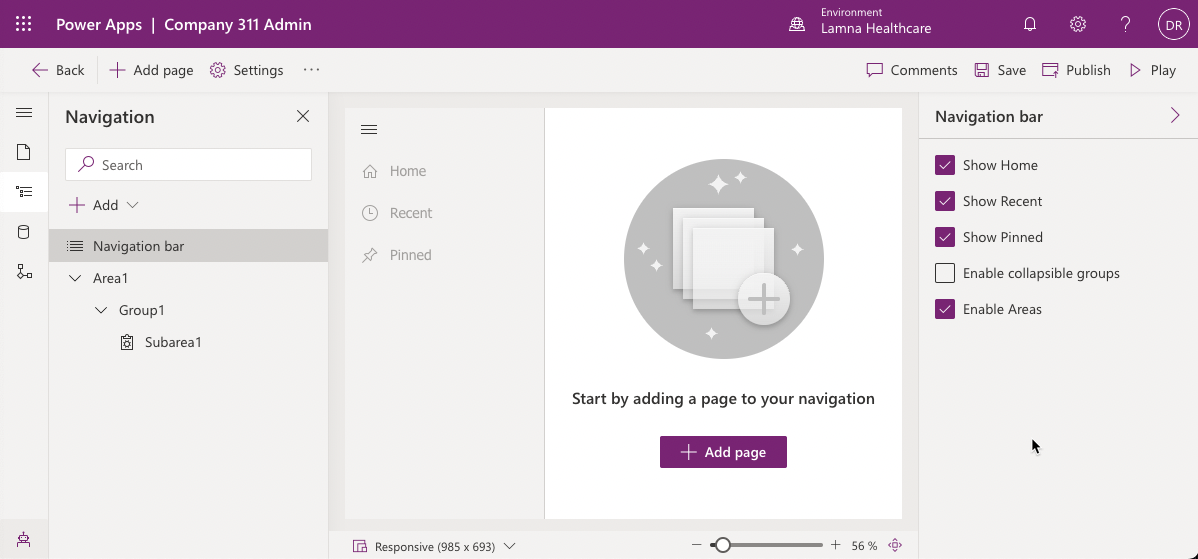
TIP
Make sure Enable Areas option has been been checked in the Navigation bar panel on the right-hand side to see the Area1 entry.
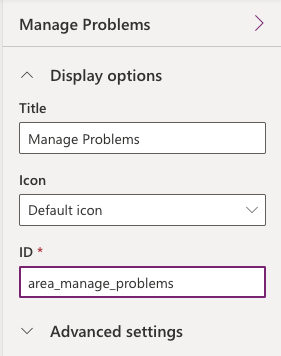
- Go to the Properties pane, enter Manage Problems for Title, and enter area_manage_problems for ID.
- Select the Group1.
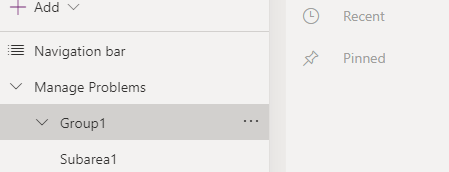
- Go to the Properties, enter Problems for Title, and enter group_problems for ID.
- Select the Subarea1 in the tree navigation.
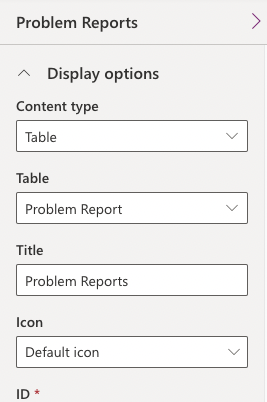
- Go to the Properties pane, select Table for Content Type, and select Problem Report for Table, and enter Problem reports for Title.
- Click + Add and select Area.
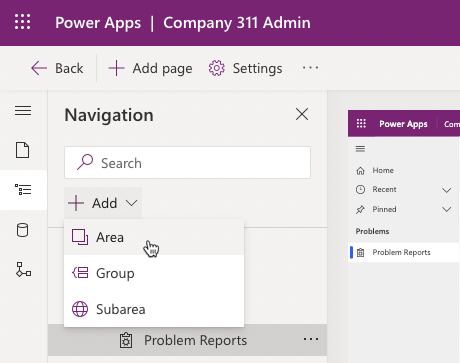
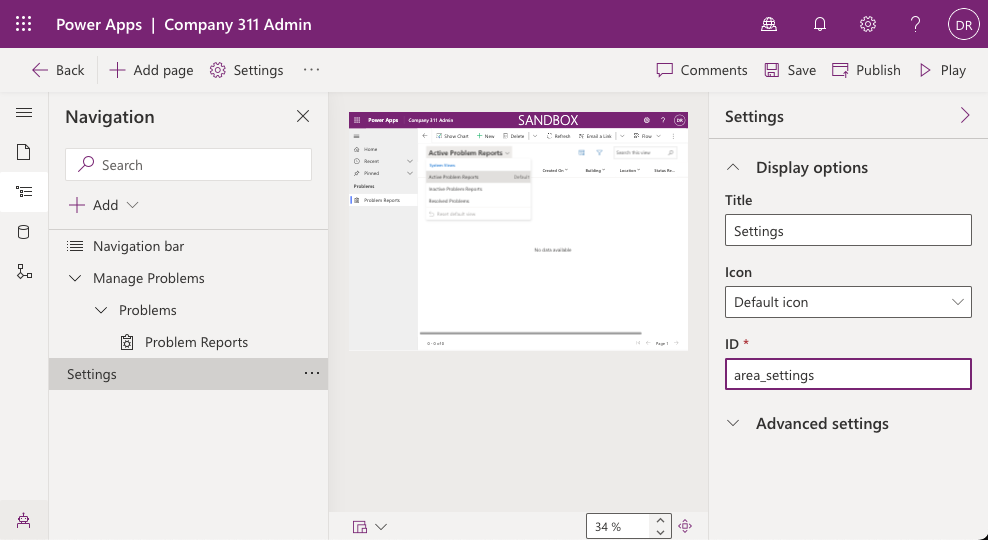
- Go to the Properties pane, enter Settings for Title, and enter area_settings for ID.
- Click + Add and select Group.
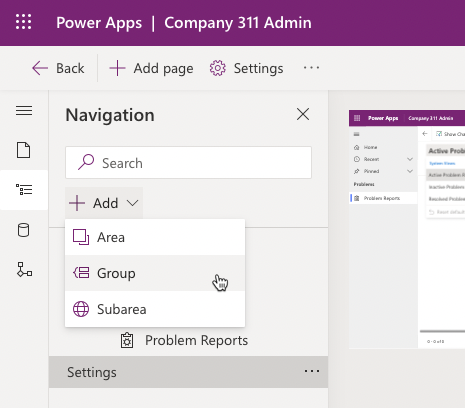
-
Select the New Group you just added.
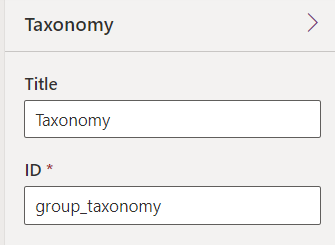
-
Go to the Properties pane, enter Taxonomy for Title, and enter group_taxonomy for ID.
- Select the Taxonomy group you just added, click + Add and select Subarea
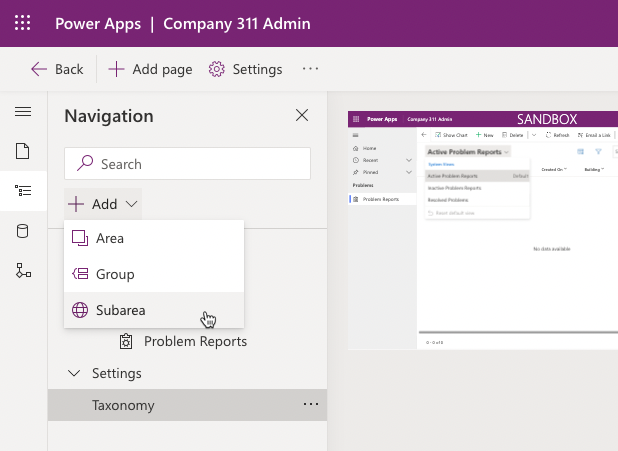
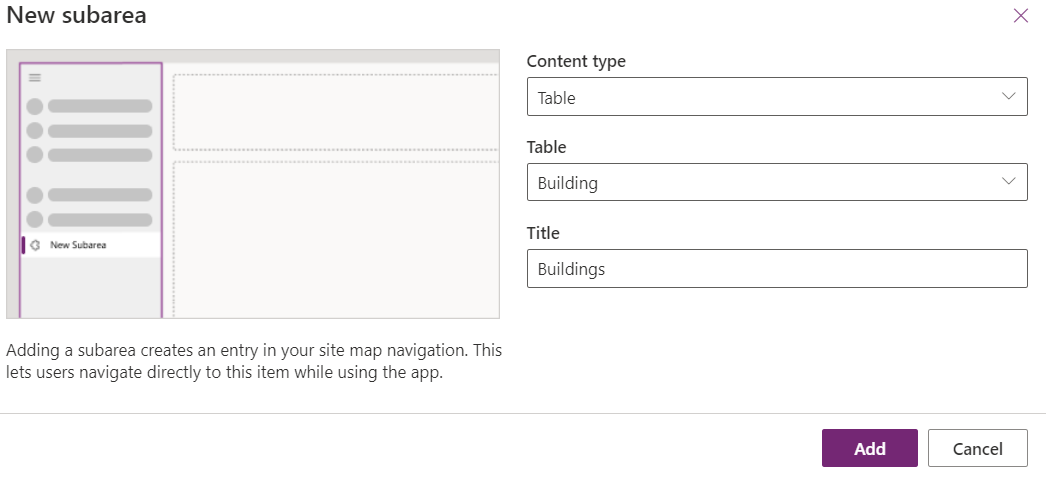
- Select Table for Content type, Building for Table and click Add.
-
Select the Taxonomy group, click + Add and select Subarea again.
-
Select Table for Content type, select Department for Table, and click Add.
-
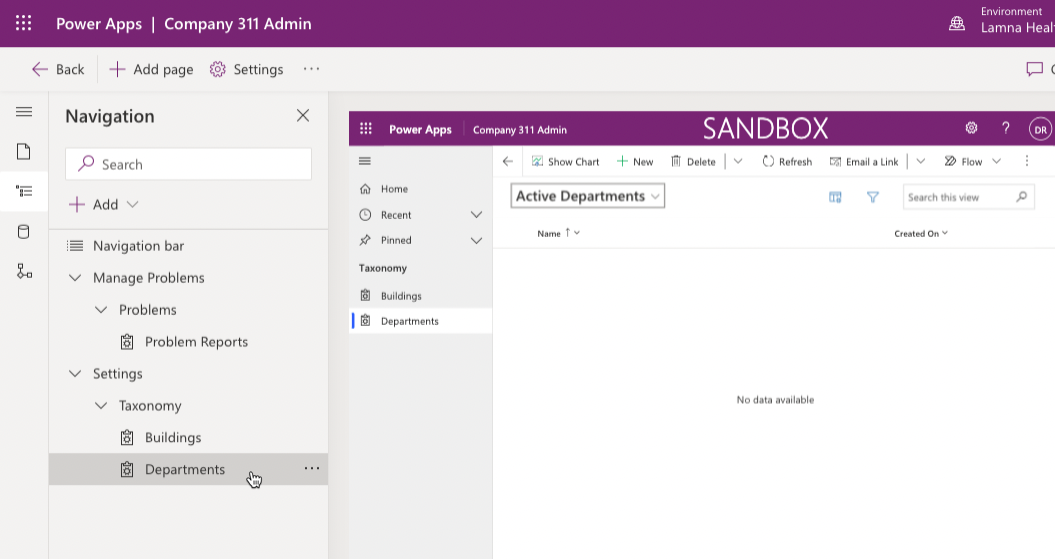
The sitemap should now look like the image below. Click Save to save the sitemap.
- Click Publish to publish the sitemap and wait for the publishing to complete.
- Press <- Back button.
- Click Publish all customizations and wait for the publishing to complete.
Exercise 5: Input data
In this exercise, you will input data to the Dataverse tables.
Task 1: Input data
-
Navigate to the Power Apps maker portal and make sure you are in the correct environment.
-
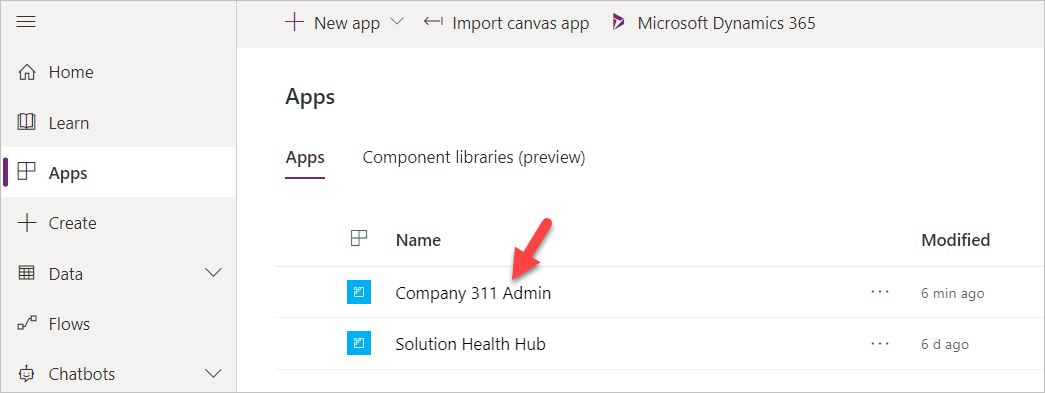
Select Apps and click to open the Company 311 Admin application you created.
- Click Change area.
-
Select Settings area.
-
Select Departments and click + New.
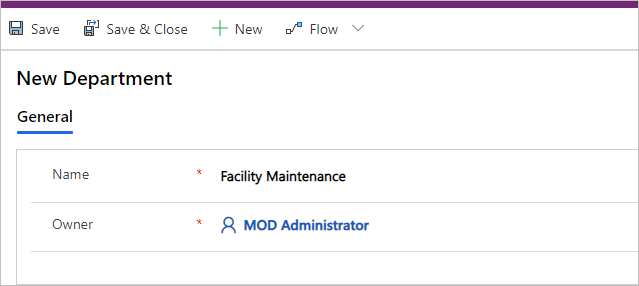
- Enter Facility Maintenance for Name and click Save.
-
Click + New again.
-
Enter Human Resources for Name and click Save.
-
Click + New one more time.
-
Enter Marketing for Name and click Save.
-
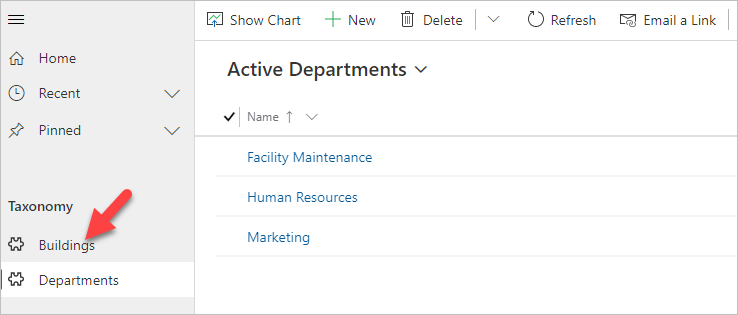
Select Departments.
-
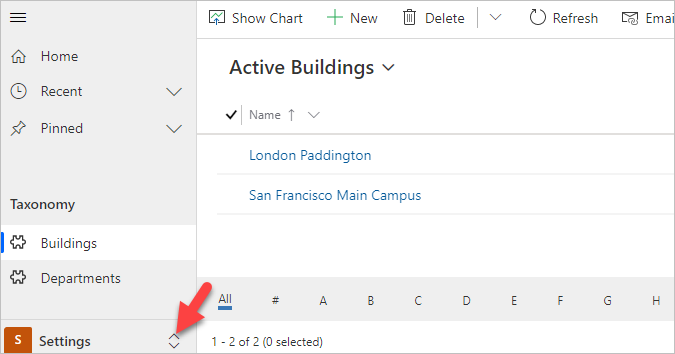
You should now have three department Rows. Select Buildings.
-
Click + New.
-
Enter San Francisco Main Campus for Name and click Save & Close.
-
Click + New again.
-
Enter London Paddington for Name and click Save & Close.
-
You should now have two building Rows. Click Change area.
-
Select Manage Problems.
-
Click + New.
- Enter Broken door for Title, select San Francisco Main Campus for Building, enter The main entrance door will not open all the way for Details, and click Save
- Click on the Photo Column.
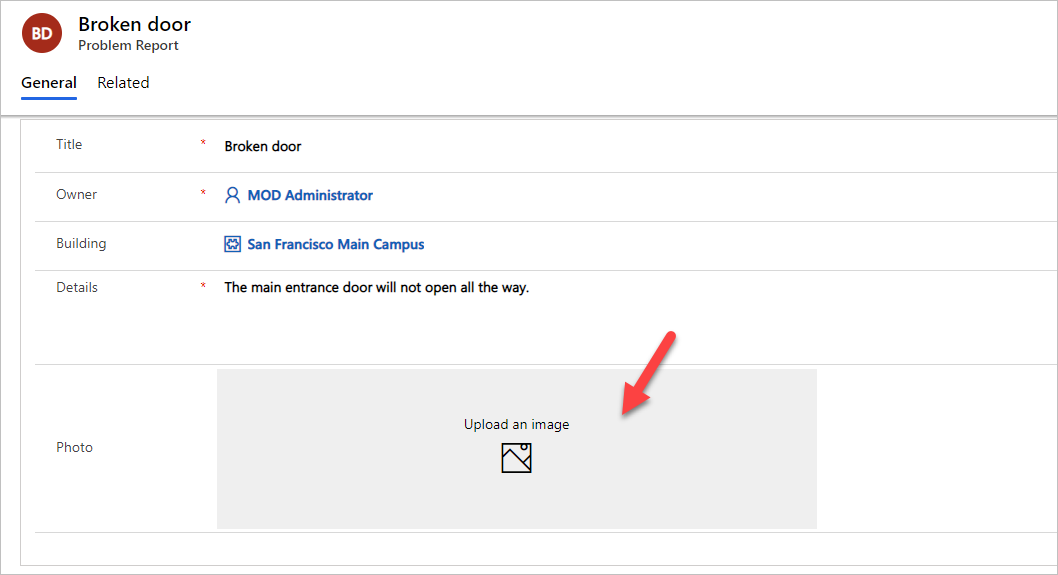
-
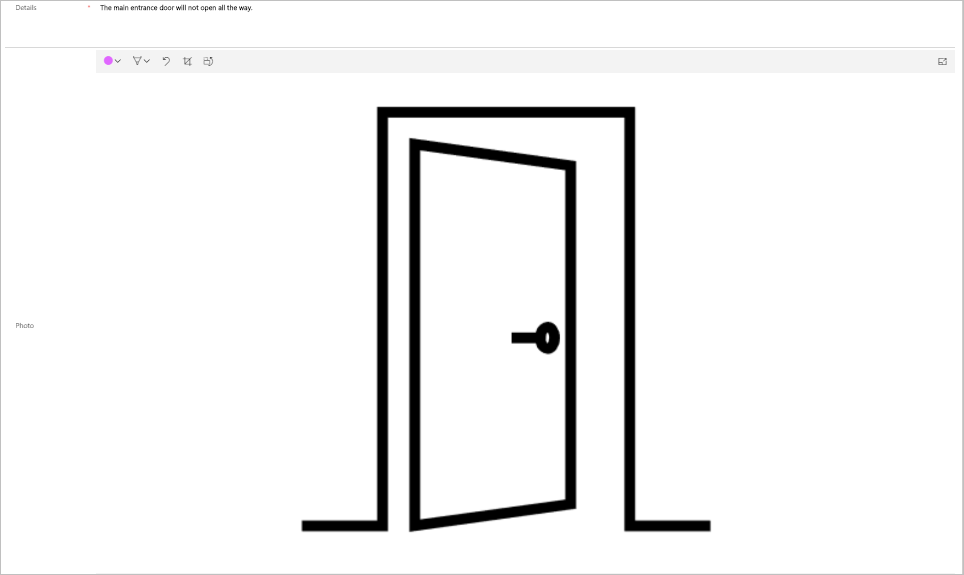
Select an image from your device. The sample image displayed below can be found here.
-
The image should now show on the form.
- Click Save & Close.
Exercise 6: Import data
In this exercise, you will import sample data into the environment. Rows are imported by a Power Automate cloud flow that you will first import using a solution.
Task 1: Import solution
- Navigate to the Power Apps maker portal and make sure you are in the correct environment.
- Select Solutions and click Import.
- Click Browse.
- Select the DataImport.zip solution file located in the lab resources folder and click Open.
- Click Next.
- Click Next again.
- Expand Select a connection dropdown and click + New connection.
- New tab will open with a prompt to create Microsoft Dataverse connection.
- Click Create, authenticate if required, wait until new connection is created. Close the browser tab.
- Click Refresh. Make sure new connection is selected in the dropdown.
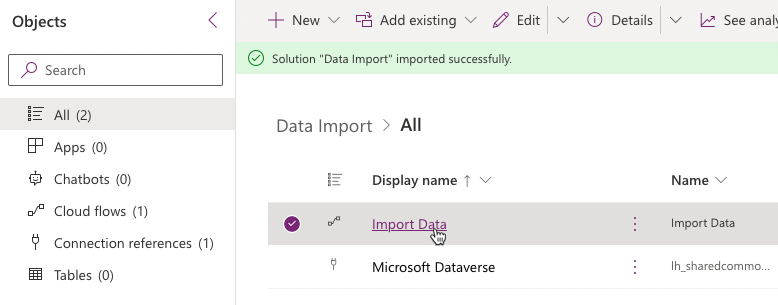
- Click Import and wait for the message Solution “Data Import” imported successfully to appear.
- Click Publish all customizations and wait for the publishing to complete.
Task 2: Review and run flow
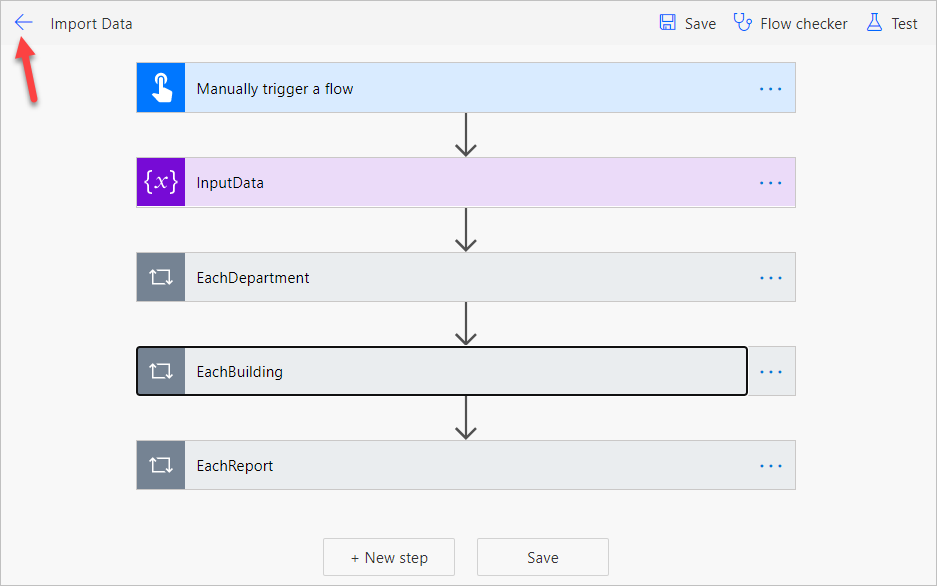
-
Click to open the Data Import solution you imported.
-
Select the Import Data flow.
-
Click Edit menu.
-
Click Continue.
-
Click to expand the Input Data step.
-
Review the JSON text in the value Column. This is the data that will be imported into your environment. Note the image data encoded as a text.
-
Expand the Each Department for each control
-
Expand and review the Upsert Department step.
-
Expand and review the rest of the steps.
-
Click Save to save the flow.
-
Click on the button and go back to the flow details page.
- Click Run.
TIP
If the Run option is disabled then make sure the flow has been enabled by selecting the Turn ON option.
- Click Run flow.
- Click Done.
- Wait for the flow run to complete. Click on the Refresh button to check if the flow run completed successfully.
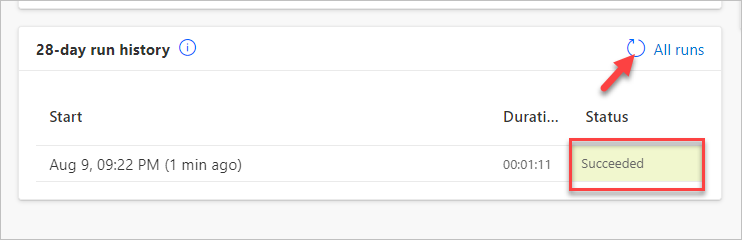
-
Close the flow editor browser window or tab.
-
Click Done on the popup if prompted.
Task 3: Review imported data
-
Navigate to the Power Apps maker portal and make sure you are in the correct environment.
-
Select Apps and click to open the Company 311 Admin model-driven application.
-
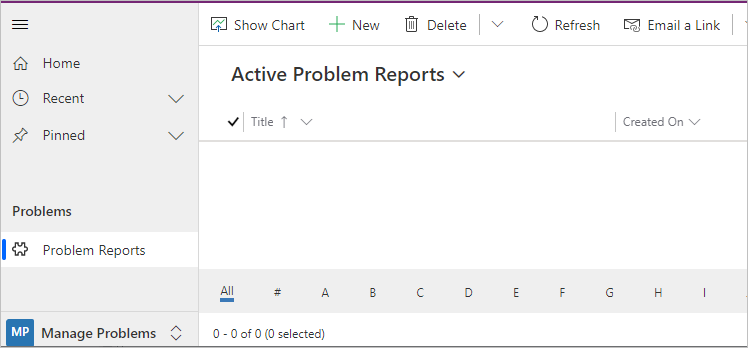
Select Problem Reports. You should see new rows of data.
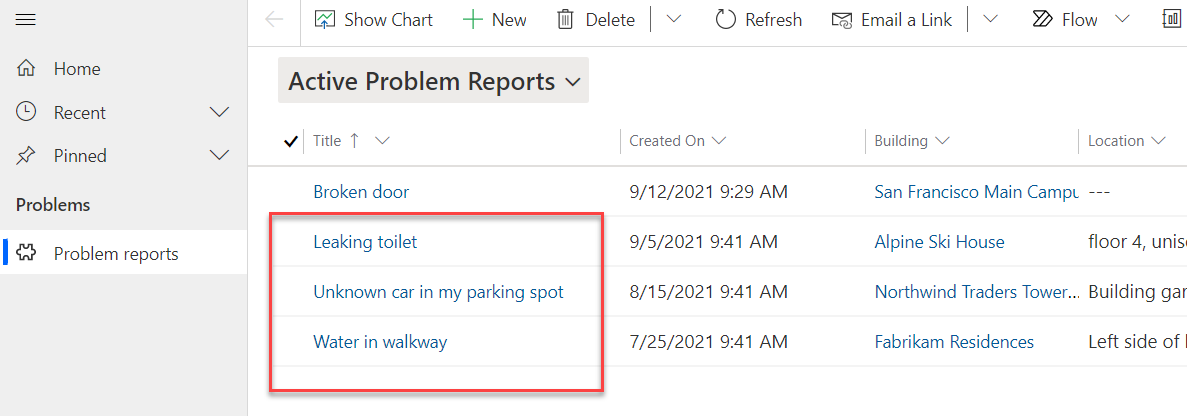
NOTE
Because the input status reason is randomized, some of the imported problem report rows may have the status reason of Completed, Won’t Fix, or Inactive. Select Resolved Problems view to find these rows.
-
Click to open one of the Problem Report Rows.
-
Click on the Search icon of the Building lookup and make sure building Rows were imported.
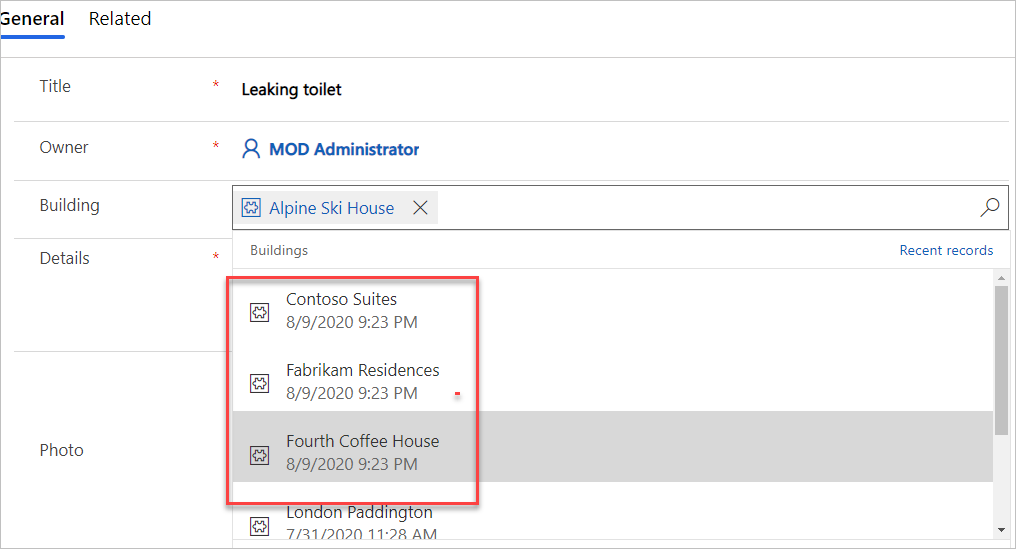
-
Scroll down and click on the Department lookup.
-
Make sure the department Rows got imported.
Bonus exercise
- Deal with problem report assignment within a department.