Demo 3 - Explore project costs
In this demo, we will walk through the creation of a time and expense entry that will be charged to the Contoso Consulting project. We’ll explore the entries in formats optimized for web and mobile presentation, and we’ll see how a workflow is used to manage the approval process.
-
In Dynamics 365 for Finance and Operations, in the navigation pane, select Modules > Project management and accounting > Timesheets > My timesheets (Optimized for mobile).
To start, although I’m not on a mobile device right now, you will recognize the forms as mobile friendly after we select the option My timesheets (Optimized for mobile).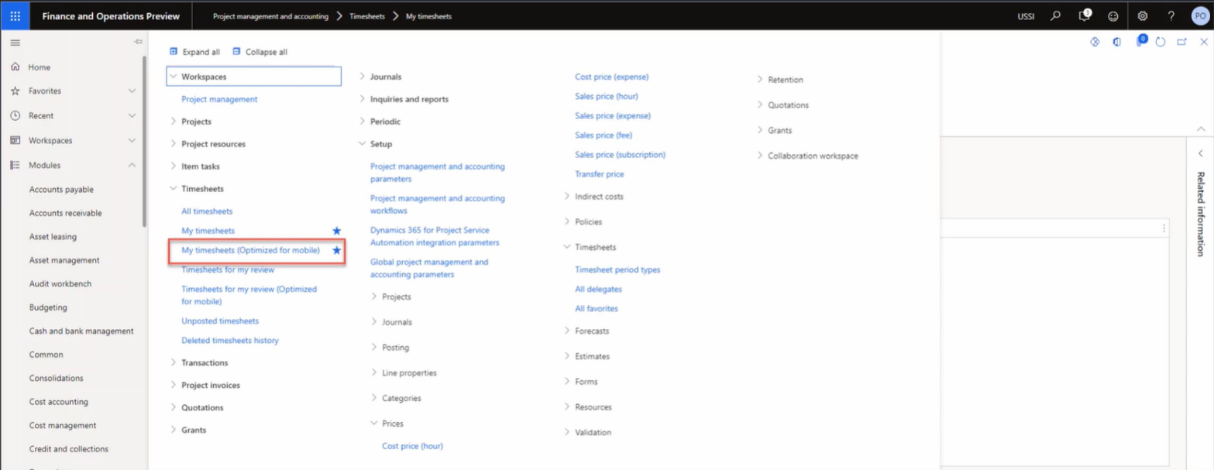
This optimization is a key differentiator for Microsoft business applications and helps ensure that there is a minimal learning curve between the web and mobile use.
-
In the top right company picker, verify the legal entity you are connecting to is USSI. If it’s not, change the legal entity to USSI.
-
On the My timesheets page, select New.
Now we will create a new timesheet which will be based upon configured settings. -
In the New timesheet pane, point to the Date box.
The date entered will determine the timesheet period. -
Point to Create from favorites.
If you have favorites saved, you can select to create from them to save time. -
When complete, select OK.
-
On the My timesheets detail page, select the New + icon.
-
In the New timesheet line pane, point to the Legal entity box.
The new timesheet line will be opened, with details such as the customer, the project, the category, the line properties, and tax parameters. You can also select a different legal entity if the time entry is on behalf of another company within your organization. -
Select the Project ID menu.
-
Select one of the available projects, such as the Contoso Consulting project.
-
When complete, select OK.
The mobile-optimized screen for time entry will open and you can begin to book your hours each day for the project and category, in this case Service. -
On the Time entry page, in the Mon box, enter 8.
This represents the entry of a single day’s hours.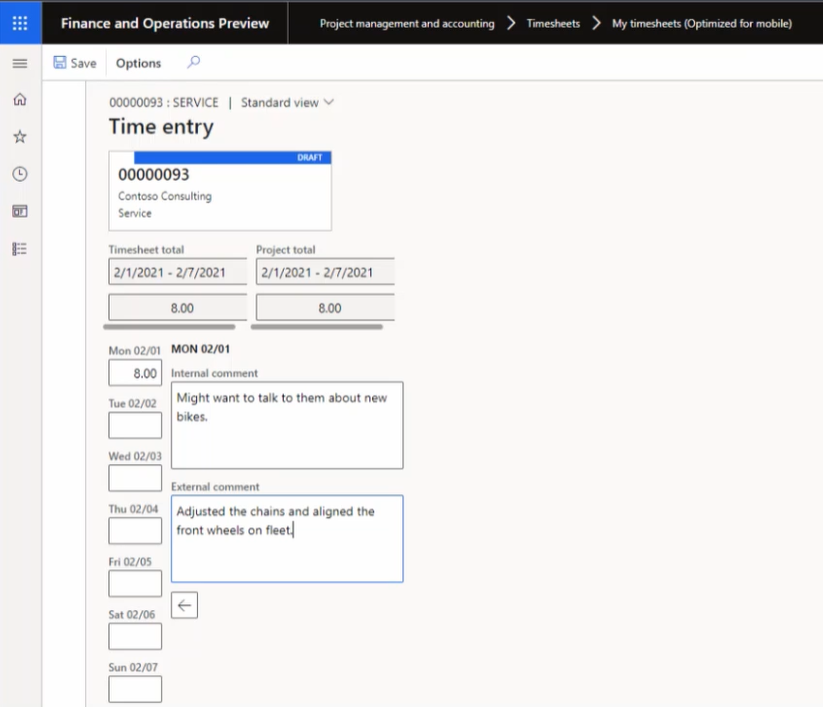
-
In the Internal comment box, add a comment. For example: Might want to talk to them about new bikes.
You can also enter internal and external comments against the project to ensure all parties understand the nature of the hours being logged. -
In the External comment box, add a comment. For example: Adjusted the chains and aligned the front wheels on fleet.
-
In the navigation bar, select Save.
-
In the left navigation menu, under Timesheets, select My timesheets.
-
On the My timesheets page, select the time entry you created earlier.
-
On the Timesheet tab, point to the Category column.
Now assume we’ve returned to a computer and are reviewing our time from within the web timesheet form. We can still see the same information, such as the category and the hours. -
Under Line details, point to Internal comment and External comment.
We can also review the comments we entered earlier. The information is there, but the layout format is just a bit different. This format is often used for final review because it can be easier for people to review and validate their time, especially when someone is assigned to multiple projects or categories. -
In the navigation bar, select the Workflow tab.
If we’re satisfied with the timesheet, we can submit it. The approvals required will be determined by each organization during the implementation phase based on their own company policies. -
In the Review timesheet workflow pane, select Submit.
-
In the Review timesheet workflow – Submit pane, add any additional comments.
-
Select Submit.
-
Browse to the Hour transactions page. If the Hour transactions tab is grayed out, browse to the My timesheets page, and select the previously created timesheet.
-
On the Hour transactions page, review the page.
Upon approval, the results will be posted and will be visible in the Hour transactions page. We can see all the relevant information, such as the legal entity, project, category, hours, and in this case, even a view of the cost price and the sales price.
Next, we can drill down to the Voucher transactions.
-
In the navigation bar, select Voucher.
-
On the Voucher transactions page, point to the Ledger account and Account name sections.
In these sections we can see the impact on the general ledger, as well as the accounts that will be used.
Now let’s create an expense entry for the same Contoso consulting project.
-
In the navigation pane, select Modules > Expense management > My expenses > Expense reports.
-
On the Expense management page, on the Reports tab, select + New expense report.
-
In the New expense report pane, in the Purpose box, enter a title. For example, Contoso – Feb2021.
-
Select OK.
-
On the Expenses page, select + New expense.
A new expense line will appear. -
In the Expense category column, select Fuel from the drop-down Category menu.
Here we can enter in the new expense with details about it. -
In the Transaction amount column, enter 25.00.
-
In the Currency column, select USD.
-
In the Transaction date column, select a date. For example, 2/1/2021.
Once you have entered in all the details, you can save the expense. -
Select Save.
-
In the left navigation menu, under Workspaces, select Expense management.
-
On the Expense management page, select the expense report you just created.
-
On the Expense report page, select the Project ID box and then select 00000093 Contoso Consulting.
Next, we can indicate that the fuel will be charged to the Contoso Consulting project, as well as additional information about the expense.
-
Point to the Additional information box.
-
On the lower-right side of the screen, select Save and continue.
-
On the right side of the screen, select Submit.
-
In the Comment box, add any additional comments.
-
Select Submit.
-
On the Expense management page, point to the Approval status column.
At this time, travel policies and expense approval flow will be activated. The costs have been posted and applied to the Contoso Consulting project and will be available later for invoicing if chargeable.
In this demo, we have processed a time and expense entry that was charged to the Contoso Consulting project. We saw samples in web and mobile formats and were able to see how workflows are used to manage the approvals required by the USSI organization.