Dynamics 365 FinOps Data Integration using Microsoft Forms (Part 2)
1. Example two: A new Forms response is submitted then Flow promts for an approval request before a new record is created in Vendors table
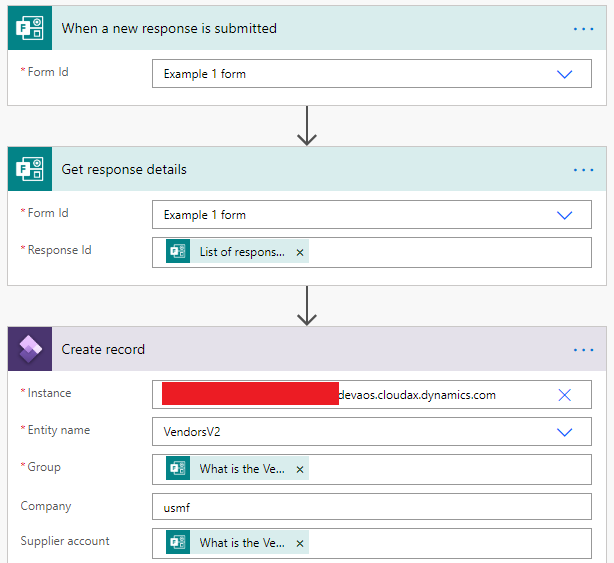
In the last example, we created a simple Flow to create a new Vendor Account from submitted Forms responses. The process was made as simple as it could be: When a new Forms response if submitted, a new Vendor Account will be created on D365FO client.
To make the process more reliable, we will now add an approval step to the Flow. It means before a new Vendor Account is created, the user will have the right to Approve or Reject the request.
1.1. Step 1: Add a new step to the Flow
The flow that we have is like this.
We will add a step right before the new record is created.
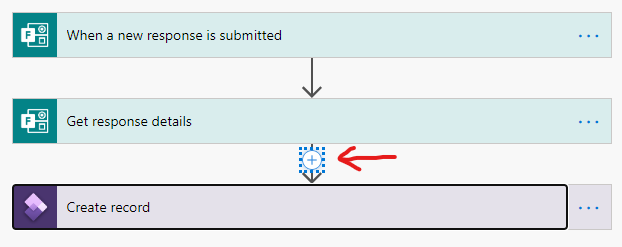
We will go with Approval > Start and wait for an approval.

This step will offer several types of approval in which the most common ones are All users must approve or First approve/reject from any user. To make it simple, we will go with First approval because in this example, we will have only one user.
As straightforward as they seem, the fields explain themselves. We will start an approval request, set a title for it and assign it to a user (only users in the same organisation as you).

Note 2-1
Almost all fields including
Title,Details, etc. are fully customisable by usingDynamic content.
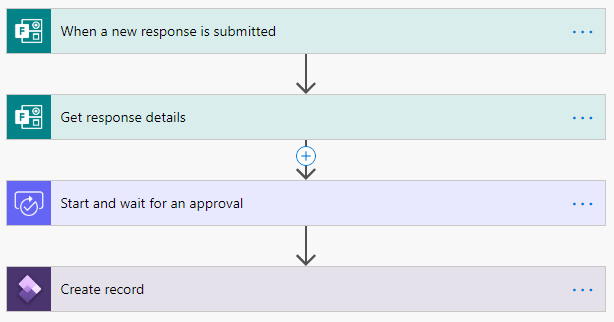
The flow now will look like this.
1.2. Step 2: Testing out
Trigger a test run of the flow.


The test run is ready, waiting for the input from MS Forms.
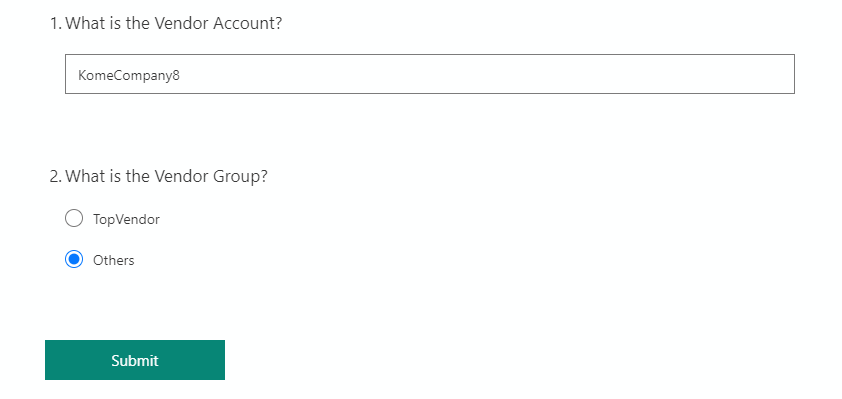
Submit a new response.
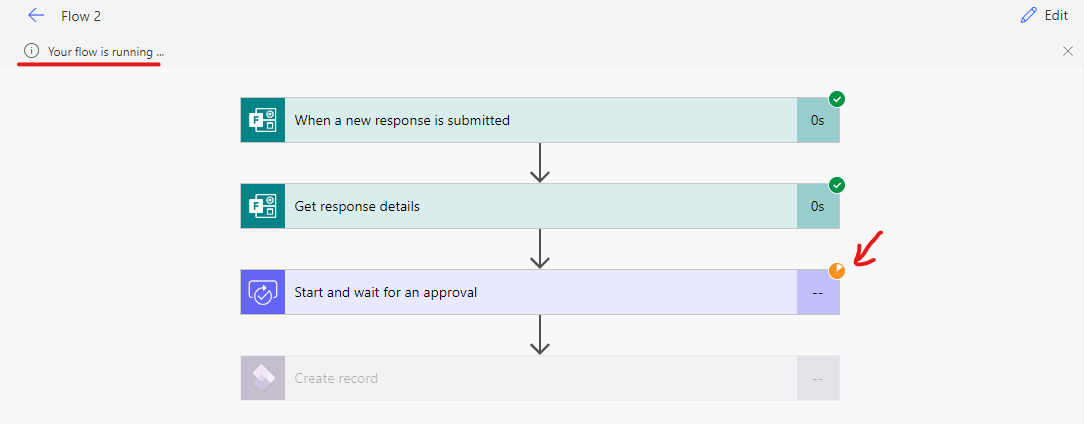
The flow will run. The process will show that an approval is being waited from the assigned user.
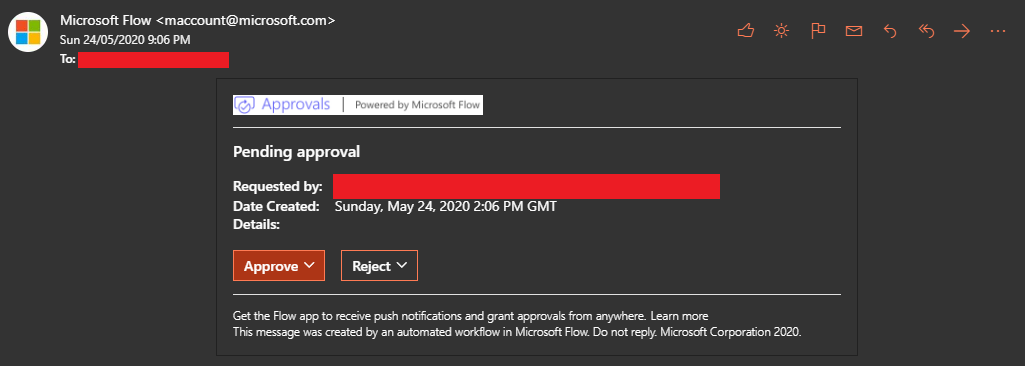
An approval request will be sent to the mailbox of the assigned user. That user can check the request in Office.com > Outlook.
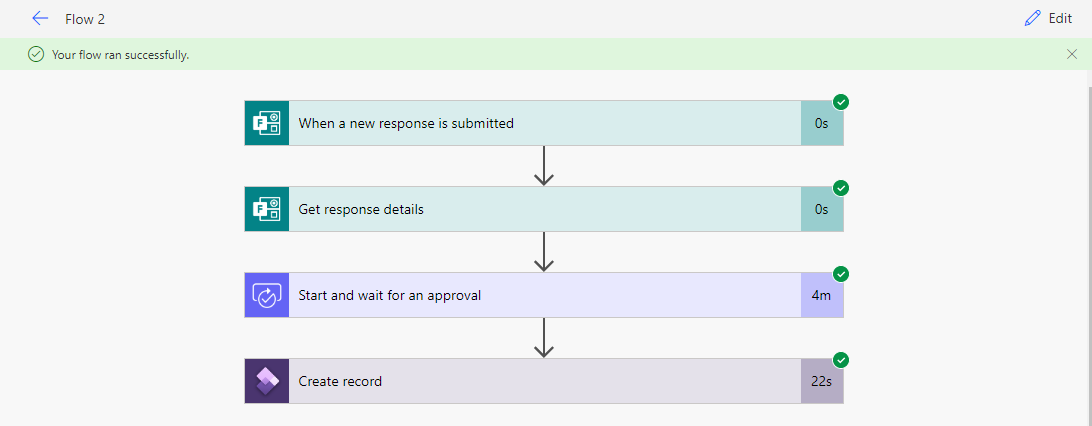
Upon approval, the flow will finish its pending step and a new record will be created.
2. Example three: From the created record in Vendors table, add related records in other tables
In the last example, we added an Approval step to the Flow which will allow users to give Approve or Reject action toward the request coming from the Form.
We can actually utilise the Flow one step further: To create additional records on different tables that might depend on the created record in VendTable.
To make it easier to understand, the process is like this:
- Create a new
Vendor Accountby using input from the Form. - Create a new
Bank Accountwith theBank Account IDexactly similar to theVendor Account. - Add some contact details to the
Vendor Account.
Which entities should we target to? They are:
- For
Vendor Bank Account: VendorBankAccounts - For
Vendor Contact Details: PartyContacts
You can play around in Visual Studio to get used to looking for an Entity that might fulfil the requirements of your intergration. Check out the next part of this article to get some quick tips into that.
Assuming that we now have a Flow as we configured in the last two examples, we can add some more steps like these underneath.
2.1. Step 1: Add a new step to add a new record to VendorBankAccounts and PartyContacts
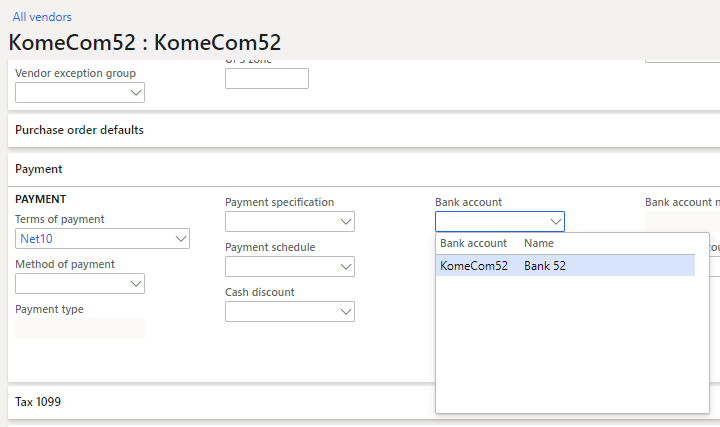
Given the case that we had a Vendor Account and Bank Account for that Vendor Account, the records would be like this.
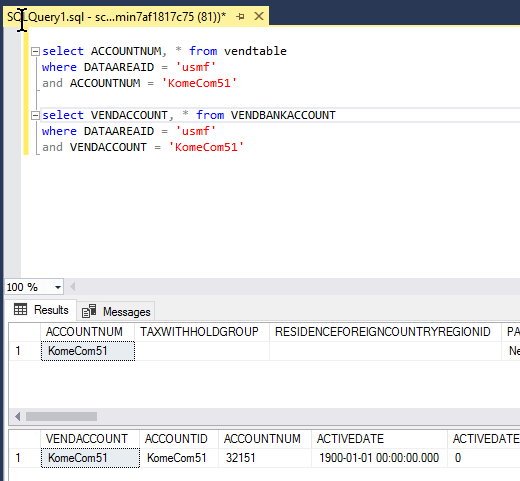
The relation should be: VendTable.AccountNum = VendBankAccount.VendAccount
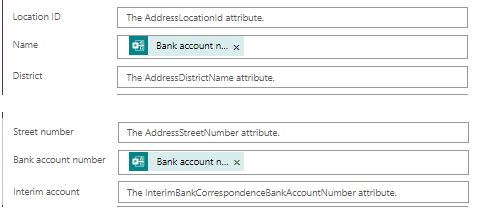
On the client, the information should be illustrated like this.
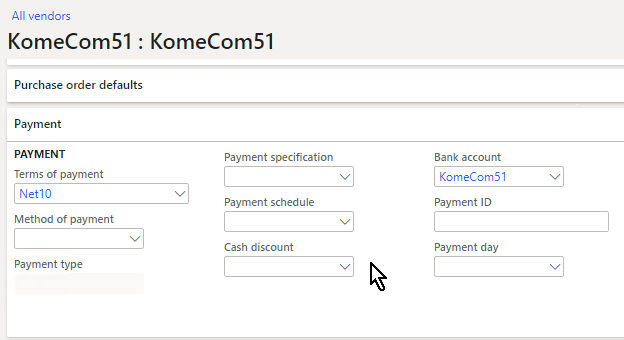
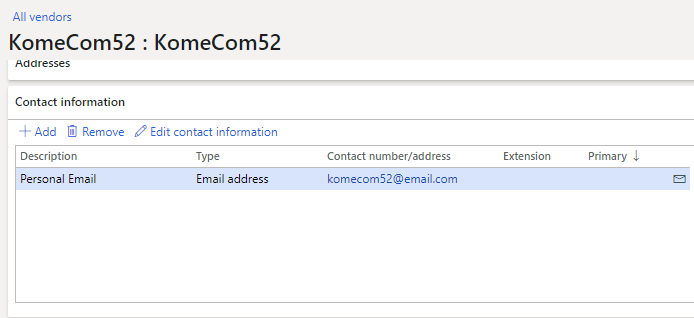
And, when checking the Bank Account details, we would find.

Now, to do so, we will add a new step right after the creation of VendTable record.
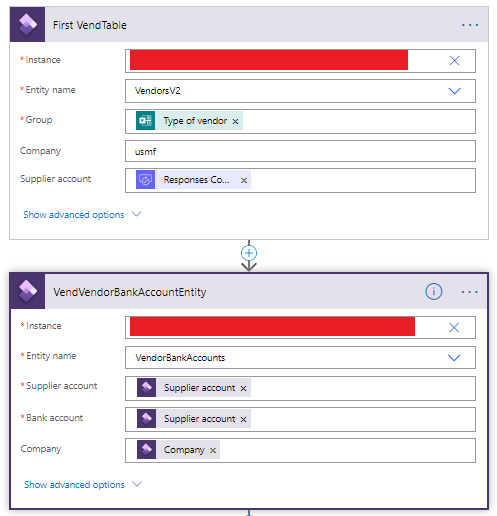
Instance=Environment URL(same as any other steps)Entity name=VendorBankAccounts(check my post about good tips with Visual Studio to know how to find the Data Entity)Supplier account=Supplier accountfrom last stepBank account=Supplier accountfrom last step (Because I would like to have same Vendor Account and Bank Account)
When saying “from the last step”, I meant this.
In MS FLow, any steps that are already executed will have outputs. We, in this step, are taking the Supplier Account from the last step of creating a new record in VendTable . This dynamic content was generated when the new record is created.
Note 3-1
Keep in mind that if the last step is not “Creating a new record”, chance is that you cannot take the output from it because there’s simply none.
Click on Show advanced options so we can add more information to the Vendor Bank Account.

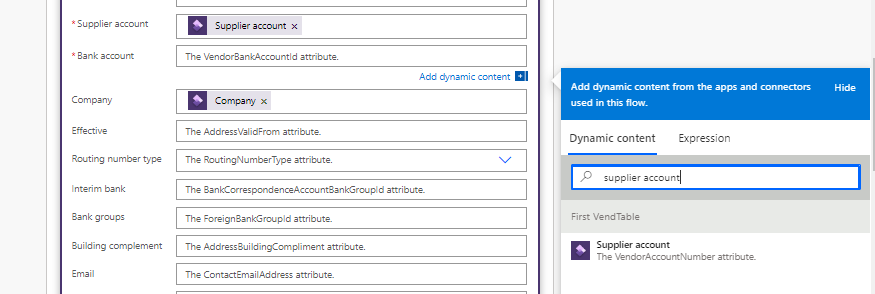
Add more details to the bank account:
Name=Bank account namechosen from the Form using Dynamic Content (we don’t want to copy any more values from the VendTable record - we actually will specify a bank account name when composing a response on the Form)Bank account number=Bank account numberchosen from the Form using Dynamic Content
We finished with Vendor Bank Account.
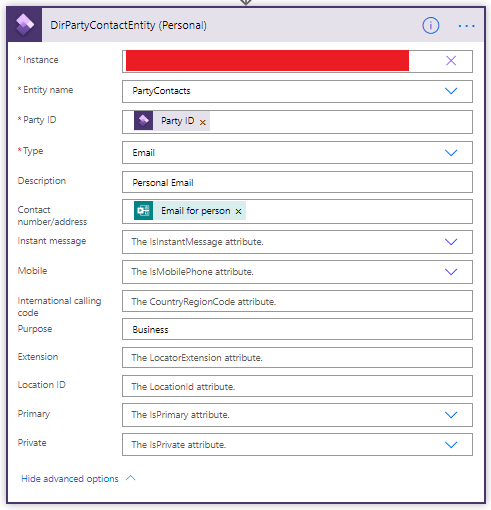
We will do just the same with the record in PartyContacts.
Party ID=Party IDfrom VendTable recordContact number/address=Emailfrom the Form (in this case, I would like to add an email address - it is totally up to you to opt to add phone number, Skype, Twitter and some other contact detail that D365FO is supporting)Purpose= I am “hard-coding” this"Business"(the supported purpose of Contact can be found on Vendor Card on D356FO client - this purpose should mainly be used when sending emails, i.e. D365FO want to send Purchase Order Confirmation to any email addresses with purpose"Invoice")
2.2. Step 2: Testing out
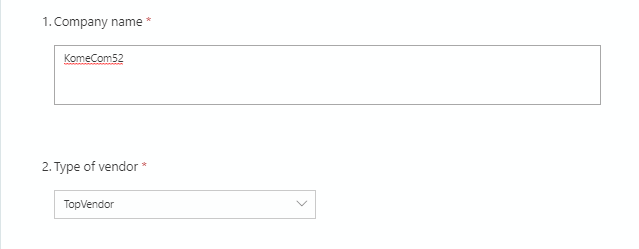
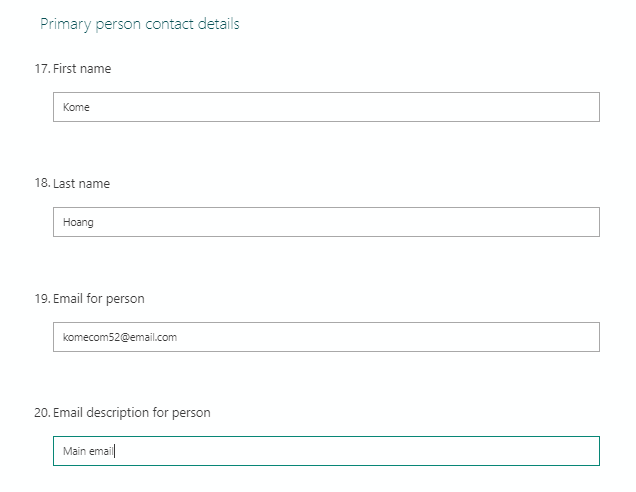
Form input.

Results on D365FO client.

There you go, simple integration between MS Forms, MS Automate and D365FO client. I am seeing that Microsoft is improving such by adding more actions on MS Automate. I believe we will be able to do many more jobs with the built-in utilities of MS Automate.
3. How to determine the Data Entity that should be used in the Power Automate
The names of the target entity on D365FO client and being found in Power Automate should be different. You can always find them out by testing several import/export but, with the help of Visual Studio, you will be able to save a lot of time. This, however, requires a certain extent of experience working with data integration on D365FO.
Given the case that we would like to import data to All Vendors, we will start our search in Workspaces > Data Management > Data Entities. Apply several filters here and there, and looking for potential ones that we usually do, we will finally end our search at the VendVendorV2Entity

Making our way to Visual Studio, it is not a difficult task for us to find out the Entity.
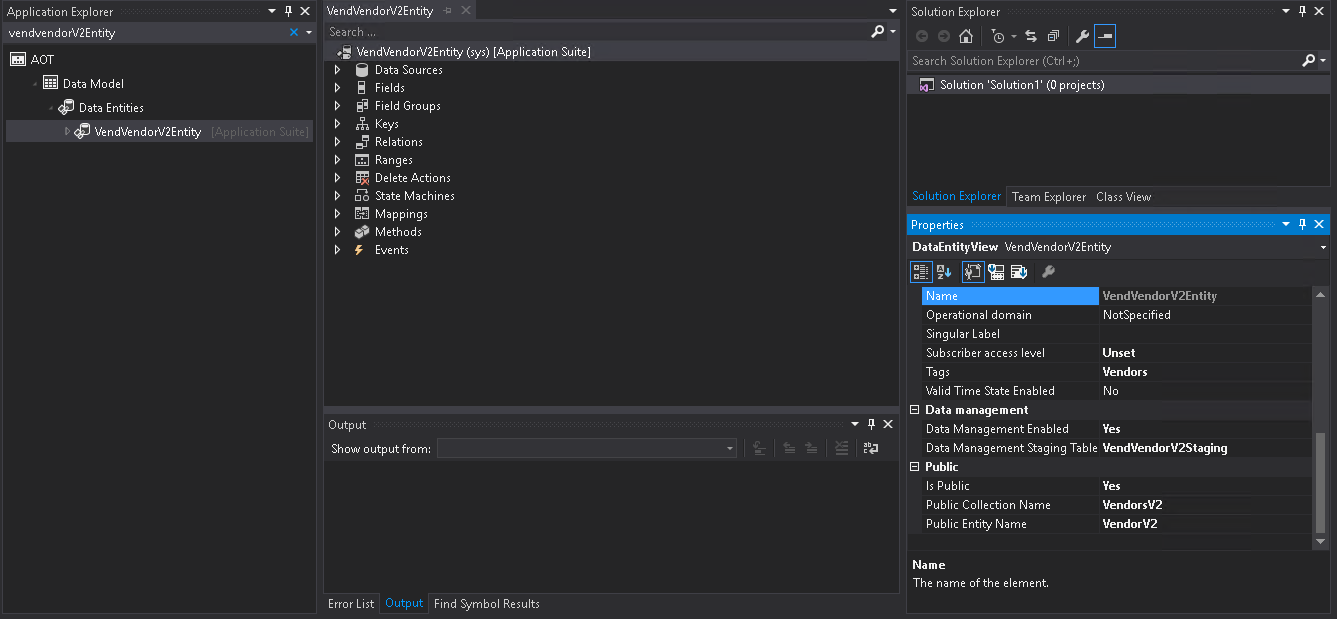
Check out the Properties, we will need to get details in the Public group.
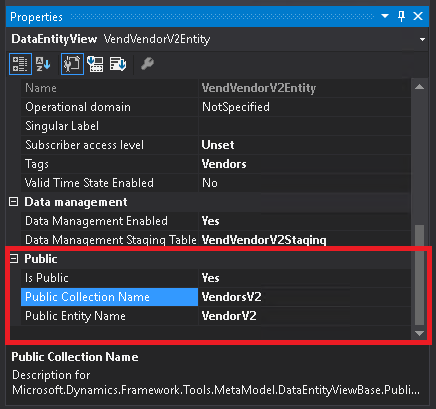
In Public:
- Is Public: If it is
Yes, the entity can be found in Power Automate; otherwise,No. - Public Collection Name:
Entity nameon Power Automate.
The information should be displayed here:

Furthermore, by checking the Entity’s fields, we can get the information of mapping between the Entity and the physical table VendTable.

Give yourself some time to play around between MS Forms, MS Automate and Visual Studio. You will finally see the relations between them.