Dynamics 365 FinOps Data Integration using Microsoft Forms (Part 1)
With any D365FO users, Data Management workspace and Data Entities should have become one of the most used and well-known tools in the system. We all agree how powerful such integration framework is, especially when it comes to a large number of records that we would need to import into different tables.
The classic method that we have been utilizing is to include all source data in a single (or multiple, much depending on the purpose and order of data integration) Excel sheet, trigger an import execution, pass any validation layers that present and ultimately have the data available on D365FO. Now, I would like to propose another method that might come useful in some circumstances: Using Microsoft Forms.
When
This method should be at its finest when you are planning to outsource the input to any external users.
Imagine you are a company who is using D365FO to leverage your daily work. You now want to add many local vendors to your system in form of new Vendor Accounts. It is fine to collect all information from them (i.e. Vendor Company’s name, their address, their contact details and so on), put everything in an Excel sheet and import it. Yet, chance is that it would take (a lot of) time for you to finish this task. You would then be very likely to try coming up with some methods to cut down time for it.
That demand should raise two questions:
- How can we let the vendors enter their information by themselves?
- And, how can we then have all such information in our system?
What
What should be needed?
- Microsoft Forms: To establish a process in which you will publish a prepared form. Any vendors out there will have the access to it and they can fill any fields on in.
- Microsoft Power Automate aka. Microsoft Flow: To set up a protocol to push the input information (form responses) to the target (D365FO Data Entities).
- (Optional) Access to Visual Studio on your virtual machine: To help you determine the target Data Entities more easily and efficiently.
How
The flow should go like this.
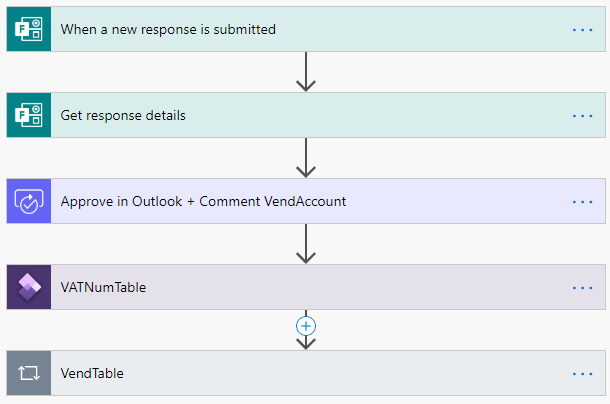
To make it short, when a response is submitted in Microsoft Form, the Flow in MS Power Automate is triggered automatically. An approval request will be sent to your Outlook mailbox and if it is approved, a new record will be created in the target data entity.
Let go through three examples in the next articles in the series (from the simplest to a more complicated) so we will see the logic behind this process.
As easy as it sounds, in this example, we will create a new Vendor Account from Microsoft Forms with only a small number of fields being populate. Note
To help simplify the example, the number of fields is minimised. In other words, we will import just enough fields so the new Vendor Account is valid. Given that, only
Vendor AccountandVendor Groupare chosen to be imported.
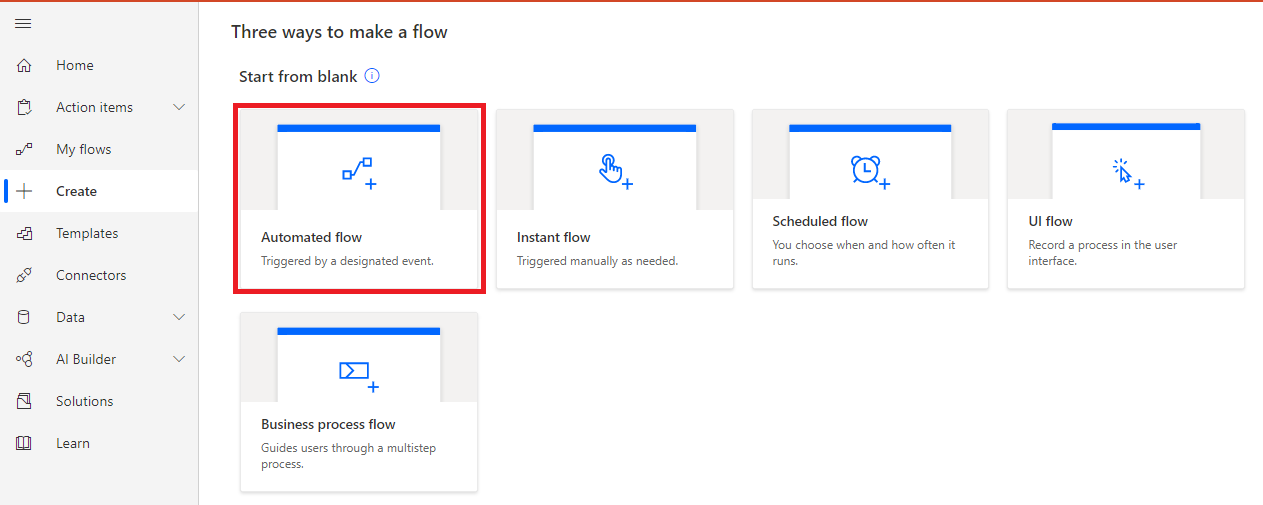
Step 1: Create a MS Form
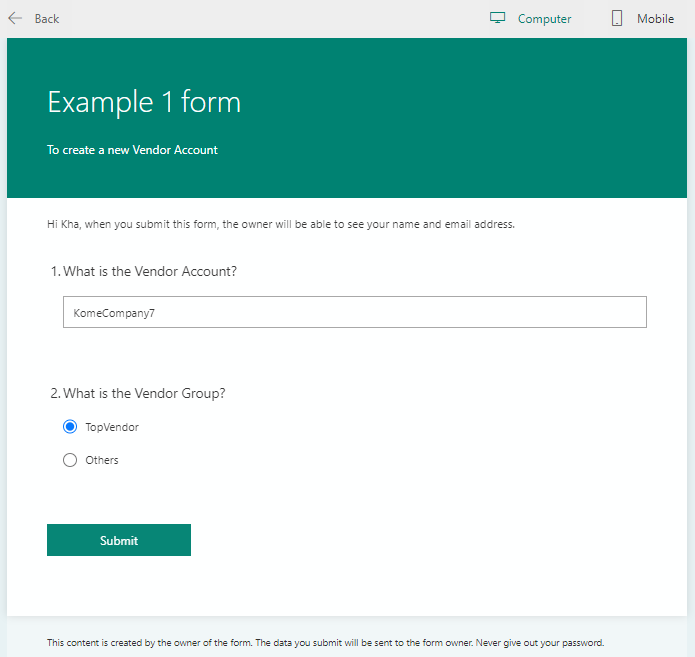
To do so, we will access Microsoft Forms and create a new form. To make the new form usable, we will create two questions asking for inputs of Vendor Account and Vendor Group.
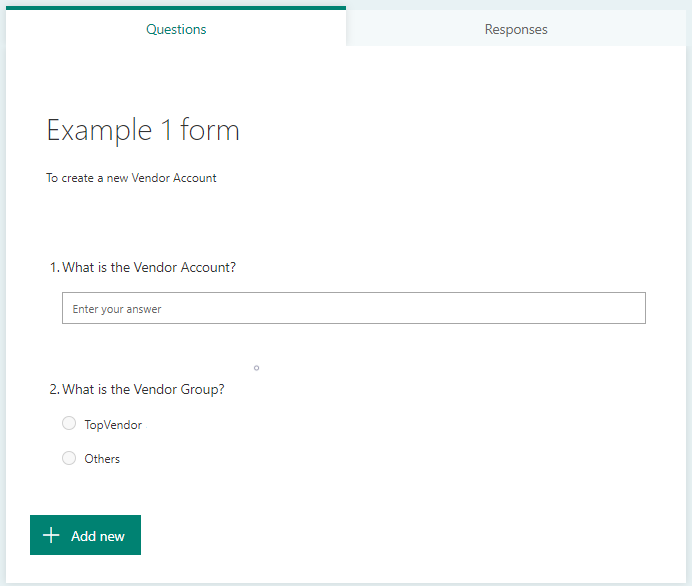
Note all information on the form is customisable. Note 1-1
We can make the questions…any questions that suit the purpose of the form. Say, in reality, the question can be
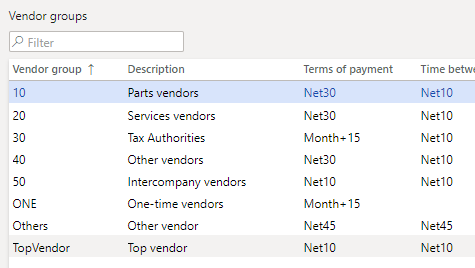
"What is your company's name?"if you want to send this form to any external vendor users. The question does not change the usability of the returned response’s value. It can still be mapped to VendAccount not matter what the question is. Note 1-2 The second question is being set in form of a Choice question. The given choices should match with available Vendor Group values found on your D365FO client. If this question is a Text one, chance is that its response might not match with any available Vendor Group values, thus, will return an error during Flow runtime. Vendor Groups can be found underAccount Payable > Vendors > Vendor Groups. In this example,TopVendorandOthersare two available Vendor Groups in my D365FO client.
Step 2: Create a MS Flow
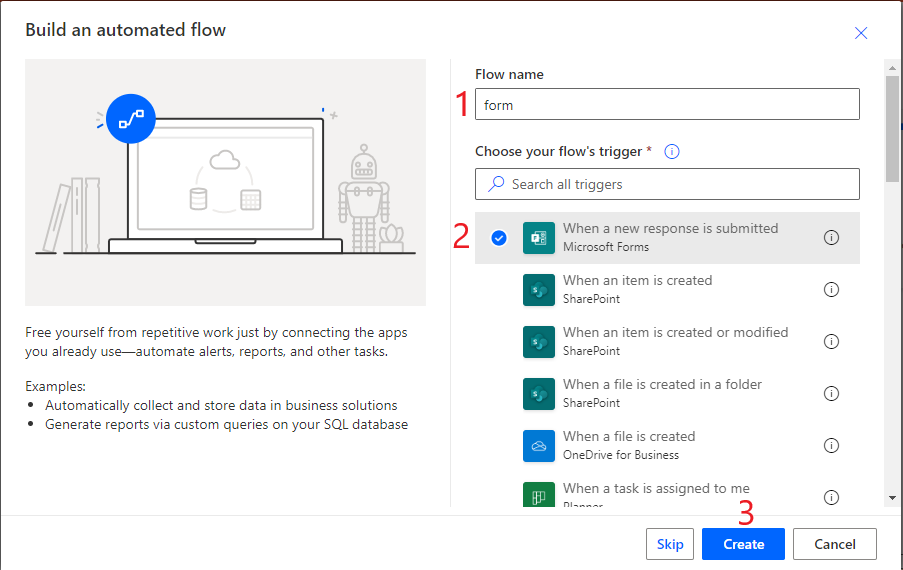
To do so, we will access Microsoft Power Automate and create a new flow. We will go with an Automated one in this case.
Search for form and choose the trigger When a new response is submitted. Hit Create to create a new flow.
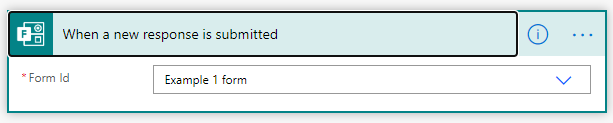
Choose the form that we just created using the dropdown list.
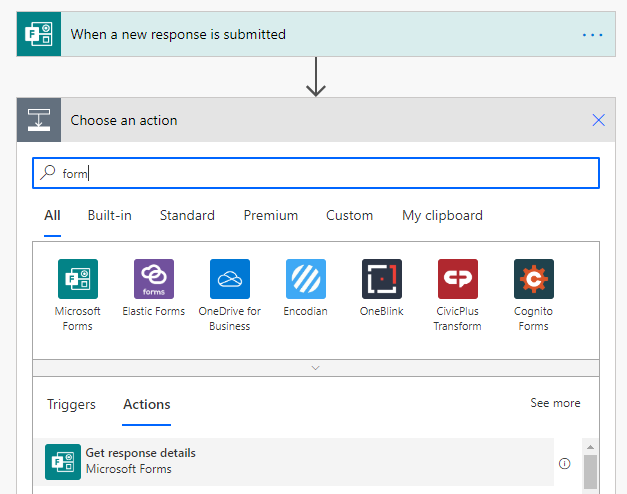
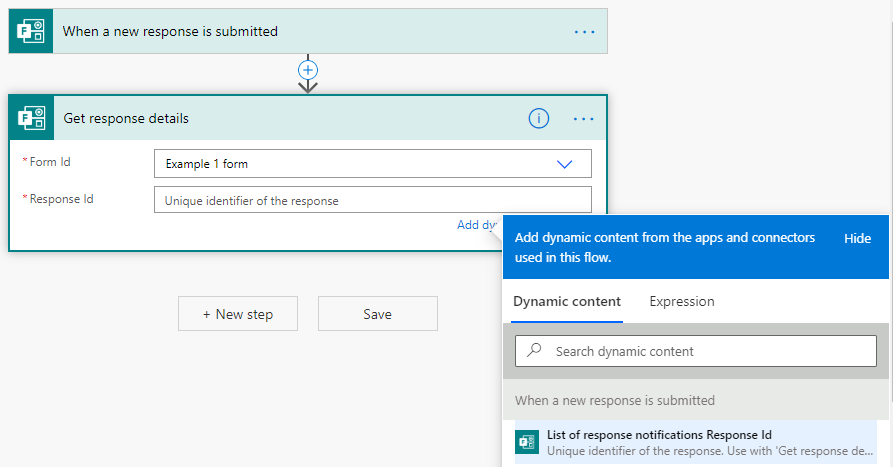
Press New step, search for form and go with Get response details.
In the new step, choose the Form ID. As soon as we move the cursor to the Response ID field, the FLow will suggest the Dynamics content that we can use. In this case, there should be only one dynamic content, which is List of response notifications Response ID. We will go with it by choosing it.
After doing so, the flow should look like this.
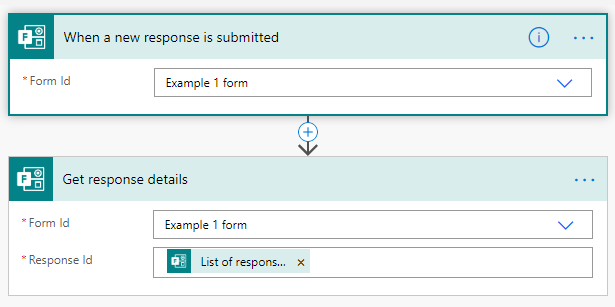
Now, the reponse details will be sent from the Form to the Flow when a new response is submitted. Next, we will set up the step to create a new Vendor Account.
Create a new step, search for dynamics and go with Dynamics 365 for Finance and Operations.
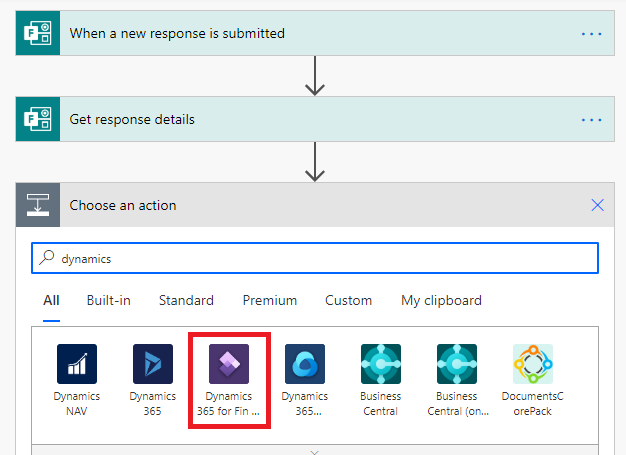
Choose Create record action.
Choose the Dynamics 365 FinOps Instance from the dropdown list. If your client does not appear here, choose Enter custom value. For privacy, environments’ name will be censored in our example.
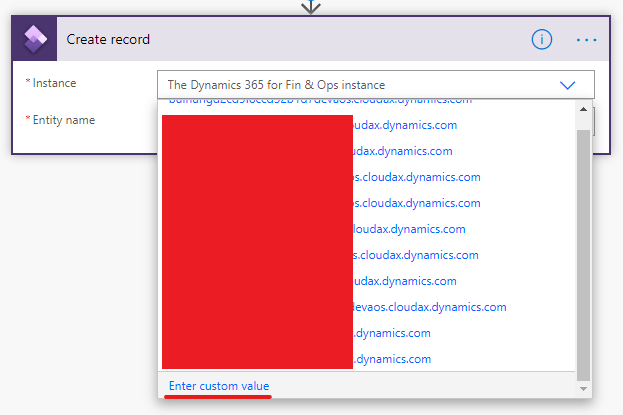
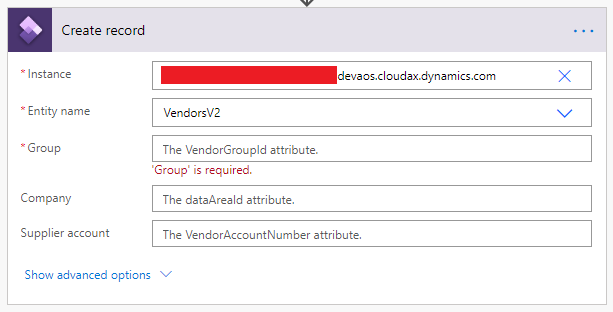
The Instance should be the link to your D365FO client. Set Entity name VendorsV2.
Note 1-3
Later in this series, we will see how to find the exact
Entity nameusingVisual Studio. Also, we will see in which condition, the Entity can be used inPower Automate.
Populate the fields that we want to import. In this example, we will populate only 3 fields: Group (VendorGroupID), Company (DataAreaId) and Supplier Account (VendorAccountNumber).
Dynamic content will be suggested automatically when the cursor is placed in each field.

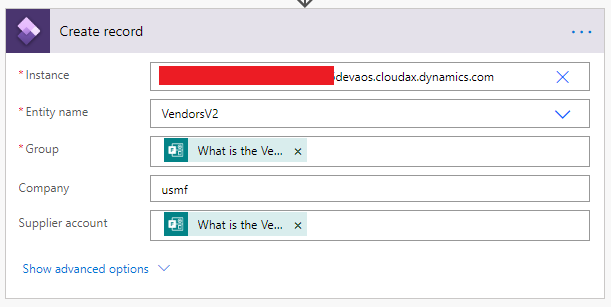
We can map Form fields with Automate fields or hardcode in these fields:
Group= Response ofWhat is the Vendor Group?question.Company= (hardcode)usmf.Supplier Account= Response ofWhat is the Vendor Account?question.Name=Supplier Account= Response ofWhat is the Vendor Account?question (Show advanced optionon the Flow to find the fieldName (VendorOrganisationName)). These fields should be required when creating a new Vendor Account on D365FO client.
We are done here with the set up.
Step 3: Testing out
On Forms, choose the form that we just created, click on Preview so we can submit a form response.
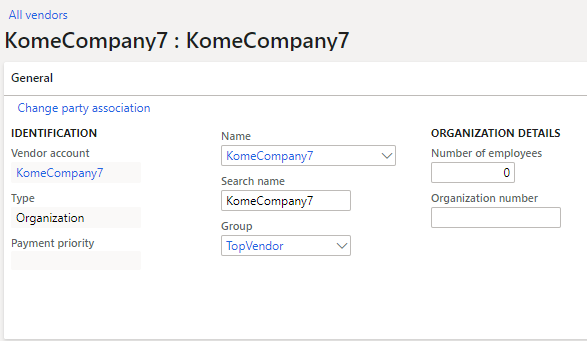
Check out All Vendors (VendTableListPage) on the client to find a new Vendor Account is created.
Note 1-4
Use
Testoption in Power Automate to follow the process of the Flow. This, in other words, is so-called"Run Flow with Debug"option.