How to create main menu in Dynamics AX 2012
- 1. Create Menu in AOT
- 2. Finally, we need to add our menu as a module to the main menu, which is done as follows:
All main entry points to the UI and reports are access though the menu structure. This is presented in three ways: the left-hand navigation pane, the content area, and the navigation bar (at the top of the client). The menu design is controlled from the Menus node in the AOT.
Each module will have a menu, which is created by adding a menu reference (or shortcut) to the main menu:

This matches the list of modules shown in the client’s left-hand navigation pane.
1. Create Menu in AOT
Open your project.
Right-click on the Menus node and select New > Menu.
Rename the menu as YourMainMeunuName and open the property sheet.
For Porperties of created Menu:
- Enter the label and create a label.
- As this menu will be a module with company-specifc information, set the SetCompany property to Yes.
- Choose the icons in the NormalImage property and set ImageLocation to EmbeddedResource.
Create Submenu, by right-clicking on the menu and navigating to New | Submenu.
2. Finally, we need to add our menu as a module to the main menu, which is done as follows:
Place the AOT window next to our project window (if required, open the AOT window by pressing Ctrl + D).
Scroll down to Menus and expand MainMenu.
Right-click on MainMenu and navigate to New > Menu reference.
This opens a new window titled Select: Menus. Locate your menu and drag it to MainMenu, as shown in the following screenshot (the title changes from Select: Menus to the path of the select node when you click on it):
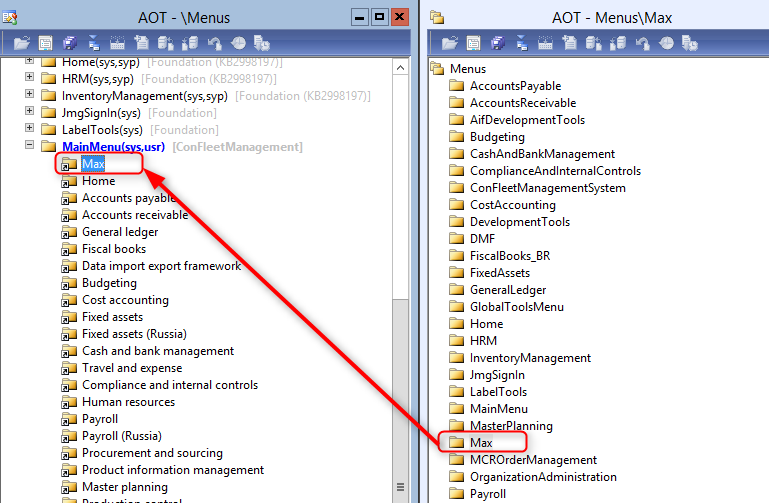
Note: Do not drag the menu from your project!
Save AOT and you can check new menu on AX client.
Thank you for reading!